
In brief: The best satellite dish for you depends on your location, the required range and the type of installation. In our 2026 test & comparison, we assess different models based on performance, build quality and ease of use. In areas with good reception, a compact multi-feed system is often sufficient. In locations with poorer reception or when receiving several satellites, high-performance offset dishes are the best choice.
Best Satellite Dishes 2026: Test & Comparison
Looking for a new satellite dish for optimal TV reception? Our 2026 satellite dish test & comparison shows you what matters. We analyse different designs and technologies. You will get clear buying advice to help you find the ideal dish for your home.
Choosing the right satellite dish determines picture quality and the range of available channels. Size, material and installation all play a key role. We help you understand the differences.
Table of contents
Satellite dish types compared
Not all dishes are the same. The design determines their performance and intended use.
Offset dishes: The modern standard
You can identify these dishes by their asymmetrical reflector. The LNB is not positioned in the centre, but lower down. This has several advantages.
The reflector is angled more steeply, making it harder for snow and rainwater to collect. Shadowing from the LNB is minimal. This results in greater efficiency. Offset dishes are easier to align.
They are available in the standard sizes from 60 cm to 120 cm. They are the first choice for normal Astra reception.
Prime-focus dishes: For demanding projects
Here, the LNB is positioned centrally in front of a symmetrical, often round reflector. This design is mechanically more stable and allows for larger diameters.
Prime-focus dishes are suitable for receiving weak satellite signals or in extremely remote locations. However, they are more complex to install and adjust. They are less common for residential use.
Multi-feed systems: Several satellites with one dish
With special brackets, you can mount several LNBs. This allows you to receive channels from different orbital positions.
For example, Astra 19,2° East and Hotbird 13° East. The dish must be large enough for this. The farther apart the satellites are, the wider the bracket needs to be. Alignment becomes more demanding.
Tip: For standard reception in Germany, an 80 cm offset dish is usually the best balance between size and performance. It also provides some reserve for slightly poorer conditions.
What to look for when comparing satellite dishes
Compare dishes based on these factors to make an informed decision.
Size and diameter
The size in centimetres indicates the diameter of the reflector. A larger dish has a greater signal-collecting surface and therefore more reception reserve.
In areas with good reception, 60 cm is sufficient for Astra. In many regions, 80 cm is recommended. For locations with poor reception or multi-feed systems, use 90-120 cm dishes. Check the recommendations for your postcode.
Material and build quality
High-quality dishes are made from coated aluminium or sheet steel. The material must be weather-resistant.
Look for a sturdy back bracket and galvanised mounts. The adjustment scales should be clear and precise. Cheap models can bend in the wind and lose their alignment.
Mounting system
The dish must be securely attached to your house. Common systems include:
- Mast clamps for round poles.
- Rail systems for flat roofs.
- Wall mounts for installation on the facade.
Make sure your chosen model is suitable for the planned installation location. The mount must withstand the full wind load.
Installation and alignment
A poorly installed dish will not provide a signal. Plan this step carefully.
Finding the ideal location
The dish needs a clear line of sight to the satellite. Obstacles such as trees or other buildings can block the signal.
Use a compass app to check the general direction (Astra: approximately south-east). Also watch out for possible reflections from glass facades. These can cause interference.
Step-by-step alignment
- Install the dish temporarily but securely.
- Connect the satellite finder or receiver.
- Set the elevation angle according to the manufacturer's instructions.
- Slowly rotate the dish horizontally until you receive a signal.
- Fine-tune the alignment by making minimal adjustments to the tilt and rotation.
- Tighten all screws without changing the position.
Important: Always disconnect the dish in the event of a lightning storm. Use an isolated lightning protection system or connect the mast to the building's earthing connection. This protects all your equipment.
Essential accessories for satellite reception
The dish is not the only important component. These accessories complete your satellite system.
The LNB: Low Noise Block
This receiver is mounted on the antenna arm. It converts the satellite signal. Choose between:
- Single LNB: For one receiver or a satellite splitter.
- Twin LNB: Two independent outputs for two receivers.
- Quad LNB: Four outputs for up to four devices.
- Universal LNB: Receives all common frequency bands.
Satellite cables and connectors
Use only coaxial satellite cable with shielding of at least 60%. Cheap cables attenuate the signal too much.
The connectors must be fitted correctly. A loose connector is the most common source of interference. Make sure connections are waterproof when used outdoors.
Mounts and roof cable entries
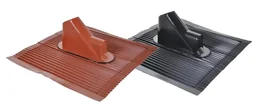
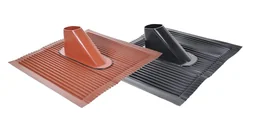
Safe and neat installation is essential. Special satellite accessories such as aluminium roof tiles are suitable for integrating the dish into the roof.
An
or a provides professional mast routing through the roof. This protects against moisture and looks neat. Alternatives such as offer solutions for other types of roofs.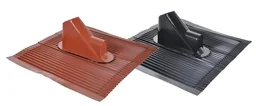
Common problems and solutions
Problems can occur even with a good installation. Here is how to fix them.
Pixelation or dropouts in the rain
This "rain fade" phenomenon occurs during heavy rainfall. Raindrops weaken the high-frequency signal.
The only solution is a larger dish, which provides more reception margin. Also check whether water has entered the LNB or connectors.
No signal despite correct alignment
Check the entire signal path:
- Is the LNB set correctly (the scale is usually at 6 o'clock)?
- Are all cable connectors tight?
- Is the receiver working, or is the tuner faulty?
- Could there be a broken cable?
A systematic check saves time.
Note: Many suspected antenna problems are actually caused by the receiver or its settings. If in doubt, test your antenna with another working device. This helps you isolate the source of the fault.
Trends and developments in 2026
Technology for satellite dishes continues to evolve. New materials and designs are taking centre stage.
Lightweight construction and design
Manufacturers are increasingly using specially shaped, flatter reflectors. At the same size, these often offer better performance. Integrated spirit levels and digital alignment aids make installation easier.
Hybrid reception
Combined LNBs that receive both satellite and terrestrial DVB-T2 signals are becoming more popular. This allows you to use one antenna for all TV sources, saving space and effort.
Integration into the home multimedia infrastructure is becoming increasingly important. Antennas are increasingly seen as part of a connected technology system.
Satellite dish comparison table
This overview shows the key features of the tested models in a direct comparison. The table helps you see the differences at a glance.
The highest-rated satellite dishes and antennas from our range in a direct comparison:
| Model | Customer rating | Availability |
|---|---|---|
| 3G/4G antenna 11 dB | – | Currently unavailable |
| 3G/4G antenna 7 dB | – | Currently unavailable |
| Active DVB-T rod antenna with amplifier and power supply | – | Currently unavailable |
| Active DVB-T rod antenna with amplifier and power supply | – | Currently unavailable |
| Aluminium roof tile for antenna mast with cable routing, black | – | Currently unavailable |
Our 2026 satellite dish test and comparison shows that the best antenna for you depends on a realistic assessment of your needs. Invest in secure installation and high-quality materials. This will give you years of crystal-clear satellite reception without interference.
Frequently asked questions
- What size satellite dish do I need?
- The required size depends on your location and the satellite you want to receive. For Astra 19.2° East in mainland Germany, 60–80 cm is often sufficient. In fringe areas or for weaker satellites, a 90–120 cm dish may be necessary. Check the recommended size for your region in advance.
- What is the difference between offset and prime-focus dishes?
- Offset dishes are the standard design used today. The reflector is angled, with the LNB positioned in the lower section. This results in less shadowing and easier installation. Prime-focus dishes are symmetrical, with the LNB mounted centrally in front of the reflector. They are often larger and are less commonly used in private homes.
- Can I receive multiple satellites with one satellite dish?
- Yes, with a multifeed system. This involves mounting several LNBs on a bracket attached to your dish. This allows you to receive channels from Astra 19.2° East and Hotbird 13° East simultaneously, for example. The dish must be large enough and precisely aligned.
- Do I need an amplifier for my satellite dish?
- Usually not. The signal path from the satellite dish to the receiver is passive. An amplifier can compensate for signal losses with very long cables (>30m). However, using an amplifier incorrectly can overload the signal and worsen reception.
- How can I align a satellite dish myself?
- You need a satellite finder or your receiver’s built-in signal menu. First, set the correct elevation angle (height). Then slowly turn the dish in azimuth (side to side). Find the point where the signal is strongest. Make fine adjustments using the markings on the LNB bracket. Patience is key here.