
In brief: Building a corner bench yourself takes careful planning, the right materials and basic tools. Measure the space precisely, choose suitable wood such as spruce or oak, and make a materials list. Assemble it in stages: start with the frame, add the seats and backrests, then protect the surface with oil or stain.
A corner bench is more than just a place to sit. It creates a cozy atmosphere, makes the most of a corner and becomes the gathering spot in your kitchen or dining room. Instead of buying an off-the-shelf model, you can build a corner bench yourself with a little DIY know-how and the right instructions. The result is a one-of-a-kind piece of furniture tailored to your needs and the dimensions of your home.
This DIY project is a rewarding challenge for any home improver. You choose the design, material and size. Follow our guide to build your own custom wooden bench.
Why build a corner bench yourself? An overview of the benefits
Building your own furniture has clear advantages over buying ready-made pieces. A DIY bench is more than a project; it's an investment in your home.
A perfect fit: The biggest advantage is that you can customize the design. Does your kitchen have an alcove with unusual dimensions? Is your dining area small or awkwardly shaped? Build the corner bench to make the most of every inch. No wasted space and no compromises.
Freedom to choose materials: You decide which wood to use. Choose durable oak for a rustic look, light pine for a Scandinavian feel or weather-resistant Douglas fir for the patio. You have complete control over the quality and appearance.
Cost control: A DIY project can cost considerably less than buying a comparably high-quality corner bench. You can adjust your budget by choosing the type of wood and the features. The real value, though, is the one-of-a-kind piece you create.
Pride and satisfaction: Sitting on a piece of furniture you built yourself is an incomparable feeling. You've made something with your own hands that's functional, beautiful and durable. Every meal shared at this bench feels special.
Pro tip
Always use partially threaded screws for load-bearing joints. They pull the wooden parts tightly together, while fully threaded screws can leave a gap. Combine the screws with wood glue for maximum stability.
Planning your project: What should you consider before building?
Good preparation is half the battle. Take the time to plan so you can avoid mistakes and frustration later. A well-thought-out plan helps the build go smoothly and gives you the best chance of a great result.
Find and measure the perfect location
Choose the exact spot for your corner bench. Measure the available wall lengths carefully. Account for baseboards, windowsills and radiators, as these can limit the space. Sketch the room and mark all the measurements.
Decide on the bench dimensions:
- Seat height: This is usually between 45 and 48 cm. Match the height to your dining table.
- Seat depth: A comfortable depth is 40 to 45 cm.
- Side lengths: These depend on the wall dimensions. You may want to leave a little space between the bench and the wall.
- Backrest height: A height of 35 to 40 cm above the seat is common.
Choosing the material: Which wood is best?
Your choice of wood affects the appearance, stability and price of your corner bench.
- Edge-glued panels (spruce/pine): Affordable, easy to work with and ideal for beginners. They're a great choice for indoor use if you plan to paint or stain the bench.
- Edge-glued panels (beech/oak): Much harder, more robust and more durable. Oak has a distinctive grain, while beech has a finer grain. Both are excellent choices for furniture that gets heavy use.
- Structural timber (KVH): A stable, dimensionally accurate choice for the base. It's usually used for frame parts that won't be visible.
- Weather-resistant wood (larch/Douglas fir): These types of wood are ideal if your corner bench will be in the garden or on a balcony. They're naturally resistant to the elements.
Careful planning is the foundation of every successful woodworking project. A detailed sketch with all the measurements not only prevents costly cutting mistakes, but also gives you confidence throughout the build.
Put together a tool and materials list
Gather all the tools and materials you'll need before you begin.
Tool list:
- Tape measure and carpenter's square
- Pencil
- Handheld circular saw or table saw
- Cordless drill with drill bits and wood drill bits
- Sander (random orbital or orbital sander) and sandpaper (grit 80, 120, 180)
- Clamps
- Optional: wooden dowel kit, router for rounding the edges
Materials list (example for a simple build):
- Edge-glued panels for the seats and backrests
- Square timber (e.g. 60x40 mm) for the frame and legs
- Wood screws in various lengths
- Wood glue
- Wood filler
- Materials for surface treatment (oil, stain or varnish)
Step-by-step guide: How to build a corner bench
With your plan and materials ready, you can start building. Work carefully and take the time to get each step right.
Step 1: Cut the wood
Use a pencil and square to transfer all the measurements from your sketch accurately onto the wood panels and timber battens. Cut each piece precisely. Straight, clean cuts are essential for the bench's stability and appearance. If you don't have a circular saw, many home improvement stores can cut the wood to size for you.
Step 2: Assemble the basic frame
The corner bench consists of two separate sections that you'll join together later. Start by building the seat frames. Screw and glue the timber battens together to make two rectangular frames. Then attach the legs to the corners. Make sure every angle is exactly 90 degrees and that the frames are stable and don't wobble.
Important
Always wear safety goggles and hearing protection when using saws and sanders. Secure the workpiece before you start to prevent it from slipping. Safety comes first.
Step 3: Attach the seats and front panels
Place the cut-to-size edge-glued panels on the completed frames. Screw the seats to the frames from underneath to keep the screw heads hidden. If you're building a storage bench, attach the seat to the back of the frame with hinges instead.
Now attach front panels to the front and open sides to cover the frame and give the bench a clean, enclosed look.
Step 4: Join the bench sections
Position the two bench sections in the corner where you want them. Join them securely by screwing the frames together or adding a separate corner connector. For a seamless look, you can also cut the seats with miter joints so they meet neatly in the corner.
Step 5: Build and attach the backrests
The backrest adds comfort and stability. The simplest option is to mount two boards vertically. For extra comfort, you can attach the backrest at a slight angle. To do this, attach supports made from leftover timber battens to the back of the bench at the desired angle, then screw the backrest boards to them.
Finishing Touches: How Do You Finish and Protect a Wooden Bench?
The construction is complete. Now it's time to give your corner bench character and protect the wood. Careful surface treatment is essential for durability and appearance.
The finish is the calling card of every piece of furniture. It not only protects the wood but also highlights its natural beauty and affects how the furniture feels to the touch.
Sanding for a Smooth Finish
Sand all surfaces and edges thoroughly. Start with coarse sandpaper (e.g. 80) to remove uneven areas, then work your way up to finer grits (120, then 180). Careful sanding creates a silky-smooth surface and helps the wood absorb the finish evenly. Remove all sanding dust afterwards.
Oil, Wood Stain or Varnish? Choosing the Right Finish
The right finish depends on the look you want and how much wear the bench will get.
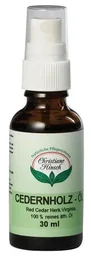
- Oil: Wood oil penetrates deeply, brings out the grain and creates a natural matte finish. It protects against moisture, lets the wood breathe and is easy to touch up. For a particularly elegant look, you can use special .
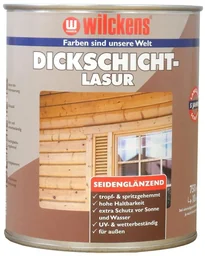
- Wood stain: Wood stain adds color while letting the grain show through. It offers good protection against UV rays and moisture. gives your bench a warm oak tone, while brings out the light tones of pine.
- Varnish: Varnish creates a sealed, durable layer on the wood. It offers the best protection against stains and wear, making it ideal for heavily used surfaces in the kitchen.
Tip
Always test oil, wood stain or varnish on a piece of scrap wood or an inconspicuous area first, such as the underside of the seat. This lets you see how the color and finish will look on your chosen wood before treating the entire bench.
Cushions and Pillows for Extra Comfort
Make your new corner bench even cozier. Custom-fit seat cushions and a selection of pillows add comfort and pops of color. You can cut and cover the cushions yourself or have them made to size.
Ideas and Variations for Your DIY Corner Bench
Your handmade corner bench is the perfect starting point for creative customizations. Here are some ideas to make your project more personal.
Corner bench with built-in storage: One of the most practical additions is a storage compartment. Design the seats as hinged lids, and the space underneath becomes handy storage for tablecloths, cushions or toys.
Outdoor bench: Planning a seating area for your garden or patio? Use weather-resistant wood and rustproof stainless-steel screws. Protect your outdoor furniture with a suitable garden furniture cover to help it last longer.
Modern look or country style: The design is up to you. For a modern look, choose clean lines, smooth surfaces and perhaps a gray or white finish. For classic country style, you can use a router to shape the edges and choose a stain that highlights the wood grain.
A project like this is more challenging than building smaller small furniture pieces, but the result is an impressive centerpiece for your home. Once the bench is finished, sturdy furniture dollies make it easier to move into place without scratching the floor.
Building your own corner bench is a great way to develop your DIY skills and create a unique, functional piece of furniture. Give it a try and make a new favorite spot for you and your family.
Frequently Asked Questions
- What is the best wood for a corner bench?
- For indoor use, glued laminated spruce or pine panels are affordable and easy to work with. Hardwood such as beech or oak is more durable and hard-wearing. For an outdoor corner bench, weather-resistant wood such as larch, Douglas fir or pressure-treated wood helps protect it from the elements.
- How much does it cost to build a corner bench?
- Costs vary widely depending on the type of wood and the size of the bench. You can build a simple bench from glued laminated spruce for around 150-250 euros in materials. High-quality oak and specialist varnishes can push the cost above 500 euros. Tools will cost extra if you don't already have them.
- Do I need a lot of DIY experience?
- Some experience working with wood and tools such as a saw and cordless drill is helpful. However, our guide is designed to help ambitious beginners complete the project successfully. Start with a simple design and work your way up gradually to avoid frustration.
- How can I make a corner bench sturdy?
- For a sturdy bench, use a solid frame, wooden dowels and wood glue alongside screws, as well as cross braces. Make sure the joints are square and tighten all the screws firmly. Take particular care to make the corner joint strong and secure.
- Can I build a corner bench with storage?
- Yes, this is a popular and practical option. Make the seat a hinged lid that lifts up, with the space underneath serving as a storage chest. This requires a slightly more elaborate frame, but creates valuable storage space in the kitchen or dining room.
You may also be interested in
- Build a corner shelf yourself: How to make clever use of room corners
- Build a stool yourself: Easy DIY guide
- Build a TV sideboard yourself: Step-by-step guide
- Build a workbench yourself: The complete guide for your DIY workshop
- Build a beer crate armchair: Creative DIY seating for the garden & parties
- Pallet garden bench: Easy DIY guide for your garden paradise