
In brief: Building your own guitar rack is a rewarding workshop project. You need sturdy wood such as pine or beech, the right tools and careful planning. The result is a custom piece of furniture that stores your instrument safely and keeps it within easy reach. This helps prevent damage and keeps everything organized.
Build a DIY Guitar Rack: A Project for Music Lovers
Your guitar deserves a safe, accessible place to rest. A handmade rack is an elegant solution. This woodworking project puts your workshop skills to the test and rewards you with a unique design made to fit your instrument.
You can save money compared with ready-made options. Best of all, you can create a style that suits you. This guide takes you from the initial plan to finished guitar storage.
How do I plan my DIY guitar rack?
Good planning helps you avoid costly mistakes. Start with the most important element: your guitar. Measure the body at its widest point, and note the total length, including the neck.
The rack should be a few centimeters wider than the body so you can take the guitar out easily. For an acoustic guitar, allow around 45 cm of width per compartment. The compartment height depends on the neck; 80 to 100 cm is a good guideline.
Decide how many instruments the rack should hold. A single-compartment design is the easiest place to start. Racks with multiple compartments need sturdy shelves between them. Sketch your design on paper and mark all the dimensions.
Pro tip
Make a simple full-size cardboard model. You can use it to check the dimensions and see how your guitar fits. You will quickly know whether the planned depth is sufficient and the neck has enough clearance.
Choosing the right wood
The material you choose helps protect your instrument. Lightweight woods such as spruce are often too soft and may give way under the weight. Choose sturdy solid wood instead.
Solid pine is a popular, affordable all-rounder. It is easy to work with and offers good stability. Beech and oak are heavier and more durable, giving the rack a high-quality look.
Wood thickness is crucial. Choose boards at least 18 to 22 mm thick for the side panels and shelves. Thinner boards may sag. Look for straight boards without knots at the hardware store.
Wood breathes and moves. To build a piece of furniture that lasts, account for this movement in your design. Rigid joints with no room to move can crack as the climate changes.
What tools do I need for this workshop project?
You only need a manageable set of basic tools. A good jigsaw with a guide rail helps you make precise cuts. A cordless drill with bits and wood drill bits is essential for assembly.
A square or spirit level helps you keep everything straight. Clamps hold the parts together while the glue dries. A sanding block with different grits prepares the surface.
For more advanced joints, use a router to make precise tongue-and-groove joints. This adds stability. For beginners, screws and wood glue are usually enough.
Important note
Always wear safety glasses and hearing protection when working with wood, and remember a dust mask. Wood chips and noise can be hazardous. Make sure your work surface is well lit and tidy.
Assembly step by step
Start by cutting all the parts to size. Carefully transfer your measurements to the wood, then cut the side panels, shelves and back panel. Sand all the edges thoroughly.
Mark the shelf positions on the inside of the side panels. Drill pilot holes for the screws to prevent the wood from splitting.
Apply glue to the joints and screw the parts together. Work from the back toward the front. First, join the side panels to the shelves. Attach the back panel last to stabilize the whole structure.
Keep checking with a square that everything is level and square. Let the glue cure completely according to the manufacturer's instructions before putting any weight on the rack.
How do I finish the surface of the wooden furniture?
An untreated rack can quickly collect dirt and moisture. A finish protects the wood, highlights the grain and enhances your work.
For a natural look with added protection, use wood oil. It penetrates deeply and brings out the grain. You will need to reapply it regularly.
is one option.
Wood stain adds a thin layer of color. It is available in many wood tones, including
or . Stain protects against UV radiation and moisture, making it ideal for racks in bright rooms.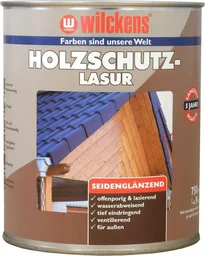
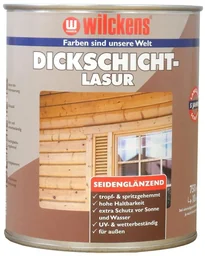
Apply the stain or oil evenly with a brush or cloth, working in the direction of the grain. After the recommended drying time, sand lightly and apply a second coat for a smooth finish.
Additional advice
Always test the finish on a piece of scrap wood or an inconspicuous area first. This lets you check the final color and practice your technique.
The final touches and positioning
Once the rack is dry, check for sharp edges and sand them again if needed. Attach soft felt strips to the points where the guitar makes contact with the rack.
This protects the instrument's finish and the wood. Find suitable accessories in the Furniture Accessories category.
Consider securing the rack to the wall to prevent it from tipping over, especially if it is tall and narrow. Use suitable anchors and brackets.
For more flexibility, fit casters to the underside. This makes it easy to move the loaded rack when vacuuming or rearranging the room.
A handmade piece of furniture always has a story. It bears the marks of your work and what you learned along the way. You will not find that individuality in a furniture store. That is the real value of DIY.
How do I integrate the rack into the room effectively?
A guitar rack is more than just storage. It makes a statement. Place it as a standalone piece in a corner or use it as a room divider. The guitar becomes a decorative feature.
Combine the rack with other storage solutions for sheet music, guitar picks or amplifiers. This creates a complete music corner. Thoughtful organization starts with the right furniture.
For a cohesive look, build additional racks in the same style. A bookcase made from the same materials and with the same finish creates harmony. DIY wooden furniture makes these matching pieces possible.
Matching accessories such as small furniture or stools complete the setup. Also consider practical details such as good lighting above the rack.
Long-term care and maintenance
A wooden rack requires little maintenance. Dust it regularly with a dry or slightly damp cloth. Harsh cleaning products can damage the finish.
Check the stability of the screw connections regularly. Changes in temperature and humidity can cause wood to contract or expand, so you may need to tighten the screws.
On oiled surfaces, fading color or dry patches are signs that the finish needs refreshing. Simply apply a new, thin coat of oil. Painted or stained surfaces need less frequent treatment.
If you move, furniture dollies are a great help. They protect the rack, your guitar and your back.
Pro tip
Never store your guitar right next to a radiator or in direct sunlight. Extreme temperature changes and dry air can damage both the instrument and the wooden rack. A room with a stable climate is ideal.
What alternatives and extensions are available?
You can adapt the basic design in many ways. Instead of a freestanding rack, build a wall-mounted rack. This saves space and creates a modern look. You will need a sturdy batten securely anchored to the wall, with notches cut into it.
Extend your rack with closed compartments at the bottom. This gives you a dust-free place to store accessories or records. Combining open and closed storage is practical.
Add lighting. An LED strip under the top of the compartment will showcase your guitar perfectly. Installation requires basic electrical skills or the help of an electrician.
For outdoor use, such as on a covered patio, the rack must be weatherproof. Use treated construction lumber and a special exterior wood stain. A
provides comprehensive protection.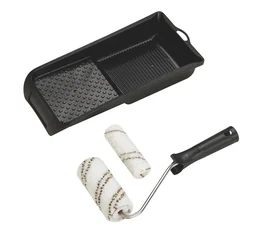
Think about other instruments, too. The same approach works for ukuleles, violins or wind instruments with adjusted dimensions. You can build a whole set of custom storage solutions.
Your homemade guitar rack is the beginning of your DIY woodworking journey. It combines a passion for music with the joy of making things. You gain more than better organization: you also get a sense of independence and pride in your work.
Frequently asked questions
- What is the best wood for a guitar rack?
- For a sturdy guitar rack, choose solid wood such as pine, beech or oak. These woods can safely support the weight. Avoid softer woods such as spruce. The side panels and support rails need to be thick enough.
- How do I plan the dimensions for my DIY guitar rack?
- First, measure your guitar. The rack should be wide enough for the body, with around 5 cm of clearance. Plan the height of the compartments to fit the guitar neck and headstock. A depth of 30-35 cm is sufficient for most models.
- Can I build a guitar rack without a large workshop?
- Yes. You can complete the project with a jigsaw, cordless drill/driver and carpenter's square. Have the lumber cut to size at your local hardware store, so you won't need a table saw. Then assemble the rack with screws and wood glue.
- How do I protect the wood from scratches caused by the guitar?
- Apply soft felt or fabric strips to the rack's support surfaces. This prevents pressure marks on the instrument and protects the wood finish. A thorough coat of stain or oil also improves durability.
- How much does a homemade guitar rack cost?
- Material costs range from 50 to 150 euros, depending on the type of wood. For solid pine, budget around 80 euros. You will also need screws, glue and finishing products. Compare prices for furniture dollies if you want your rack to be mobile.
You might also be interested in
- Build a DIY shelf with integrated speakers: Your own sound furniture
- Build a DIY shelf: Easy instructions and creative ideas
- Build a pallet plant shelf: DIY guide to garden furniture
- Build a corner shelf: Make smart use of your room's corners
- Build an industrial-style shelf: Step-by-step guide
- Upcycling idea: Build your own cassette shelf