
In brief: A DIY ladder shelf combines practical storage with personal style. You’ll need sturdy wooden strips for the sides, suitable boards for the shelves and the right hardware. The construction is straightforward, and you can adapt it to your room and taste. The finished piece is a one-of-a-kind way to display books, plants and decorative items.
How do I plan my DIY ladder shelf?
A successful DIY project starts with good planning. First, decide where the shelf will go and what you’ll use it for. Will it hold books in the living room, plants on the balcony or towels in the bathroom?
Measure the available space carefully. Note the height, width and desired depth, then sketch your shelf. A classic ladder shelf has two side sections (the “ladders”) and several crossboards.
Work out how much material you’ll need. Sturdy square lumber works well for the side sections. You can make the shelves from solid wood panels or glued boards. Remember to include screws, glue and, if needed, metal brackets for mounting.
Pro tip
Draw a scale plan on graph paper or use simple 3D software. This helps you visualize the proportions and avoid wasting material. Plan the shelf spacing so there’s room for taller items, such as vases.
Choosing the right wood
Your choice of wood affects the look, stability and cost. For indoor projects, pine or spruce is an affordable classic that’s easy to work with.
Beech and oak are harder, heavier and more expensive, but have a more premium look and last longer. For damp rooms or outdoor use, choose treated lumber, larch or specially designed bamboo products.
At the home improvement store, look for straight, accurately sized lumber without large knots or cracks. Well-seasoned wood is less likely to warp after assembly. For a modern look, you can also use plywood with an attractive veneer.
Which tools do I need to build it?
Basic DIY tools are all you need to build a sturdy ladder shelf. A good handsaw or electric jigsaw is essential for cutting the lumber.
A cordless screwdriver saves time and effort when fastening the parts. You’ll also need suitable wood drill bits and screwdriver bits. A spirit level, carpenter’s square and tape measure are essential for accurate work.
Sandpaper in different grits (e.g. 80, 120, 180) smooths the surface. A sanding block helps create clean edges. C-clamps hold the parts in place while you glue and screw them together.
Important note
Always wear safety glasses and hearing protection when working with wood, especially when sawing and sanding. Work in a well-ventilated area, particularly when applying varnish, oil or glue. Keep your tools sharp and in good working order.
The perfect joining technique
Your shelf’s stability depends on its joints. The simplest method is to drive screws through the side sections from the outside and into the shelves. Use countersunk screws, then fill the screw heads.
For a neat finish, glue and screw strips to the inside of the side sections so the shelves rest on them. An even more elegant and sturdy option is to cut the shelves into the side sections with mortise-and-tenon joints.
You’ll need a jigsaw or router for this technique. Metal brackets or concealed shelf supports are simple alternatives that you can adjust later.
The beauty of handmade furniture often lies in its visible joints. A neatly executed lap joint or dovetail joint showcases the craftsmanship and gives the shelf character.
How do I build the shelf step by step?
1. Cutting and preparing the lumber
Transfer the measurements from your plan precisely onto the lumber. Mark the cut lines with a pencil and carpenter’s square. Cut the two side sections (the ladders) and all the shelves to size.
Sand all sawn edges and surfaces thoroughly. Start with a medium grit (e.g. 120) and work up to a fine grit (180 or 240). This prevents splinters and prepares the surface for finishing.
Now mark the exact positions on the inside of the side sections where the shelves will rest. Use a spirit level to draw horizontal lines.
Additional advice
Lay all the cut parts out in the room before assembly. This lets you check the fit and proportions in place. You can still correct minor inaccuracies with sandpaper at this stage.
2. Assembling the basic structure
Start by attaching the first shelf. Position the bottom shelf between the two side sections at the marked location. Hold the parts in place with C-clamps.
Use a thin pilot drill bit to pre-drill the screw holes. This helps prevent the wood from splintering or cracking. Drive screws through the side section and into the shelf from the outside, or attach it from below with brackets.
Work your way up, one shelf at a time. After installing each shelf, use the spirit level to check that the unit is still level and plumb. For long shelves, a central support at the back can prevent sagging.
For extra storage at the bottom, you can also plan a drawer combination. This is ideal for kids’ rooms or a home office.
3. Finishing and treating the surface
Once the shelf is assembled, give it a final sanding. Check the entire unit for sharp edges or protruding wood fibers and smooth them out.
Thoroughly remove all sanding dust with a lint-free cloth or vacuum cleaner. Now finish the surface. Wood oil enhances the grain and is easy to reapply. Clear varnish or colored wood stain provides more durable protection.
Apply oil or varnish evenly in thin coats, following the direction of the wood grain. Let each coat dry completely before applying the next one. 2 to 3 coats are usually enough.
Patience is key when finishing the surface. The wood must dry completely between sanding stages and between coats of varnish. This is the only way to achieve a professional, long-lasting result.
Where is the best place to use a ladder shelf?
A ladder shelf is incredibly versatile. In the living room, it adds structure to a corner and provides space for books, decorations and houseplants. Place it beside the sofa to create a cosy reading nook.
In the bathroom, it serves as a stylish towel rack and storage space for toiletries. Be sure to use moisture-resistant wood such as bamboo here. Our
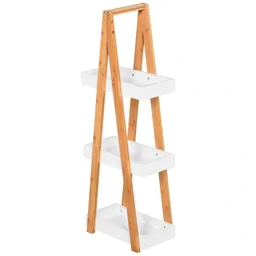
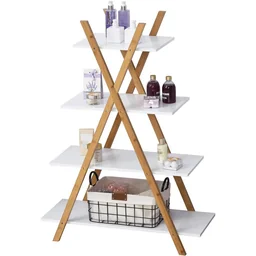
In the hallway or entryway, it becomes a handy place to store keys, mail and accessories. On the balcony or patio, it can be transformed into a herb or flower stand. A product such as
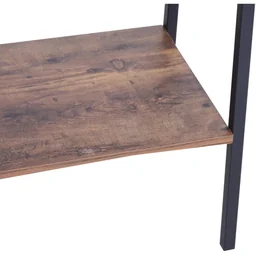
In the children's bedroom, it creates well-organised storage space for toys and books. Easy access to every shelf makes it ideal for children. Pay particular attention to stability and secure it against tipping or attach it to the wall.
Decorative ideas to make it your own
Your homemade shelf is a blank canvas for creativity. You can cut the side panels asymmetrically or decorate them with cut-out patterns.
Instead of using full-width boards, use shelves of different widths or arrange them in different configurations. Combine open compartments with closed storage, such as boxes or baskets placed on the shelves.
Painting the shelf in an accent colour makes it a real focal point. Alternatively, stain it in two colours: dark side panels and light shelves. Attach LED strips underneath the shelves for indirect lighting in the evening.
What are the most common mistakes, and how can I avoid them?
The most common mistake is inaccurate measuring and cutting. Always measure twice before sawing. Use sharp saw blades for clean cuts.
Neglecting stability can be dangerous. A tall, narrow shelf can easily tip over. Widen the base of the side panels or mount the shelf directly to the wall. Test its stability before completing the project.
Choosing the wrong material can lead to warping or damage. Do not use untreated standard softwood in wet environments. The right equipment also makes transport easier: a furniture dolly protects both your project and your back.
Overloading the shelves can cause them to bow. Calculate the load in advance. For long spans, use thicker wood or plan for a central support. The shelves of our are sized as an example here.
Caring for and maintaining your wooden shelf
A wooden shelf requires little maintenance, but it should be cared for regularly. Dust it with a dry, soft cloth. For dirt and stains, use a slightly damp cloth and dry the surface immediately afterwards.
Check all screw connections once a year and tighten them if necessary. Inspect the surface. For oiled shelves, you can apply a new, thin coat of oil every few years to nourish the wood.
Avoid prolonged exposure to direct, strong sunlight, as it can fade the wood. Do not place dripping-wet plant pots or glass coasters directly on untreated wood.
For garden furniture, a suitable protective cover is also recommended during the winter months to protect it from the weather.
Frequently Asked Questions
- What is the best wood for a DIY ladder shelf?
- For indoor use, pine, spruce or beech are good, affordable choices. They are easy to work with. For outdoor use or damp rooms such as the bathroom, you need treated wood or durable woods such as oak, larch or specialist bamboo. Choose smooth, dimensionally stable, well-seasoned wood without severe warping.
- How wide and deep should a ladder shelf be?
- The depth of the shelves depends on your storage needs. 25-30 cm is standard for books and decorative items. For stability, the width of the ladder side rails should be around 10-15 cm greater than the shelf depth. The overall width of the shelf is often between 60 and 100 cm. Measure the intended location carefully and allow clearance above and at the sides.
- How do I securely attach the shelves to the ladder frame?
- The safest method is to cut the shelves into the side rails (mortise-and-tenon joint) or place them on glued and screwed cleats. Metal angle brackets screwed to the underside of the ladder and shelf are simpler. Concealed shelf supports are an invisible alternative. Always test the load before final assembly.
- Can I secure a ladder shelf to the wall?
- Yes, and this is highly recommended, especially for tall or heavily loaded shelves. Fit a sturdy metal rail or angle brackets to the wall so that the back of the shelf slots into place or can be securely screwed to it. Alternatively, attach the ladder side rails directly to the wall using suitable wall plugs and screws.
- How do I finish the surface of my homemade wooden shelf?
- Sand the wood thoroughly, first with coarse and then with fine sandpaper. For a natural look, apply wood oil or wax. Paint or stain adds colour and provides robust protection, particularly in a child's bedroom or bathroom. Treat all cut edges and choose products that are safe for indoor use.
You may also be interested in
- Build a staircase shelf: DIY furniture for the kitchen or bathroom
- Build a corner shelf: Cleverly use corners in your home
- Build a wooden shelf: Complete step-by-step guide
- Build a stacking shelf: Practical solutions for your home
- Build a guitar shelf: Keep your instrument organised
- Build a DIY desk with shelving: Clever lightweight design