
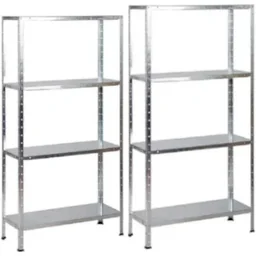
In brief: Build a pipe shelf using galvanised steel pipes, matching fittings and wooden or metal shelves. The materials are durable, affordable and offer maximum design flexibility. Cut the pipes to size, screw the fittings together and attach the shelves. The result is a unique, extremely sturdy piece of furniture with industrial character.
Pipe Shelf: An Industrial Look for Your Home
Industrial design has moved beyond the workshop. The raw charm of steel, concrete and exposed structures now shapes living rooms, kitchens and home offices. A pipe shelf embodies this trend perfectly. It is sturdy, individual and surprisingly easy to build yourself.
You do not need professional tools or years of experience. With careful planning, standardised components and our guide, you can create your own one-of-a-kind piece. This shelf does more than hold your books or plants. It makes a statement.
How Do You Plan Your Pipe Shelf?
Planning determines the success and stability of your project. Start by sketching the design. Where will the shelf stand? How many shelves do you need? What dimensions will fit the room? Consider the depth of the room. A shelf that is too deep can look bulky.
Think about what you want to store. Heavy tools, gardening equipment or lightweight decorations? This determines the material thickness of the pipes and shelves. For heavy loads, choose pipes with a 3/4 Zoll or 1 Zoll diameter. For a slim bookcase, 1/2 Zoll is often sufficient.
Choose a style. Should the pipes be visibly black, galvanised silver or painted in a special colour? The shelves can be made from rustic solid wood, smooth film-faced plywood or even toughened glass.
The key to the perfect industrial look lies in simplicity. Showcase the construction, use authentic materials and avoid unnecessary decoration. Beauty lies in function.
Materials List: What You Need
Get these parts before you start building. It saves time and frustration.
- Threaded steel pipes: Hot-dip galvanised, in the required lengths. Have them cut to size and threaded at a specialist supplier.
- Fittings: T-pieces, 90-degree elbows, reducers and couplings. They connect the pipes.
- Shelf boards: Plywood, solid wood boards, film-faced plywood or metal. Minimum thickness 28 mm.
- Flanges (pipe clamps): For securing the frame to the wall for greater stability.
- Tools: Pipe wrench (Stillson), tongue-and-groove pliers, tape measure, spirit level, drill, screws and wall plugs.
Pro tip
Always buy pipes and fittings from the same manufacturer or the same batch. Thread tolerances can vary. This helps prevent leaking or wobbly connections. Test a threaded connection before buying.
Which Construction Method Is Right for You?
There are two basic construction principles: the freestanding box and the wall-mounted frame.
The freestanding box is a completely self-contained cuboid. Four vertical pipes form the corners. Horizontal pipes connect them at the top, bottom and each shelf level. This design is extremely stable and mobile. It is suitable for the centre of a room or as a room divider.
The wall-mounted frame saves space and creates a floating appearance. Here, the vertical pipes act as supports, which you secure to the wall with flanges. You fit the horizontal shelf pipes between them. This option is ideal for narrow hallways, above desks or in small workshops.
Step by Step: Build the Basic Frame
Start assembling the frame on a level surface. Work systematically from one corner to the next.
First, assemble the bottom frames. Connect short pipe sections with T-pieces to form a rectangle. The T-pieces should point upwards. You will later screw the vertical support pipes into them. Use the spirit level to check that the frame is level.
Insert the vertical pipes into the T-pieces. Tighten them by hand. Now build upwards, one level at a time. Fit a T-piece to each vertical pipe for the next horizontal connection. Continue in this way up to the top level.
Finally, secure the top horizontal frame. Use simple 90-degree elbows or T-pieces pointing inwards. Do not take the entire frame apart yet.
Important note
Tighten all threaded connections with the pipe wrench, but do not overdo it. Over-tightening threaded galvanised pipes can strip away the zinc coating. This is where rust will start first. Work carefully and check the stability.
Now stand the frame upright or mount it to the wall. For wall mounting, mark the position of the flanges. Drill the holes, insert the wall plugs and screw the flanges in place. Hang the pipe frame and secure it with the clamping screws on the flanges.
How Do You Secure the Shelves Safely?
The shelf boards carry the load. Their attachment must be reliable. The simplest method is to drill a hole at each of the four corners of every board, slightly larger than the pipe. The board then slides over the vertical pipes and rests on the horizontal T-pieces or elbows.
This support method is simple and visually clean. The boards can easily be lifted off later to clean or modify the shelf. Make sure the holes are drilled precisely so that the boards sit level.
For a fixed connection, use angle brackets. Screw small, flat metal brackets to the vertical pipes. Screw the shelf board into these brackets from below. This method is invisible and remains secure even under lateral loads.
The choice of wood defines the character. Brushed oak feels warm and natural. Black-stained alder is modern and dramatic. A painted film-faced plywood board with a concrete look reinforces the industrial minimalism. Be bold with contrasts.
For an ultra-industrial look, use slabs made from ground steel or aluminium instead of wood. They are heavier and require a more robust substructure, but they look completely authentic.
Surface Treatment: Raw, Painted or Patinated?
The original finish of hot-dip galvanised pipes is a light silver-grey. This look suits many interior styles. It is corrosion-resistant and easy to care for. Simply leave it as it is.
Would you prefer black pipes? Paint them with a special metal primer and a matt direct-to-metal coating. Lightly sand the galvanised surface first so the paint adheres. Wear respiratory protection.
For an antique patina, treat the pipes with acid or special ageing agents. This is experimental. Test the technique on a leftover piece first. A simpler alternative is to use pre-aged, black powder-coated pipes from a retailer.
Additional advice
If you place the shelf in a damp area such as a garden shed or garage, treat the wooden boards as well. Oil, wax or varnish them. For outdoor use, special patio furniture covers are useful for protecting it over winter.
What creative variations are there?
Go beyond the standard shelf. Water pipes are versatile.
Build a rolling shelf. Mount four sturdy furniture casters with locking brakes underneath the base frame. This makes it easy to move heavy toolboxes or potted plants through the workshop or conservatory.
Combine open shelving with enclosed elements. Add a wire-mesh basket to the bottom level and hang it from the pipe frame. Or mount a large wooden drawer on runners. You can also find inspiration for practical storage in our small furniture and chests of drawers categories.
Use the system for other furniture projects. A side table made from water pipes with a glass top. A clothes rail in the hallway. A loft bed with an integrated ladder and desk underneath for a child's bedroom. Your creativity is the only limit.
Inspiration for every room
In the living room, a slim, wall-mounted shelf can serve as a media unit for receivers, speakers and games consoles. Run the cables discreetly down through the hollow pipes.
In the kitchen, pipe shelves provide practical storage for spices or a place to hang cooking utensils. Combine wooden boards with hooks on horizontal pipes.
In a home office, a large L- or U-shaped shelving system made from pipes creates order above the desk. Its industrial aesthetic encourages focused work.
For a child's bedroom, the sturdy shelf provides space for toy boxes and books. You can also find a child-friendly industrial-style version among our ready-made designer children's furniture.
Conclusion: Your own industrial-style furniture
Building a shelf from water pipes is a rewarding DIY project. You get a custom-made, exceptionally sturdy piece of furniture that is anything but mass-produced. Material costs stay reasonable, while the learning experience is invaluable.
You start with a simple shelf and gain the confidence to tackle more complex projects. Perhaps a coat rack system or a workbench will be next. The industrial look combines style with functionality. It works just as well in modern lofts as it does in rustic country homes.
Start with a sketch. Gather your materials. Then build your first one-of-a-kind piece. The satisfaction of creating something with your own hands is the best part of the project.
For more projects for your home and garden, we offer not only inspiration but also practical helpers such as the
for balmy summer evenings or the
Frequently asked questions
- Which pipes are best for a pipe shelf?
- Galvanised steel pipes (hot-dip galvanised) are the first choice. They are corrosion-resistant, sturdy and offer an authentic industrial look. Avoid thin-walled aluminium pipes for heavy loads. Standard thread sizes are 1/2 inch, 3/4 inch or 1 inch. Measure the outside diameter to find suitable fittings.
- How do I attach the wooden shelves to the pipe frame?
- There are two secure methods. Drill holes in the corners of the shelf and slide it over the upright pipes. Alternatively, fit angle brackets to the pipes and screw the shelf in place from underneath. For a floating effect, use pipe clamps fitted underneath the shelf to support it invisibly.
- Can I also build a pipe shelf for the garden?
- Yes, with the right preparation. Use hot-dip galvanised pipes and stainless steel fittings. Stain or powder-coat the frame for additional protection. The shelves should be made from weather-resistant wood such as thermally modified timber or Bangkirai, or from screen-printing boards with a waterproof melamine coating. A garden furniture cover provides protection in winter.
- How much weight can a DIY pipe shelf hold?
- The load-bearing capacity is very high. A frame made from 3/4-inch steel pipes can hold several hundred kilograms. The connections or shelves are usually the limiting factors. Use sturdy fittings and shelves made from multiplex or solid wood at least 28 mm thick. Distribute heavy loads evenly and test the stability before fully loading the shelf.
- Where can I get the components for an industrial-style shelf?
- You can find galvanised pipes and fittings at specialist plumbing suppliers, DIY stores or online. Pay attention to the thread quality. DIY stores, timber merchants or clearance stock are suitable sources for the shelves. At Westfalia, you will find sturdy children’s furniture in an industrial style and practical furniture dollies for moving heavy shelves.
You might also be interested in
- Build your own industrial shelf: step-by-step guide
- DIY shelf with integrated speakers: your own sound furniture
- Build a DIY desk with shelving: clever lightweight design
- Build your own corner shelf: clever ways to use corners
- Build your own stairway shelf: DIY furniture for the kitchen or bathroom
- Build your own shelving systems: organisation and style for your home