
In brief: Building a one-of-a-kind armchair takes careful planning, suitable materials and solid craftsmanship. Start with a detailed sketch and a list of materials. Choose sturdy wood for the frame and quality upholstery materials for comfort. The project involves building the frame, adding the padding and fitting the fabric cover. You’ll end up with a custom piece of furniture that suits your living room perfectly.
Build Your Own Armchair: A DIY Upholstery Guide
A DIY armchair is more than just a piece of furniture. It reflects your personal style and how you live. You choose the shape, comfort level and fabric. This guide takes you from your first sketch to a finished, upholstered armchair.
We’ve broken the project down into clear steps. You’ll learn about materials, pick up essential techniques and avoid common mistakes. When you’re done, you’ll have a one-of-a-kind chair to enjoy.
Why make your own furniture?
DIY furniture is becoming increasingly popular for good reason. Ready-made furniture often doesn’t fit unusual spaces or meet specific ergonomic needs.
Building your own furniture solves that problem. You can create the exact armchair you have in mind, often for less than the price of a designer piece. And the satisfaction of making it yourself is hard to put a price on.
“Hand-built furniture carries the story of its maker. Every small imperfection and carefully sewn seam becomes part of the project’s story.”
You’ll also gain practical skills. Knowing how to make wood joints and upholster furniture comes in handy for all kinds of repairs. You’ll be less reliant on the furniture industry, too.
How do I start planning my DIY armchair?
Good planning helps prevent frustration. Don’t start cutting wood right away. Take time to work through your design first.
Creating the perfect sketch
Draw your armchair from several angles. At a minimum, include side, front and top views. Use graph paper or a simple CAD program for home use.
Set the key measurements. Aim for a seat height of 45 to 50 cm and a seat depth of 50 to 55 cm. A backrest height of 70 to 90 cm is comfortable for most people.
Pro tip
Before building the armchair, make a full-size model out of cardboard. This lets you check the proportions in your room and get a realistic feel for the seating position. It can save you from wasting expensive wood and help prevent disappointment.
Making a materials list and shopping
List every component with its exact dimensions. Allow for waste—around 15 per cent for wood. Choose your wood: spruce is lightweight and inexpensive, while beech is hard and durable.
For the upholstery, you’ll need foam in different firmness levels, batting, fabric and possibly springs. Buy plenty of fabric. If you’re using a pattern, remember to allow for pattern repeats.
Gather all your materials before you start building. Few things interrupt your momentum like waiting for a delivery halfway through a project. For specialist supplies such as upholstery fabric or wooden dowels, browse our furniture accessories range.
Which tools do I need to build upholstered furniture?
The right tools help you work safely and accurately. You don’t need a fully equipped workshop; a basic set is enough.
Tools for woodworking
A precise saw is essential. A jigsaw with a wood blade works for simple curves. For straight cuts, a circular saw with a guide rail is a better choice. A miter saw makes accurate angled cuts.
A drill with a drill stand and Forstner bits is essential for clean, flat-bottomed holes. An 18-volt cordless screwdriver can drive even long screws securely. Use clamps in various sizes to hold the parts together while the glue dries.
Important safety note
Always wear safety glasses and hearing protection when sawing and sanding. Wood dust can irritate your respiratory tract, so wear a dust mask. Make sure your work area is well lit so you can work accurately.
Tools for upholstery
An electric staple gun is a must-have. It secures the padding and fabric to the wood. Choose a model with enough power for the thickness of your wood. The staples should penetrate the wood without coming through the other side.
A sharp utility knife with plenty of spare blades will cut foam and fabric. Heavy-duty fabric scissors can handle thick upholstery fabrics. If you’re sewing the cover, you’ll need upholstery needles and strong thread.
How do I build a sturdy armchair frame?
The frame supports the weight, so stability comes before looks. Choosing the right joints is essential.
Basic construction and joints
The classic box frame, made from four legs, rails and cross braces, is very sturdy. Join the parts with glued screw joints. Drill a pilot hole for the screw shaft and a wider, flat-bottomed hole for the screw head.
Mortise-and-tenon joints are stronger and give a more refined, professional finish, but they take practice and precision. Dowel joints are a good compromise for beginners and help the frame withstand pulling forces.
“An armchair’s stability comes from its hidden joints. Take your time here. You can’t fix a wobbly frame later without removing all the upholstery.”
Use wood glue on every joint. It spreads the load evenly across the joint. Screws alone can’t withstand constant stress. Wipe away excess glue right away with a damp cloth.
Building in angles and ergonomics
A flat seat can feel uncomfortable. Tilt it back by around five degrees. The backrest should lean back by 10 to 15 degrees. These angles help reduce strain on your spine.
Cut the angles accurately into the wood with a miter saw. Check them with a digital angle finder. Build the incline into the rails from the start instead of adding wedges later.
More advice
If you plan to build a taller armchair, such as a recliner, study finished models first. The chairs & armchairs range is a useful source of inspiration for sturdy angles and comfortable proportions. Pay attention to the backrest and seat angles.
Once you’ve assembled the bare frame, test it thoroughly. Sit on it and put your full weight on it. It shouldn’t creak or shift. Then you’re ready to sand it.
How do I upholster an armchair professionally?
Upholstery is what makes an armchair comfortable. Build it up in layers, from firm to soft. Each layer has a specific purpose.
The suspension: the foundation of seating comfort
Traditional options include seat springs and no-sag springs. For DIY projects, elastic webbing is a practical choice. Attach it to slotted screws or special hooks in the frame.
Weave the webbing across the seat at intervals of around seven centimetres. Keep the tension even and firm. Add a second layer of webbing at a 90-degree angle for extra stability. Alternatively, use a ready-made slatted base sized for an armchair.
Cutting and layering the foam
You can buy foam in blocks from foam suppliers. Trace the seat and backrest shapes onto the foam with a felt-tip pen. Cut along the lines with long, even strokes of a utility knife.
Use firm high-resilience (HR) foam with a density of at least 40 kg/m³ for the seat. It should be eight to ten centimetres thick. Five to seven centimetres is enough for the backrest. Choose softer foam for the armrests and any headrests.
Join the layers with upholstery spray adhesive. Apply adhesive to both surfaces, wait one minute, then press them firmly together. Weigh the pieces down until the adhesive dries.
How do I upholster the armchair?
The fabric cover is the visible outer layer. This work takes patience and a good eye for how the pieces will fit together. Getting the tension right is key.
Cutting and preparing the fabric
Prepare the fabric by ironing out all the creases. If it has a pattern, take care to keep it straight so it won't become distorted later.
Cut the fabric with plenty of extra material. For simple surfaces, an overhang of five centimeters on each side is enough. Allow more for complex shapes with pronounced curves. Mark the center of each fabric panel and the center of the corresponding armchair section with pins.
For a more elaborate cover with seams, such as a Chesterfield armchair, sew the cover first. This takes sewing experience. Beginners should choose a stretchy fabric or a design without complex seams.
Stretching and securing the fabric
Start with the seat. Staple the fabric at the center of the front edge. Then move to the opposite center at the back edge. Pull the fabric taut, but not so tightly that it compresses the foam, and staple it in place.
Repeat this at the center of the left and right sides. Then work outward from these fixing points, alternating between opposite sides. Fold the fabric at the corners like wrapping paper and staple it neatly.
Follow the same steps for the backrest. With armrests, you often need to guide the fabric around small curves. Make small cuts in the excess fabric so it lies smoothly. Later, cover the staples with matching trim or fabric tape.
How do I incorporate my DIY armchair into my living room decor?
The finished armchair should suit the room. Thoughtful choices of materials and style help it feel right at home.
Coordinating color and material
The wood tone of the frame should complement the other wooden furniture in the room. If your sideboard is made of oiled oak, choose a similar finish. Contrasting tones can also look great, such as light ash paired with dark walnut.
The fabric cover adds an accent. Pick a color from your curtains, rug, or cushions. If you choose a pattern, consider its scale. A large floral print can overwhelm a small armchair. A subtle stripe looks classic and understated.
For ideas on furnishing an entire room, such as a children's room with matching seating, explore the Children's Furniture Styles category.
Making the most of function and placement
Think about how you plan to use the armchair. A reading chair needs good lighting and a small side table. A TV chair should feel deep and inviting. A guest chair can be slimmer and more elegant.
Avoid placing the armchair by itself in the center of the room. Tuck it into a corner or place it against a wall to create a cozy feel. Leave enough space around other furniture for clear walkways. A large armchair such as the
needs enough room.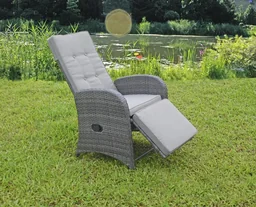
Furniture movers are useful when you want to rearrange your space or clean under heavy furniture. Find practical helpers in the Furniture Dollies category.
What are some other DIY seating ideas?
Not every armchair needs upholstery. There are plenty of creative, less demanding ways to make a seat your own.
The bean bag or pouf
A large, sturdy fabric bag filled with polystyrene beads makes a comfortable bean bag. Sewing it can be challenging, but it doesn't take much material. You can use old cushions or blankets as filling.
The pallet armchair
Euro pallets from a hardware store make a quick base for your project. Sand them down, screw them together in the shape of an armchair, and add thick cushions to the seat. The result is a relaxed, industrial look for the garden or loft.
Protecting your furniture is important outdoors. Learn more about tarps for patio furniture.
The miniature children's armchair
Build a scaled-down version for your child. The techniques are the same, but you'll need less material and spend less. It's a perfect practice project. For inspiration and kid-friendly designs, visit the Play Furniture section.
A multifunctional piece of furniture such as the
shows how seating and sleeping functions can be combined in one clever design. This kind of space-saving furniture is especially popular in small apartments.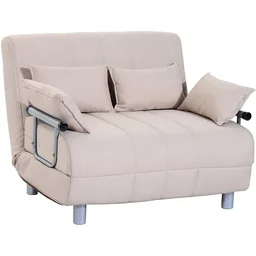
Caring for and maintaining your DIY armchair
Handmade furniture deserves careful care. Regular maintenance will keep it looking great and sturdy for a long time.
Clean the fabric upholstery regularly with your vacuum's upholstery attachment. Treat stains right away with a cleaner suited to the fabric. Always test the cleaner on an inconspicuous area first.
Check all screw connections once a year. Wood responds to changes in the climate, so screws can loosen over time. Tighten them if needed. Also check that the upholstery fabric is still taut.
If the armchair shows significant wear, you can replace individual upholstered parts, such as the seat cushion, or remove the entire cover and reupholster it. When you build it yourself, you know every screw and seam, so repairs are straightforward.
A stylish set of upholstered chairs such as the
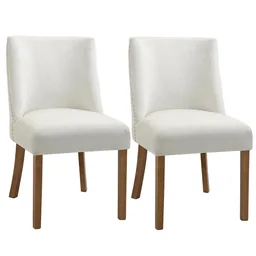
Your DIY armchair is finished, and every detail bears your personal touch. Now it's time to sit back and enjoy it. Every time you take a seat, this piece of furniture will remind you of your craftsmanship and creativity. That's priceless.
Frequently Asked Questions
- What type of wood is best for building an armchair frame?
- Use solid, well-seasoned softwood such as spruce or pine for a lightweight frame. Beech or oak are ideal for a durable, sturdy frame. The wood should be at least 40x40 mm thick for load-bearing parts. Avoid particleboard, as it does not hold screws or support heavy loads well.
- How do I upholster a DIY armchair properly?
- Start with a layer of elastic webbing or a slatted base for support. Add upholstery foam cut to size, using different firmness levels: firm foam for the seat and back, and soft foam for the armrests. Secure everything with upholstery adhesive and staples. Finally, pull the fabric cover taut and staple it in place, working from the center outward.
- Can a beginner build an entire armchair?
- Yes, with a simple design and thorough preparation. Start with clear building instructions and practice joinery techniques on scrap wood. Focus on right angles and sturdy connections. Upholstery takes patience, but you can learn as you go. A small stool or footstool is an ideal first project before you build a full-size armchair.
- What tools do I need to build an upholstered armchair?
- Essential tools include a jigsaw or circular saw for cutting the wood, a drill with a screwdriver bit, a cordless drill/driver, and a staple gun for the upholstery. A level, square, clamps, and a utility knife are also useful. For professional results, a band saw or table saw and an upholstery sewing machine can help.
- How can I make my DIY armchair fit perfectly in my living room?
- First, consider the style, colors, and materials of your existing furniture. Choose a type of wood and stain that complement your shelves or tables. The upholstery fabric should pick up accent colors from your cushions or rug. Pay attention to proportions: a large Chesterfield armchair needs plenty of space, while a slim designer chair can fit into a small corner.
You might also be interested in
- How to reupholster an armchair yourself
- Build your own pallet armchair for comfortable outdoor seating
- Build your own furniture: Creative DIY projects for your home
- Build your own TV stand: Instructions for a DIY furniture project
- Build your own stool: Easy DIY instructions
- DIY zigzag table: Build a unique piece of furniture