
In brief: Before plastering, check the substrate for strength, dryness, cleanliness, absorbency and cracks. Remove dust, loose areas, oil and old coatings. Repair damage, apply a primer suitable for the masonry and have damp or structurally concerning areas assessed by a professional first. This ensures the plaster bonds securely for the long term.
Quick answer: Before plastering, check the substrate for strength, dryness, cleanliness, absorbency and cracks. Remove dust, loose areas, oil and old coatings. Repair damage, apply a primer suitable for the masonry and have damp or structurally concerning areas assessed by a professional first. This ensures the plaster bonds securely for the long term.
When plastering walls, the substrate determines the bond, finish and service life. Even high-quality plaster can flake, crack or dry unevenly if the masonry is dusty, absorbs too much water or remains permanently damp. Checking the substrate should therefore come before choosing any materials.
Why is checking the substrate before plastering so important?
Plaster will not bond to just any surface. It needs a firm, dry and clean substrate that can absorb the stresses that occur. Masonry, concrete, old plaster and plasterboard all behave differently. Simply brushing the surface down roughly is therefore not enough.
What properties must the substrate have?
A suitable plaster substrate must meet several conditions at the same time:
- Sound: The surface must not sand, chalk or have hollow areas.
- Dry: Rising damp, leaks and significant residual moisture must be investigated.
- Clean: Dust, grease, oil, soot, shuttering oil residue and release agents prevent good adhesion.
- Even enough: Large projections and hollows lead to different plaster thicknesses.
- Suitably absorbent: The substrate must not draw the mixing water out of the plaster too quickly.
- Free of cracks or professionally prepared: Moving cracks require separate assessment and repair.
The surface must also be free from frost, ice and loose dirt. For exterior surfaces, also check driving rain, splash water, algae growth and the stress caused by changing temperatures. On interior walls, old wallpaper residue, nicotine, soot and unsuitable paint coatings are more significant.
What happens if you skip the inspection?
Problems often only become visible after drying. The plaster may then fail to bond in places, blister or come away in sheets. Highly absorbent masonry can leave the surface patchy and rough. A surface that is too dense or smooth, on the other hand, leads to poor adhesion and later flaking.
Cracks in the substrate may also remain visible through the new plaster. If plaster covers movement that is still active, the new layer will usually crack in the same place. A short substrate inspection therefore saves reworking, materials and time.
“For plastering work, the substrate must be dry, clean, sound and free from separating layers.”
How do you check masonry step by step?
When checking the substrate, work from a general visual inspection through to simple physical tests. Do not inspect only one area that looks good. Check corners, plinth areas, transitions, window reveals, repair areas and surfaces with visible discolouration.
1. Visual inspection in good light
Shine a light across the wall from the side. Raking light reveals unevenness, waves, cracks and edges. Look for dark areas, water runs, white efflorescence, flaking paint and areas with a different texture.
Make a note of noticeable areas or mark them with a pencil. Measure larger cracks with a ruler. Photograph the surface before removing anything. This will help you see later whether any damage has changed.
2. Hand test and wipe test
Run the flat of your hand over several areas of the wall. If a powdery or sandy residue remains on your hand, the surface is not sufficiently sound or is dirty. Do not simply wipe away the dust and plaster immediately. Brush or vacuum the surface and repeat the test.
With chalking old paint, you need to determine how deep the weakness extends. If only the paint layer rubs off, remove the coating. If the plaster underneath also sands, remove the loose layer down to a sound base.
3. Scratch test in several areas
Carefully score the surface with a screwdriver or suitable scratching tool. A sound mineral surface remains largely stable. If grains crumble away or a layer can be lifted easily, it is not strong enough.
Carry out the test especially at transitions. Old repair mortar, filled chases and areas above cables may have different properties from the rest of the masonry. Remove loose edges and plan a suitable repair.
4. Tap test for hollow areas
Carefully tap the surface with the handle of a tool or a small piece of wood. An even, solid sound indicates a good bond. A hollow or dull sound may indicate separation between the plaster and masonry.
Mark areas that sound hollow and check their edges. Remove loose flakes of plaster completely. New plaster will not hold permanently on an old layer that is already separating from the masonry.
5. Check absorbency with water
Dampen several small areas with a wet sponge or a few drops of water. If the surface absorbs the water immediately and quickly becomes dark, it is highly absorbent. If the water remains as droplets for a long time, the surface is very dense or has been coated.
Always check several areas, because repair mortar, brick, aerated concrete and concrete may react differently. Even absorbency makes application easier. If absorbency varies considerably, you need a suitable plaster primer or a compatible pre-treatment.
6. Assess cracks and movement
Hairline cracks in the finishing plaster are not automatically dangerous. Wide, recurring or growing cracks deserve closer attention. Stair-step cracks in masonry, diagonal cracks around windows and doors, and cracks at material transitions may indicate movement.
Mark the ends of a crack and write the date next to them. Check the area again after a few weeks if the work does not need to start urgently. If there are obvious changes, signs of structural movement or any uncertainty, a professional should investigate the cause.
Pro tip
Always check the substrate in at least three places per wall area. A single clean area says little about the surface as a whole. Plinths, window junctions, old repairs and areas where the wall colour has visibly changed are particularly informative.
What damage and old coatings need to be repaired?
When preparing masonry, remove anything that could affect adhesion. The solid substrate must be visible and accessible. Do not assume that a thick layer of plaster will compensate for every uneven area or defect. Plaster is not a solution for damp masonry or loose building materials.
How do you remove loose layers?
Use a scraper or suitable brush to remove flaking paint, crumbling old plaster and loose mortar residue. Then sweep the surface thoroughly and vacuum up the dust. A hand brush is sufficient for small areas, while a suitable vacuum cleaner makes the job easier on larger surfaces.
Remove greasy or sooty residue with a suitable cleaning agent. Then allow the surface to dry completely. Cleaning-agent residue can also act as a separating layer and must be removed with clean water if the substrate allows this.
How do you repair uneven areas and holes?
Fill deep holes with a repair mortar suitable for the masonry. First remove crumbling edges and only dampen the substrate as specified for the material being used. Fill large depressions in several layers so that the mortar can harden securely.
Level out pronounced projections before plastering the entire surface. Different plaster thicknesses dry at different rates and can create tension. On very uneven masonry, a multi-layer build-up is more suitable than one very thick layer.
What should you do with old paint?
Check old paint for adhesion and composition. Water-soluble or chalking paints usually need to be removed. Oil-based, glossy and very dense coatings provide little adhesion for plaster. Sand or remove them according to the condition of the substrate, then remove all sanding dust thoroughly.
Wallpaper, paste residue and textile wall coverings must be completely removed from the wall before plastering. Even thin films of paste can alter the absorbency. Then check the exposed surface again using wipe, scratch and water tests.
How should you deal with salt efflorescence?
White, crystalline deposits indicate moisture and dissolved salts. Do not simply brush away the efflorescence and then seal the wall airtight. First establish whether water is entering from the ground, a leaking pipe, a joint or outside.
For light deposits, dry brushing may be sufficient once the cause has been resolved. Recurring efflorescence requires a renovation plan. Ordinary interior plaster often will not remain durable on permanently damp or heavily salt-contaminated masonry.
Keep the work area clean. Covers, sheeting and fixing materials can be found, for example, in the Industrial Supplies section. For larger renovation projects, tarpaulins and nets can also help protect adjacent surfaces from dust and splashes.
Important note
Do not plaster a wall where active moisture, heavy salt efflorescence, mould or widening cracks are visible. Stop work, establish the cause and have the surface professionally assessed if there are building or structural concerns.
Which plaster primer is suitable for which substrate?
Plaster primer does not create a load-bearing substrate. It balances differences in absorbency, binds fine residual dust or improves adhesion on a suitable but difficult surface. The right primer depends on the plaster system and the existing material.
When does highly absorbent masonry need a primer?
Bricks, aerated concrete and some sand-lime brick substrates can quickly draw water from fresh plaster. This makes the plaster more difficult to work with and causes it to dry unevenly. A suitable primer or pre-treatment reduces these differences and extends the open time.
Do not apply the primer by guesswork. Read the technical data sheet for both the plaster and the primer. Some systems require a specific dilution, while others are applied undiluted. The important thing is to prepare the surface evenly and avoid leaving glossy puddles.
When is a strengthening primer useful?
A strengthening primer may be suitable for slightly sandy but fundamentally sound mineral surfaces. It binds surface dust and reduces absorbency. It is not sufficient for severely crumbling plaster. In this case, remove the weak layer down to the solid substrate.
After drying, test the surface again by hand and with a scratch test. If it remains sandy or grains come away, you need a different preparation method. Applying more primer will not automatically make an unsuitable substrate load-bearing.
When do you need a bonding primer?
Smooth, dense and low-absorbency surfaces such as concrete may require a bonding primer. Depending on the product, this contains adhesion-promoting ingredients and often a granular aggregate. The rough surface improves the plaster's mechanical grip.
Use a bonding primer only on a clean, solid substrate. Oil, dust and loose concrete laitance must be removed first. Observe the specified drying time before applying the plaster.
How do you apply plaster primer correctly?
- Clean the substrate and remove loose layers.
- Stir the product thoroughly without unnecessarily incorporating air.
- Apply it at the specified temperatures.
- Apply the primer evenly, without runs or puddles.
- Allow the surface to dry for as long as specified for the product.
- Then check that the surface is solid, dry and evenly prepared.
Avoid strong draughts, direct heat sources and frosty conditions. These factors affect drying and can cause an uneven surface. For exterior work, also take rain, dew and direct sunlight into account.
“Before plastering begins, the substrate must be inspected. Any concerns must be reported if its condition does not allow defect-free work.”
What applies to cables, moisture and problem surfaces?
Checking the substrate involves more than adhesion and absorbency. Also check what is inside the wall and which connections will later need to remain visible or accessible. Especially when renovating older buildings, cables, conduits and repaired chases may be hidden beneath several layers of plaster.
How should you deal with cables and penetrations?
Before drilling, chasing or making repairs, determine the route of existing electrical, water and heating lines. Secure exposed cables and pipes professionally and document their location. Service penetrations must be firmly seated, properly sealed and compatible with the plaster system.
If checking the substrate reveals work on outdoor cables or earthing connections,
and should be included in further specialist planning. For protected cable connections, may be relevant. These products do not replace a qualified electrician. Have cable work, connections and testing carried out by a qualified professional.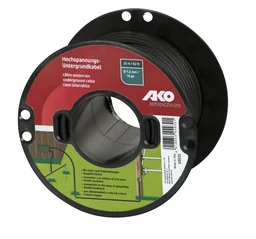
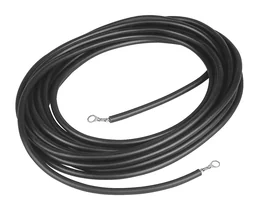

For pipe penetrations and connections, clearly separating the different trades is helpful. You can find information and suitable products for cable-related work in the Plumbing and Irrigation section. Only plaster once the cables and pipes have been inspected, secured and protected against damage.
When can you continue working on damp masonry?
Only once the cause of the damp has been eliminated and the surface has dried sufficiently. A dry surface does not automatically mean that the entire structure is dry. If damp is suspected, have it professionally measured or assessed, especially in basements, plinth areas and external walls in contact with the ground.
Do not heat a damp wall intensely for a short time in order to plaster it sooner. Rapid drying can create stresses and only shifts the problem elsewhere. Ensure controlled ventilation and follow the conditions specified for the plaster system.
What conditions apply on the day of plastering?
Follow the manufacturer's specifications for temperature, humidity and substrate conditions. Mineral plasters often must not be applied in freezing temperatures or extreme heat. Interior spaces need sufficient air exchange, but no strong draughts. Direct sunlight can cause exterior surfaces to dry too quickly.
Prepare your tools, water, mixing containers and materials before you begin. Work in sections where possible and keep transitions wet-on-wet if required by the system. Different mixes or subsequently altered water quantities can cause differences in colour and texture.
Which checklist helps before applying the first coat of plaster?
- The wall is visibly clean and free from dust, grease and loose layers.
- The scratch and wipe tests show that the substrate is sound.
- Hollow areas have been opened up, removed and professionally repaired.
- Cracks have been assessed and repaired where necessary.
- Moisture, salts and mould are no longer active.
- Cables, pipes and penetrations have been inspected and protected.
- The absorbency is known and has been prepared evenly.
- The selected plaster primer is suitable for the substrate and plaster system.
- The primer and repaired areas are completely dry.
- Temperature, humidity and weather conditions comply with the manufacturer's specifications.
Only once these points have been met is it worth applying the plaster. If needed, buy additional supplies for the job in the shop and check the application instructions again before opening the containers. Checking the substrate is not an unnecessary detour, but the basis for an even, durable plaster finish.
Additional advice
Allow at least as much care for checking and preparing the surface as you do for applying the plaster. On unfamiliar substrates, first create a small test area. This lets you assess absorbency, adhesion, colour effect and working time before treating the entire wall.
Frequently Asked Questions
- How can I tell whether a wall is strong enough to plaster?
- Rub the surface with your hand and scratch it in several places with a hard object. If dust, sand or loose layers come away, the substrate cannot safely support the plaster. Also tap the surface. A high-pitched, hollow sound indicates that areas may be loose.
- Do I always need to apply primer before plastering?
- No. The type of primer depends on the substrate's absorbency, strength and surface. Highly absorbent masonry usually needs a primer to regulate absorption, while dusty surfaces need a consolidating primer. Smooth, dense concrete often requires a bonding primer. Remove loose or dirty layers first; primer is not a substitute for cleaning the substrate.
- How long does plaster primer take to dry?
- Drying time depends on the product, temperature, humidity and absorbency of the substrate. Follow the manufacturer's instructions and check that the surface is evenly dry, firm and no longer sticky. Drying takes longer in cool, damp rooms. Ventilate the area, but avoid draughts and direct heat.
- Can I plaster damp or salt-contaminated masonry?
- Not without first identifying the cause. Moisture carries salts through the plaster and can cause it to flake off. First find the source, such as rising damp, a leaking pipe or driving rain. Have heavily affected areas assessed by a professional, then choose a suitable renovation or plinth system.
- Which cracks need to be checked before plastering?
- Check wide, expanding, diagonal or stepped cracks particularly carefully. Mark their course and width, document any changes and consult a professional if you are unsure. Hairline cracks in old plaster can often be repaired. Cracks in masonry, around joints or above openings may indicate movement.
You might also be interested in
- Applying plaster: The basics for interior and exterior walls
- Wallpaper or plaster: How to design your interior walls properly
- How to lay tiles and plaster walls properly – a DIY guide
- Plastering over old tiles: A guide to smooth walls
- Applying and painting mineral plaster: A step-by-step guide
- Preventing mould: Stop moisture with insulation boards and plaster