
In brief: The most reliable way to control spider mites in the garden is to use suitable predatory mites. Phytoseiulus persimilis feeds on many spider mites in warm, humid conditions. Neoseiulus californicus tolerates drier conditions better. Amblyseius andersoni is suitable for preventive release. Remove heavily infested leaves, avoid broad-spectrum sprays and check the undersides of leaves every week.
Spider mites are among the most common pests affecting vegetables, ornamental plants and fruit trees. They reproduce particularly quickly when heat, dry air and weakened plants occur together.
Predatory mites offer a biological solution. They seek out pests directly on the leaves and can significantly reduce an infestation when the right species is released early enough. Proper plant care also determines whether beneficial organisms become established long term.
What are spider mites and how can you identify an infestation?
Spider mites are not insects but very small arachnids. Adult mites are usually less than half a millimetre long and prefer to stay on the undersides of leaves. There, they pierce individual plant cells and suck out their contents.
Many pale spots or yellowish speckles initially appear on the upper surface of the leaves. As the infestation increases, leaves turn silvery, bronze or yellow and eventually dry up. The plant grows more slowly, produces fewer flowers and may lose a large proportion of its leaves in a severe infestation.
Fine webbing often only becomes visible once spider mites have already multiplied significantly. They gather in leaf axils, between shoots or on the undersides of larger leaves. A single spider web is not conclusive evidence, as garden spiders leave similar threads without causing the typical feeding damage.
How do you check plants for spider mites?
Check susceptible plants at least once a week in warm, dry weather. Always inspect several leaves from the inside of the plant, as spider mites are protected there from sun and wind.
- Inspect the undersides of leaves: Carefully turn the leaves over and look for tiny moving dots.
- Use white paper: Tap a shoot over a sheet of white paper. Moving dark or reddish dots may be spider mites.
- Use a magnifying glass: With a ten-power magnifying glass, you can see bodies, legs and occasionally the round eggs.
- Check for webbing: Look for threads between leaf veins, stems and young shoots.
Also examine the youngest leaves. They often show signs of infestation earlier than older leaves because the plant grows particularly actively there. Mark infested plants so you can compare their progress during your next inspection.
“The earlier you detect an infestation, the easier it is to regulate it with natural predators.”
Why are beneficial organisms suitable for controlling spider mites in the garden?
Beneficial organisms eat pests or parasitise them. In the case of spider mites, predatory mites mainly perform this role. They seek out eggs, nymphs and adult spider mites directly on the plant, naturally keeping the population small.
Biological plant protection leaves no residues on the plant and protects many organisms when you use the right beneficial species. Predatory mites also work directly where the infestation is located. You do not need to treat the whole plant with a broad-spectrum spray.
Success depends on timing. A predatory mite cannot repair badly damaged leaves or restore a plant that is completely covered in webbing. Release the mites at the first signs of feeding damage or shortly before an expected infestation surge.
What conditions do beneficial organisms need?
Each species responds differently to temperature, humidity and prey density. Read the supplier’s information before buying beneficial organisms. The following points are especially important for successful release:
- Choose the right species: Select a predatory mite suited to the location, temperature and humidity.
- Choose the right time: Release the mites in the evening or under overcast skies so that heat and direct sunlight do not cause additional stress.
- Provide enough food: Specialists need live spider mites. For preventive use, more robust species are suitable because they can also survive on pollen or other tiny prey.
- Observe the waiting period after pesticides: Plant protection products can harm beneficial organisms for days or weeks after application.
- Check regularly: Continue inspecting the plants so you can plan a second release in good time.
Pro tip
Before releasing the mites, place the infested plant in a sheltered, bright spot without intense midday sun. Water the root area evenly and avoid dry air from heaters or strong wind directly around the foliage.
Which beneficial organisms help against spider mites?
Predatory mites are the most important helpers against spider mites. The species determines whether the mites are best suited to an active infestation, preventive release or protected growing conditions. Only buy beneficial organisms approved for your crop and intended area of use.
| Beneficial organism | Strength | Suitable use |
|---|---|---|
| Phytoseiulus persimilis | Specialist spider mite predator | Active infestations in warm and sufficiently humid conditions |
| Neoseiulus californicus | Tolerates drier conditions better | Prevention and light to moderate infestations on many plants |
| Amblyseius andersoni | Hardy, versatile predatory mite | Preventive protection and changing conditions |
| Feltiella acarisuga | Larvae feed on various spider mite stages | Protected, more humid growing areas and greenhouses |
Which beneficial organisms in the garden complement predatory mites?
Green lacewing larvae, predatory bugs and various spiders are also beneficial organisms in the garden. Depending on the species, they eat aphids, thrips, small caterpillars or other small creatures. They are generally less targeted against spider mites than specialised predatory mites.
An insect hotel alone will therefore not solve a spider mite infestation. It provides shelter for certain wild bees and other insects, but offers predatory mites no direct protection. A diverse range of plants, areas with leaf litter and deadwood, and avoiding broad-spectrum insecticides are more effective.
Outdoors, rain, wind and major temperature fluctuations make release more difficult. In a greenhouse, conservatory or sheltered balcony, you can control temperature and humidity more effectively. Information on suitable pest and plant protection products and the plant protection range can help you choose further measures.
Important note
Do not spray broad-spectrum insecticides shortly before or after releasing predatory mites. Oil, neem and soap products can also harm them. Check the label of every product and observe the stated waiting period and compatibility information.
How do you use predatory mites correctly?
Application begins with a realistic assessment of the infestation. Do not inspect only visibly damaged leaves; check neighbouring plants as well. Spider mites spread through wind, contact and shared tools.
How do you prepare for application?
- Confirm the infestation: Check the undersides of the leaves with a magnifying glass and note which plants are affected.
- Remove severely damaged parts: Cut off withered or heavily webbed leaves. Leave healthy young shoots in place, as they can continue to develop after successful control.
- Adjust the location: Protect plants from intense midday sun, hot winds and prolonged drought. Waterlogging, on the other hand, does not help and damages the roots.
- Choose the right species: Use a specialised predatory mite for an active infestation. More robust species may be suitable for dry locations or preventive applications.
- Handle the delivery correctly: Do not store the packaging in the sun and open it only at the intended application site. Follow the supplier's temperature and humidity instructions.
- Release the mites: Distribute or hang the carrier material directly in the plant as instructed. Avoid unnecessary shaking and do not place the mites on dry, overheated leaves.
For clean cuts on infested leaves and shoots, the
, the Wonder Shears for home and garden. A sharp blade crushes less plant tissue and makes pruning easier. You can find more suitable helpers among the garden tools.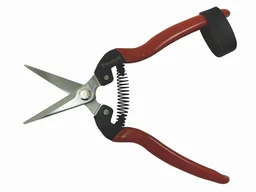
After application, leave the mites to work undisturbed. Do not wipe or spray the leaves every day, as you may also remove the predatory mites. Instead, check individual leaves carefully and monitor their development over several days.
“Predatory mites should be introduced as early as possible when an infestation begins, because severely damaged plants cannot regain the leaf mass they have lost.”
What should you do in the event of a severe spider mite infestation?
A severe infestation requires a coordinated approach. Beneficial insects continue to work, but a high number of spider mites and many eggs prolong control. First remove the worst infestation hotspots and create better starting conditions for the predatory mites.
What does a sensible recovery plan look like?
- Isolate the plant: Keep infested potted plants separate from healthy ones. In beds, mark the affected area and avoid unnecessary contact.
- Rinse the foliage: Rinse robust plants from underneath the leaves using a gentle stream of water. Do not use high pressure and allow the leaves to dry before releasing beneficial insects.
- Cut off infested leaves: Remove leaves with heavy webbing, extensive feeding damage or dried-out edges. Disinfect or clean the shears after pruning.
- Dispose of plant debris safely: Do not put heavily infested material in an open compost heap. Seal it in a bag and dispose of it according to local regulations.
- Release predatory mites: Follow the supplier's dosage and reapplication interval. With a severe infestation, a single application is often not enough.
- Assess progress: Photograph a comparison leaf every week. Fewer new speckles, more healthy shoot tips and receding webbing indicate successful control.
For annual plants, cutting them back completely or disposing of them may be more sensible than lengthy treatment. Perennial plants with healthy new growth, on the other hand, have a good chance of recovering. Continue removing dead leaves, but do not cut off all green leaves indiscriminately.
Avoid rapidly switching between home remedies, sprays and beneficial insects. Oil- and soap-based products may be approved for use against spider mites, depending on the product, but they also affect predatory mites. For a coordinated organic plant protection approach, read every label and allow sufficient intervals between treatments.
Additional advice
Do not order beneficial insects until you have prepared the plants and the weather conditions are suitable. Release them on the day they arrive if possible, avoid direct sunlight during transport and do not store the mites in the fridge unless the supplier specifies otherwise.
How can you prevent a new spider mite infestation?
Spider mites benefit from plant stress. Consistent watering, a suitable location and regular checks slow their reproduction more effectively than occasional emergency measures. Plants are particularly at risk next to hot walls, under glass and in poorly ventilated polytunnels.
What care keeps plants resilient?
- Supply the root zone evenly: Water thoroughly as soon as the top layer of soil has dried out. Avoid both complete drying and waterlogging.
- Keep leaves dry and well ventilated: Preferably water at soil level and do not leave dense plantings wet for long periods. Good air circulation also reduces the risk of fungal diseases.
- Fertilise with nitrogen in moderation: Over-fertilised plants produce soft, lush growth that can be more susceptible to various pests.
- Thin out dense shoots: Cut back weak or crossing shoots. This makes it easier to check the undersides of the leaves.
- Check new plants: Isolate newly purchased plants at first and inspect them several times before placing them with existing plants.
- Ventilate the greenhouse: Open doors and windows when the weather is suitable and shade the plants during extreme heat.
For an even supply to the root zone, you can use the garden irrigation options. Automatic watering does not replace inspections, but it prevents dry periods of stress during longer absences.
How long should you monitor plants after treatment?
Monitor the plants for at least three to four weeks after the last visible spider mite. Eggs can hatch at different times, and individual mites may survive in protected leaf axils. Therefore, check new leaves, not just the areas that are already damaged.
Preserve flowering borders, leaf litter beneath shrubs and other suitable hiding places. Avoid unnecessary broad-spectrum pesticides. This supports a stable network of beneficial insects in the garden and reduces spider mite pressure in the long term.
Conclusion: Early monitoring, the right predatory mite and consistent plant care provide the most reliable biological control of spider mites. Remove severely damaged leaves, protect the released beneficial insects and act immediately when new feeding damage appears.
Frequently Asked Questions
- Which beneficial insects help control spider mites?
- Predatory mites are particularly effective against spider mites. Phytoseiulus persimilis feeds on large numbers of spider mites in warm, humid conditions. Neoseiulus californicus tolerates drier conditions better. Amblyseius andersoni is suitable for preventive release. Lacewing larvae and other beneficial insects in the garden provide additional protection, but usually cannot replace a specialised predatory mite in cases of severe infestation.
- How quickly do predatory mites work against spider mites?
- Predatory mites start searching for prey after release. You will often see the first changes after a few days, but depending on temperature, humidity and the initial infestation level, a significant reduction usually takes one to three weeks. Severely damaged leaves will not turn green again. Regularly check new leaves and webs for this reason.
- Can I use predatory mites outdoors?
- Yes, predatory mites can be used outdoors, on balconies and patios, and in greenhouses. Success depends on the species, weather and timing. Choose a more robust species for dry, changeable locations and release the mites in the evening or on an overcast day. Follow the manufacturer's instructions.
- What can I spray when using beneficial insects against spider mites?
- Do not spray broad-spectrum insecticides shortly before or after releasing predatory mites. Oil-based, neem and soap-based products can also harm them. Check the label of every product, observe the specified waiting period and only release beneficial insects once their compatibility with the product has been confirmed.
- How can I prevent spider mites next year?
- Check plants regularly on the undersides of their leaves, especially in hot, dry conditions. Water the root area evenly, avoid excess nitrogen and thin out dense growth. Keep new plants separate at first. Avoid broad-spectrum products so that predatory mites and other beneficial insects in the garden are preserved.
You may also be interested in
- Insects and Spiders: The Best Helpers for Your Garden
- How to Get Rid of Spider Mites: Identification and Home Remedies
- How to Get Rid of Chigger Mites: Effective Protection for People & Gardens
- Using Lacewings: Natural Pest Control
- How to Get Rid of Aphids: Biological Methods for the Garden
- Insect-Friendly Garden: How to Create a Habitat for Beneficial Insects