
In brief: A DIY kids’ storage shelf with bins gives toys, books, and clothes a place of their own. Customize the dimensions to fit the room and choose colors your child will love. The project can help your child become more independent, and the shelf can last for years.
DIY Kids’ Storage Shelf with Bins: Smart Toy Storage
A little clutter in a child’s room is normal. A custom shelf with bins brings order to the space. You choose the size, colors, and layout to create storage that grows with your child.
A DIY shelf is more than just a piece of furniture. It’s a project you can tailor to your child’s needs, creating storage that’s both practical and attractive.
Why build your own shelf?
Store-bought shelves come in standard sizes. They may not fit neatly into an alcove or under a window. Building your own lets you make the most of every inch. You can size each compartment to fit your toy storage bins.
You’re in control of the design. Your child can choose the bin colors or help paint the shelf. Getting involved can give them a sense of ownership, and they may be more eager to use a shelf they helped design.
You also choose the materials and how the shelf is put together. Sturdy wood and strong joints help it stand up to energetic play.
Storage for children should be simple and intuitive. Kids should be able to see at a glance where everything belongs. Open bins in a sturdy shelf frame are ideal.
Which materials work well for a shelf?
Solid wood is a classic choice. Spruce and pine are soft, easy to work with, and affordable. Choose well-seasoned wood to help prevent warping.
Birch plywood is another excellent option. It’s stable, resists warping, and has a smooth surface. Sand the edges carefully or cover them with edge banding.
Avoid particleboard without waterproof bonding. It can absorb moisture and release emissions. Your child’s health comes first.
Important note
For painted or glazed wood-based materials, look for the GS mark for tested safety. For paints and varnishes, check for wording such as "safe for use on toys" or "EN 71-3" (toy safety). Non-toxic, water-based paints are the best choice.
Choosing the right bins
The bins are at the heart of the system. They should be easy to grip, sturdy, and easy to clean. Plastic storage bins are practical and come in many colors.
Fabric bins have a softer look and make less noise, but they aren’t washable. A mix of materials may work well.
Measure the outside dimensions of your chosen bins to the nearest millimeter, then plan the shelf around them. Leave about 1-2 cm of clearance in each compartment.
Fixed shelves without bins work better for books and notebooks, so include them in your design from the start. Find inspiration for storage in our kids’ room ideas category.
How do I plan the dimensions and construction?
Start by measuring the space available. Check the width, height, and depth of the wall area, and account for baseboards and outlets.
Add 2-3 cm to the depth of the bins to allow for the shelf frame. A total depth of 35-40 cm is enough for most toys.
Choose a compartment height based on the bin height, with a little extra room above. Avoid stacking too many compartments. The top one should be within your child’s reach.
Pro tip
Draw a scale plan on graph paper or use simple 3D software. Include every measurement, including the thickness of the wood panels (e.g. 2 cm). This will show you how many panels you need and help prevent costly cutting mistakes.
Plan for stability from the start
A kids’ shelf must be stable and resistant to tipping. One simple option is a full-height shelf that reaches the ceiling, which helps keep it from tipping over.
For shorter, freestanding shelves, wall mounting is essential. Use suitable metal brackets and wall anchors. Securing the shelf to the wall is a must.
Strengthen the structure with cross braces or a sturdy back panel made from screen-printed plywood. A back panel makes the shelf more rigid and keeps small items from falling out the back.
Furniture dollies are invaluable for transporting the materials and moving the finished shelf later.
Which tools and joints do I need?
Basic tools include a jigsaw or circular saw, a cordless screwdriver, a sander or sandpaper, a square, a tape measure, and a pencil. For precise cuts, have the panels cut to size at a hardware store.
The simplest joint uses wood glue and construction screws. Countersink the screw heads and fill the holes.
Mortise-and-tenon joints and wooden dowels take more work but make sturdy joints. You’ll need a router or dowel drill for these.
Metal shelf brackets fitted on the inside are another straightforward option. They remain visible and give the shelf an industrial look.
The time you spend planning and working precisely will show in every corner of the finished shelf. A well-built shelf looks straight and feels solid, which helps children feel secure.
Step by step: Build your shelf
1. Cut and prepare the pieces
Prepare all the parts according to your plan: side panels, shelves, any intermediate supports, and the back panel. Check all the dimensions.
Sand every edge and surface thoroughly. Start with a coarse grit (e.g. 80) and work up to a fine grit (120-150). Remove all the dust.
2. Assemble the shelf
It’s easiest to assemble the shelf flat on the floor. First, connect the two side panels to the bottom shelf. Use a level to check that everything is square.
Fit the remaining shelves and any intermediate supports one at a time. Attach the back panel last. It will stabilize the whole structure.
Additional advice
Always drill pilot holes for screws to prevent the wood from splitting or cracking. Use a wood drill bit slightly smaller in diameter than the screw. Pre-drilling is essential when working with hardwood.
3. Finish the surface and add the bins
Now it’s time to add some color. Prime the wood first, especially if it’s softwood. Primer helps the paint absorb evenly and cover better.
Apply at least two thin coats of paint or wood stain. Let each coat dry completely, and sand lightly between coats.
Test-fit the dry bins. Then move the shelf into its final position and anchor it to the wall right away.
Your custom storage system is ready. Find more room design inspiration in our kids’ room decor section.
Personalized Design Ideas for Your DIY Shelf
Paint the interior compartments a different color from the frame. This creates depth and a sense of surprise.
Cut large, round hand holes into the side panels. This looks modern and is safer than protruding handles.
Attach name labels or small pictures to the boxes. This way, each child knows which compartment is theirs.
You can fit casters underneath the shelf to make it mobile. However, make sure it is especially sturdy and has lockable casters.
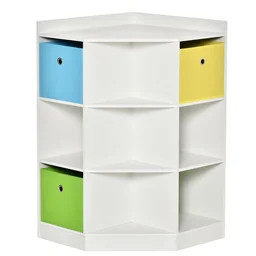
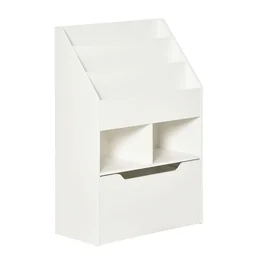
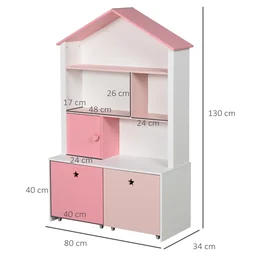
Flat, wide boxes are ideal for toy cars or dolls. Tall, narrow boxes are better for building blocks or LEGO bricks. Suitable options, such as the
Long-Term Care and Adaptation
A wooden shelf ages gracefully. Small dings become part of its character. You can touch them up with a matching pen.
As your child's interests change, the shelf can change with them. Simply replace the boxes or repaint it.
When you move, take the shelf apart. The numbered parts can easily be put back together later. That way, it can stay with your child for many years.
The effort is worthwhile. You create more than just order: you create a one-of-a-kind piece. A shelf that fits perfectly and stays just the way you and your child want it. For all your other home projects, find durable covers in the Patio Furniture Covers category.
Frequently Asked Questions
- What type of wood is best for a DIY kids' shelf?
- Use solid, well-seasoned softwood such as spruce or pine. It is easy to work with, sturdy, and relatively affordable. Birch multiplex or screen-printing plywood offers a very smooth surface and excellent stability. Look for the GS mark for tested safety, and choose low-emission paints or wood stains.
- How tall should a shelf be for toddlers?
- For children under 6, the shelf should be no more than 100-120 cm tall. This lets your child reach the top shelf safely. Always anchor every shelf firmly to the wall, even low models. Store heavy items in the lower compartments to minimize the risk of tipping.
- Can I use standard plastic bins in a DIY shelf?
- Yes, this is a practical solution. Before building, measure the outside dimensions of your chosen bins precisely. Make each compartment about 1-2 cm wider and taller than the bin so it can be pulled out easily. Choose sturdy bins with easy-grip sides. Find suitable options in our range of kids' shelves.
- How can I make a shelf safe and kid-friendly?
- Sand all edges and corners thoroughly. Use non-toxic, saliva-resistant paints or varnishes. Avoid long, thin handles that could snag on something. Round openings in the side panels make good alternatives to handles. A bright, friendly color scheme makes the shelf easier for children to use and encourages them to use it.
- How much does a DIY shelf cost compared with a store-bought one?
- Materials for a simple solid wood shelf start at around 50-80 euros. A comparable store-bought shelf often costs twice as much. The big advantage of a DIY model is that you can customize it to fit your room and needs. You may not save money, but you are investing in a tailored, durable solution.
You may also be interested in
- Build Your Own Toy Storage: Creative DIY Ideas
- Build a DIY Shelf: Simple Instructions & Creative Ideas
- Build Your Own Corner Shelf: Clever Ways to Use Room Corners
- Build Your Own Buffet Cabinet: Step-by-Step DIY Guide
- Build Your Own Industrial Shelf: Step-by-Step Guide
- Build Your Own Kids' Loft Bed: Space-Saving and Creative