
In brief: A DIY kids' storage shelf with boxes creates flexible organisation. You can adapt the dimensions exactly to the room and choose colours that suit your child. The boxes hold toys, books or clothes. The project encourages your child's independence and will last for many years.
DIY Kids' Storage Shelf with Boxes: Clever Organisation
Clutter in a child's room is normal. A self-designed shelf with boxes brings structure. You decide on the size, colours and layout. The result is personalised storage that grows with your child.
A DIY shelf is more than a piece of furniture. It is a project you can adapt to your child's needs. You create storage that works well and looks great.
Why building your own shelf is the better choice
Store-bought shelves have fixed dimensions. They often do not fit perfectly into a niche or beneath a window. Building your own makes use of every centimetre. You can plan the compartment height around the size of the toy storage boxes.
You are in control of the design. Your child can choose the colours for the boxes or help with painting. This creates a sense of ownership. The shelf will be used happily because your child helped design it.
You control the quality of the materials yourself. Use sturdy wood and strong joints. This ensures that the shelf can withstand even lively play sessions.
Storage systems for children need to be simple and intuitive. At a glance, children should be able to see where everything belongs. Open boxes in a sturdy shelf frame are ideal for this.
Which material is suitable for the shelf?
Solid wood is the classic material. Spruce or pine are soft, easy to work with and affordable. Buy well-seasoned wood to prevent warping.
Birch plywood is an excellent alternative. It is very stable, hardly warps and has a smooth surface. Sand the edges carefully or cover them with edge banding.
Avoid chipboard without waterproof bonding. It absorbs moisture and can release emissions. Your child's health comes first.
Important note
Only use painted or glazed wood-based materials bearing the GS mark for tested safety. For paints and varnishes, look for the wording "safe for use on toys" or "EN 71-3" (toy safety). Non-toxic water-based paints are the best choice.
Finding the right boxes
The boxes are the heart of the system. They should be easy to grip, sturdy and easy to clean. Plastic storage boxes are practical and available in many colours.
Fabric boxes look softer and make less noise. However, they are not washable. A combination of different materials may be a good choice.
Measure the outside dimensions of your preferred boxes to the nearest millimetre. Plan the shelf around these dimensions. Each compartment should allow about 1-2 cm of clearance.
Fixed compartments without boxes are better for books and notebooks. Include these in the design from the outset. Find inspiration for suitable storage in our children's room ideas category.
How do I plan the dimensions and construction?
Start with the available space. Measure the width, height and depth of the wall area. Take skirting boards and sockets into account.
The depth of the boxes plus 2-3 cm for the shelf frame gives you the overall depth of the unit. A depth of 35-40 cm is sufficient for most toys.
The compartment height should be based on the box height plus a little extra space above. Do not plan too many compartments on top of each other. The top compartment should remain within your child's reach.
Pro tip
Draw a scale plan on graph paper or use simple 3D software. Enter all dimensions, including the thickness of the wood panels (e.g. 2 cm). This shows you exactly how many panels you need and helps prevent costly cutting errors.
Think about stability from the start
A kids' shelf must be tip-resistant. The simplest solution is to build a full-height shelf that reaches the ceiling. This prevents it from falling over.
For freestanding, lower shelves, wall mounting is essential. Use suitable metal brackets and wall plugs. Anchoring the shelf to the wall is not optional—it is absolutely necessary.
Reinforce the structure with cross braces or a sturdy back panel made from screen-printed plywood. A back panel makes the shelf more rigid and prevents small items from falling out at the back.
For transporting the materials and moving the finished shelf later, furniture dollies are an invaluable aid.
Which tools and joints do I need?
Basic equipment: a jigsaw or circular saw for cutting, cordless screwdriver, sander or sandpaper, square, tape measure and pencil. For precise cuts, have the panels cut to size at the hardware store.
The simplest joint uses wood glue and construction screws. Countersink the screw heads and fill the holes.
More demanding but very sturdy options include mortise-and-tenon joints or wooden dowels. For these, you need a router or dowel drill.
Metal shelf brackets fitted on the inside are a straightforward solution. They remain visible, creating an industrial look.
The time you invest in planning and precise workmanship will be evident in every corner later. A well-built shelf is not only straight; it also feels solid. That gives children a sense of security.
Step by step: From cutting to the finished shelf
1. Cutting and preparation
Prepare all the parts you need according to your plan: side panels, shelves, any intermediate shelves and the back panel. Check the dimensions.
Sand all edges and surfaces thoroughly. Start with a coarse grit (e.g. 80) and work up to a fine grit (120-150). Remove all dust thoroughly.
2. Assembling the shelf
It is best to assemble the shelf lying flat on the floor. First, connect the two side panels to the bottom shelf. Use a spirit level to check that everything is square.
Insert all the remaining shelves and any intermediate supports one after another. Finally, attach the back panel. It stabilises the entire structure.
Additional advice
Always drill pilot holes for the screws. This prevents the wood from splitting or cracking. Use a wood drill bit with a slightly smaller diameter than the screw diameter. Pre-drilling is essential when working with hardwood.
3. Finishing the surface and arranging the boxes
Now it is time for the colour. Prime the wood first, especially softwood. This helps the paint absorb evenly and cover better.
Apply at least two thin coats of paint or wood stain. Allow each coat to dry completely and lightly sand between coats.
Test-fit the dry boxes. The shelf can now be moved to its final position. Anchor it to the wall immediately.
Your personalised storage system is complete. Find more room design ideas in our children's room decor section.
Personalised Design Ideas for Your DIY Shelf
Paint the interior compartments a different colour from the frame. This creates depth and a sense of surprise.
Cut large, round handle openings into the side panels. This looks modern and is safer than protruding handles.
Attach name labels or small pictures to the boxes. This way, each child knows which compartment is theirs.
You can fit castors underneath the shelf. This makes it mobile. However, make sure it has a particularly sturdy construction and lockable castors.
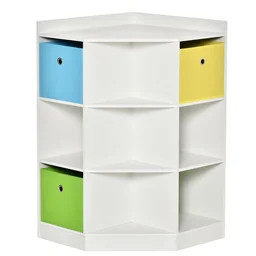
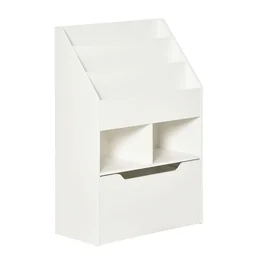
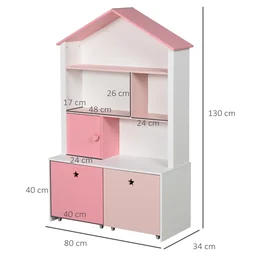
Flat, wide boxes are ideal for toy cars or dolls. Tall, narrow boxes are better for building blocks or LEGO bricks. Suitable solutions such as the
Long-Term Care and Adaptation
A wooden shelf ages gracefully. Small knocks are part of its character. You can touch them up with a matching pen.
As your child's interests change, the shelf can change with them. Simply replace the boxes or repaint it.
When moving house, take the shelf apart. The numbered parts can easily be put back together later. This means it can accompany your child for many years.
The effort is worthwhile. You create more than just order: you create a one-of-a-kind piece. A shelf that fits perfectly and stays exactly the way you and your child want it. For all your other home projects, you can find durable covers in the Garden Furniture Covers category.
Frequently Asked Questions
- Which type of wood is best for a DIY children's shelf?
- Use solid, well-seasoned softwood such as spruce or pine. It is easy to work with, sturdy and relatively affordable. Birch multiplex or screen-printing plywood offers a very smooth surface and excellent stability. Look for the GS mark for tested safety, as well as low-emission paints or wood stains.
- What is the maximum height for a shelf for toddlers?
- For children under 6, the shelf should not exceed a maximum overall height of 100-120 cm. This allows the child to reach the top shelf safely. Always anchor every shelf firmly to the wall, even low models. Store heavy items in the lower compartments to minimise the risk of tipping.
- Can I integrate standard plastic boxes into a DIY shelf?
- Yes, this is a practical solution. Before building, measure the outside dimensions of your chosen boxes precisely. Plan each compartment to be about 1-2 cm wider and higher than the box so it can be pulled out easily. Choose sturdy boxes with easy-grip sides. You can find suitable systems in our range of children's shelves.
- How can I make the shelf child-friendly and safe?
- Sand down all edges and corners thoroughly. Use non-toxic, saliva-resistant paints or varnishes. Avoid long, thin handles that could catch on something. Round openings in the side panels are good alternatives for handles. A bright, friendly colour scheme makes the shelf easier for children to use and encourages them to accept it.
- How much does a DIY shelf cost compared with a bought one?
- The material costs for a simple solid wood shelf start at around 50-80 euros. A comparable bought shelf often costs twice as much. The great advantage of a DIY model is that it can be customised to suit the room and your needs. You do not necessarily save money, but you invest in a tailored, durable solution.
You may also be interested in
- Build Your Own Toy Storage: Creative DIY Ideas
- Build a DIY Shelf: Simple Instructions & Creative Ideas
- Build Your Own Corner Shelf: Cleverly Use Room Corners
- Build Your Own Buffet Cabinet: Step-by-Step DIY Guide
- Build Your Own Industrial Shelf: Step-by-Step Guide
- Build Your Own Children's Loft Bed: Space-Saving & Creative