
In brief: A wooden obelisk is made from a dry, sufficiently strong wooden post, a secure anchoring system and weatherproof surface protection. Cut a clear relief or geometric notches, sand the surfaces and position the obelisk where it stands out against a calm background. This turns wooden garden decor into a long-lasting garden sculpture.
A homemade wooden obelisk adds height, structure and a personal touch to your garden. You do not need a large collection of machinery. A suitable wooden post, a clear pattern, carefully finished edges and a secure fixing are all you need for this DIY garden decor project.
The obelisk works just as well in a modern flower bed as it does in a naturalistic garden. With just a few steps, you can create a garden sculpture that adapts to the seasons and surrounding plants. You can find ideas, materials and complementary products for your project in the Garden and Outdoor section.
Why is a wooden obelisk such a striking feature?
An obelisk draws the eye upwards and creates a focal point in a flat garden area. Among perennials, grasses and low shrubs, a vertical feature acts as a visual anchor. It gives the flower bed structure without taking up much space.
For many gardens, a visible height of 100 to 160 centimetres works well. A slim obelisk can be around 15 to 30 centimetres wide. On larger properties, you can combine several elements of different heights; in a small garden, a single, well-proportioned piece usually creates a calmer effect.
Choose a clear shape before cutting the wood. An untreated post with visible grain has a natural, understated look. A coloured surface, sawn-out openings or deep notches give the wooden garden decor a graphic effect. You can also create a shallow relief featuring a leaf, circle or wave line with simple tools.
Check the location using cardboard or a temporarily positioned piece of timber before you start cutting. This allows you to see whether the height works with the house, hedge and flower bed. An obelisk in front of a calm background has more impact than an elaborate object surrounded by lots of colourful decorations.
The grain is part of the design. Lines running lengthways emphasise the height, while crosswise cuts make the piece appear wider. If there are knot holes, plan the pattern so that these natural features remain visible or do not fall on an especially thin notch.
„A garden is a great teacher. It teaches patience and careful watchfulness; it teaches industry and thrift; above all it teaches entire trust.“
Which materials and tools do you need?
Choosing the right wood
Larch, robinia and oak are suitable for a long-lasting garden obelisk. Robinia tolerates moisture particularly well. Larch offers a good balance of durability, weight and ease of working. Oak is strong and distinctive, but its tannins can cause dark discolouration when it comes into contact with metal or water.
Spruce and pine are inexpensive and easy to work with. Outdoors, however, they require consistent protection and regular maintenance. Use dry, straight wood without soft spots. Large longitudinal cracks, loose knots and damp cut surfaces shorten its lifespan.
Reclaimed beams can give the obelisk character. Check them for nails, screws and concealed metal parts before working on them. Wood of unknown origin or old, heavily treated railway sleepers should not be used near vegetables, herbs or play areas.
Materials for the construction
- a wooden post or piece of timber with a cross-section of about 6 x 6 to 10 x 10 centimetres
- stainless steel or galvanised steel screws for outdoor use
- a galvanised post support, steel sleeve or suitable ground anchor
- concrete and coarse gravel for a stable, well-drained foundation
- sandpaper in grits 80, 120 and 180
- exterior wood oil or exterior wood stain
- covering material for storage during the drying and construction phase
Assembling the right tools
For straight cuts, you need a saw, a square and a guide rail. A jigsaw is suitable for curves and sawn-out patterns. The 10-piece jigsaw blade set
covers cuts in wood and metal and is useful if you also need to adapt a thin metal plate or fitting in addition to the wood.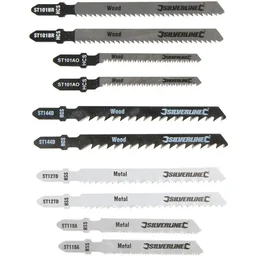
Use a sharp chisel to carve notches, bevels and small reliefs. The 12-piece wood chisel set
offers a range of widths for the job. Supplement your tools with a drill, wood drill bits, clamps, a rasp, sanding block and a brush. A selection of suitable garden tools can also expand your equipment for future projects.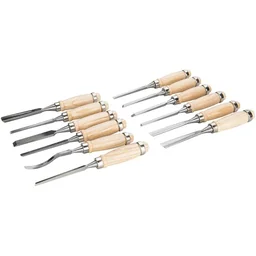
Wear safety glasses when sawing and chiselling. Hearing protection safeguards your ears when working with power tools for extended periods. Always secure the workpiece before sawing or chiselling. A slipping post can quickly result in crooked cuts and injuries.
Pro tip
Draw the design on a paper template to scale first. Then transfer the template with a pencil and square to two sides of the post. This keeps the lines and heights consistent from every angle and prevents a pattern from suddenly shifting when you turn the obelisk.
How do you make a wooden garden obelisk yourself?
Work in a set sequence. First decide on the shape and pattern, then cut the wood to size, prepare the surface and finally install the anchor. Allow the wood to dry completely after each wet step before sanding or applying a finish.
1. Decide on the design, dimensions and cuts
Measure the planned visible height and add the length needed to secure the obelisk. For an obelisk with a visible height of 140 centimeters, you may need a post around 190 to 220 centimeters long if part of it will be hidden in a post support or sleeve. The exact length depends on the foundation and ground anchor you choose.
Mark a straight top edge or a slight slope. A sloping top lets rain run off more quickly. Saw the post at a right angle using a guide, or cut it to match your template. Then check every edge with a square.
2. Transfer the pattern
Create a geometric pattern with lines, triangles and offset rectangles. For an organic design, draw a leaf vein, a branch or a stylized wave. Keep the lines at least two to three centimeters from the outer edges so the wood does not splinter during shaping.
For cut-out openings, first drill a starter hole inside the outline. Guide the jigsaw blade slowly through the wood without applying pressure. Small openings often look better than a large cut-out because they keep the obelisk stable while allowing the grain to show through.
3. Carve reliefs and notches
Cut shallow notches with several light strokes. Position the chisel bevel-side down or up, depending on whether you want to remove material or make a clean edge. Do not strike with full force. Short, controlled movements help prevent deep tear-out.
Create a relief by lowering the surface around the design slightly. First cut around the outline, then gradually remove wood from the background area. Leave the design raised by at least a few millimeters. Check the effect from time to time in side lighting, which makes the relief's shadows easier to see.
4. Ease the edges and sand the surface
Lightly round sharp edges with sandpaper or a rasp. A small bevel of two to three millimeters helps water run off and prevents the finish from becoming too thin on a sharp edge. Start with coarse sandpaper, remove the dust, then smooth the surface with 120 to 180 grit.
Wipe the surface with a dry cloth. Do not leave sanding residue in notches or drill holes. To bring out the natural grain, apply the oil with a lint-free cloth. For an opaque splash of color, use a pigmented exterior wood stain.
5. Prepare the base and mounting
The most reliable solution keeps the wood off the ground. Set a post support or steel sleeve in a concrete foundation, and plan a layer of gravel beneath the foundation if the soil drains poorly. The wooden post must not sit permanently in a damp pocket.
For a narrow obelisk around 150 centimeters high, a foundation of approximately 30 x 30 x 60 centimeters can serve as a starting point. Loose soil, an exposed location or a significantly taller obelisk calls for a larger or deeper foundation. Align the support precisely vertically and allow the concrete to cure completely.
Drill the mounting holes only once the support is in place. This lets you mark the actual positions and avoid putting the wood under stress. Use washers and tighten the screws without crushing the wood. A small gap between the wood and metal prevents water from collecting at the contact point.
Check the finished obelisk from several angles. It should not wobble, have sharp splinters or collect water on top. If the design is not visible enough, a darker stain in the background or subtle lighting can help; making the pattern larger is not always the answer.
“The garden suggests that there is a place where we can meet nature halfway.”
How do you protect wooden garden decor?
Which finish suits your design?
Oil keeps the wood grain visible and usually creates a natural, matte finish. An exterior wood stain also adds color pigments and protects the wood from moisture and UV radiation. Only use products explicitly intended for outdoor use and suitable for the type of wood.
Test the color in an inconspicuous area. Wood absorbs the finish differently on end grain, the long sides and the relief. Two thin coats usually produce a more even result than one thick coat that settles in the notches.
Pay attention to end grain, notches and the underside
The cut surfaces at the top and bottom absorb particularly large amounts of moisture. Seal or oil these surfaces carefully. Check deep notches after rain. If water collects there, sand the edge again or improve the slope.
You can deliberately let the obelisk develop a gray patina. This changes the color but does not fully protect the wood from moisture. Even with a silvery-gray patina, a dry construction, clearance from the ground and regular inspections remain essential.
Important note
Never place a wooden obelisk directly next to a grill, Swedish log fire or fire basket. Sparks and intense heat can ignite wood or dry out the surface without you noticing. The fire basket
made of natural steel belongs in its own prepared, fireproof area, well away from wooden decor, plants and buildings.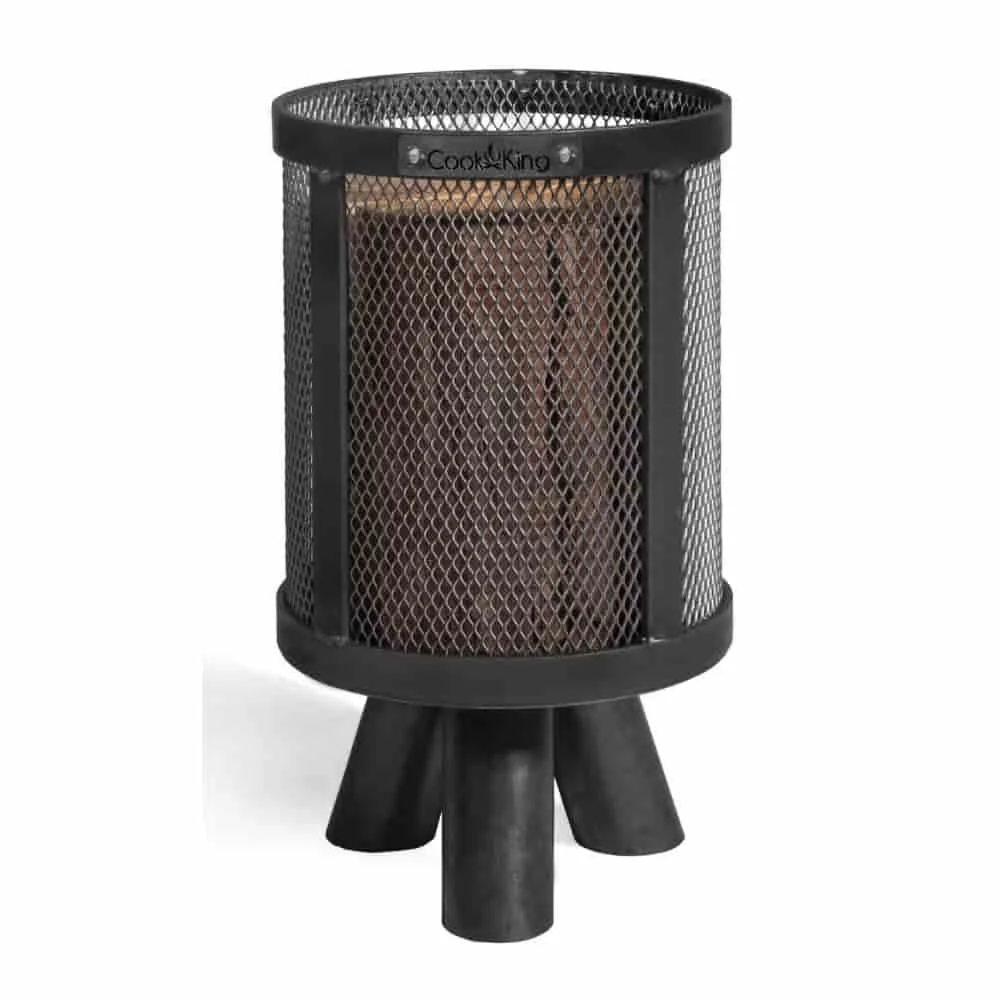
Maintenance throughout the year
Inspect the obelisk in spring and autumn. Look for swollen areas, new cracks, loose screws, green deposits and damaged finish. Remove dirt with a soft brush and let the wood dry before applying more oil or stain.
- Sand rough areas locally instead of unnecessarily removing material from the entire surface.
- Renew the protection on particularly exposed edges and end grain.
- Tighten loose fixings and replace rusting screws.
- Store the obelisk in a dry place if you dismantle it for an extended period.
For temporary storage, use a tarpaulin for wood. Do not wrap damp wood airtight with the tarpaulin. A base and a little space allow air to circulate.
Where is the best place for a garden sculpture?
Choose a backdrop and viewing angle
Choose a simple backdrop with strong color contrast. Light wood stands out against a dark hedge, while a dark stain looks better in front of a light-colored wall. Check how it looks from the kitchen window, seating area and garden path you use most often.
A distance of around two to five meters from the main viewing point keeps the details visible. A finely carved surface is best viewed from closer up. Large, bold shapes can be placed farther away.
Do not position the obelisk exactly in the center of every bed. A slightly offset position often looks more natural and leaves room for planting. If the obelisk marks the end of a sightline, it can be centered, but it should be aligned particularly carefully.
Combine plants and natural materials
Grasses, ferns and low-growing perennials frame a wooden obelisk without hiding its shape. Leave a clear strip of around 20 to 30 centimeters around the base. This lets you check the fastenings and prevents damp leaves from accumulating on the wood.
Repeat a color from the stain in the planting, or echo the shape of the relief with plants that have rounded or slender leaves. Natural stone, gravel and low metal edging give the obelisk a defined setting. Suitable plant accessories can help you design the surrounding area.
Use lighting strategically
A spotlight placed to the side brings out grooves and reliefs with shadows. Do not aim the light directly at the entire surface, or the texture will lose its depth. Warm white light generally creates a more relaxing effect in the garden than a very cool shade.
Lay cables safely and use outdoor lights with a suitable ingress protection rating. Position the light so it does not get in the way when mowing the lawn or tending the beds. With solar-powered lights, check that the location gets several hours of direct sunlight.
Keep other decorative elements in proportion
The obelisk should remain the most important vertical feature in its immediate surroundings. Pair it with one to three complementary elements, such as a boulder, bowl or low lantern. Several tall objects compete with one another and diminish the impact of the garden sculpture.
A fire bowl like can define a separate area of the garden as a distinct design feature. Leave plenty of space around it and choose a non-combustible surface for the fire area. The wooden obelisk remains the focal point when it is kept away from flying sparks and dense decorations.
Seasonal changes do not require a new coat of paint. In spring, fresh shoots look appealing beside light wood; in summer, grasses emphasize the vertical shape; and in fall, seed heads create a warm contrast. Remove decorations that collect water or remain in constant contact with the surface.
Additional tip
Photograph the obelisk from inside the house and from the seating area before planting around it. The photo will quickly show whether grasses are hiding the relief or the backdrop is too busy. Start with just a few plants and add more only where the sightline remains clear.
A wooden obelisk combines craftsmanship with a clear design. If you keep the wood dry, build the base carefully and choose the location thoughtfully, your homemade wooden garden decor will remain a striking feature for many years. More ideas for durable garden equipment can complement this focal point.
Frequently asked questions
- What type of wood is best for a garden obelisk?
- Larch, robinia and oak are especially suitable for a wooden garden obelisk. The wood should be dry, straight and free of large cracks. Spruce or pine can also be used, but they need consistent coating and regular maintenance. Robinia is the most resistant to moisture.
- How do I secure a wooden obelisk so it stands firmly?
- Do not anchor the obelisk directly in the ground. Set a galvanized post support or steel sleeve in a well-drained concrete foundation, keeping the wood above ground level. For an obelisk approximately 150 centimeters high, a foundation measuring around 30 x 30 x 60 centimeters is a sensible starting point, depending on the soil and wind conditions.
- How do I weatherproof wood in the garden?
- Treat all wooden surfaces with an oil or exterior stain suitable for outdoor use. First sand to grit 120 or 180, lightly round off sharp edges and carefully coat the end grain in particular. Apply two thin coats and renew the protection as soon as the surface looks dry, cracked or chalky.
- What tools do I need to build a wooden obelisk?
- To build a simple wooden obelisk, you need a tape measure, pencil, square, saw or jigsaw, drill, clamps, wood rasp, sandpaper and brushes. A wood chisel is useful for grooves and reliefs. Wear safety glasses and hearing protection. A sharp blade makes clean cuts and prevents tear-out on the surface.
- Where should I place a wooden obelisk in the garden?
- The best location combines visibility with a simple backdrop. Place the obelisk in front of a hedge, a dark house wall or an uncluttered lawn so its shape stands out. Avoid busy paths, waterlogged ground and the immediate vicinity of a barbecue or fire bowl. Side lighting makes reliefs especially clear in the morning or evening.
You might also be interested in
- Build your own wooden Christmas advent obelisk
- Build your own sundial: unique garden decor
- Build your own wooden star: easy garden decoration to stake
- Garden decor ideas: easy DIY projects
- Build your own lighthouse: impressive garden decor for your home
- Make your own stone owls: DIY garden decor from natural stone