
In brief: To build a drywall partition, align the UW and CW tracks, fasten them to the floor and ceiling, add insulation to the cavity if needed, then cover both sides with staggered drywall sheets. For ceilings, install suitable framing on load-bearing joists or the structural ceiling. Plan wiring, moisture protection and fire protection before closing up the wall or ceiling.
Drywall is suitable for non-load-bearing interior walls, suspended ceilings and attic conversions. The construction usually consists of framing, insulation and drywall sheets. You won’t need mortar or the drying time required for masonry, but you do need to plan connections, spacing and sheet joints carefully.
The amount of work depends on the room and the type of wall you want to build. With careful measuring and the right tools, you can build a simple partition yourself. Fire protection, damp rooms, high sound insulation requirements and load-bearing structures involve additional requirements that you should check before buying materials.
Table of contents
- How do you plan a drywall wall or ceiling?
- How do you build the framing for a partition?
- How do you cover walls and ceilings with drywall sheets?
- How do you improve sound insulation and safety?
- How do you finish an attic with drywall?
How do you plan a drywall wall or ceiling?
Plan dimensions, use and connections
First, measure the room height, wall length and all openings. Mark doors, windows, radiators, outlets, switches and wiring routes on a sketch. The position of the studs and sheets depends on these fixtures. If you plan to hang a sink, wall cabinet or TV on the wall, reinforce the framing at the mounting points.
Check that the floor and ceiling are level and structurally sound. In an older building, the floor may be uneven or the ceiling may not be level. Mark the wall position with a tape measure, spirit level and chalk line. Transfer the line precisely to the ceiling and walls. For a ceiling covering, locate load-bearing joists or a suitable structural ceiling to use as a fixing base.
Also consider what the construction needs to do. Is the wall just dividing a room, or do you need extra sound insulation? Will it be in an area exposed to moisture? Does a connection need a certified fire rating? These requirements determine the type of sheet, tracks, insulation, fixings and joint construction. If fire or sound protection is required, don’t mix components from different systems at random.
Prepare materials and tools
For a typical partition, you’ll need UW tracks for the floor and ceiling, CW studs, sealing tape, suitable screws and drywall sheets. Depending on the construction, you may also need insulation, perimeter seals, joint compound and corner bead. Buy sheets in a length as close as possible to the room height. This reduces horizontal joints and offcuts.
Use a tape measure, pencil, spirit level and chalk line to measure and align the framing. You’ll need tin snips or a suitable cutting tool for the tracks. To cut drywall sheets, score them with a utility knife and snap them along the cut. Use a suitable circle cutter to make round cutouts for lights or wiring, such as the Drywall Circle Cutter
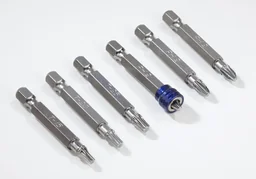
. For drywall screws, a 7-Piece Drywall Bit Set helps drive each screw to the right depth without unnecessarily damaging the paper surface.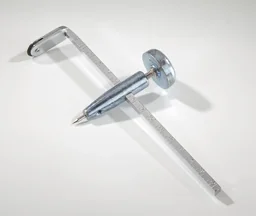
Pro tip
Before installation, mark the doorway, outlets and planned loads directly on the floor, ceiling and tracks. Photograph wiring routes and reinforcements before closing up the wall. This will help you choose safer places to drill later.
How do you build the framing for a partition?
Align the UW and CW tracks
Cut the UW tracks to the required length and apply the specified sealing tape to the contact surfaces. The tape improves the connection and reduces direct sound transmission between the track and the building structure. Fasten the floor track to a sound subfloor with suitable anchors and screws. Secure the ceiling track as well. A suspended ceiling isn’t automatically strong enough to support a new wall.
Align the tracks with a spirit level or laser level. Don’t compensate for uneven surfaces by installing crooked studs. Instead, check whether the connection surface needs preparation. Install perimeter tracks against adjoining walls and seal the connections according to the system specifications. Cut the CW studs to size and position them with their openings facing the same direction. This makes it easier to feed wiring through the designated openings.
Stud spacing depends on the sheet size and the system you’ve chosen. In many common wall systems, the sheet edges meet at the center of a stud. Follow the manufacturer’s instructions and plan reinforced connections around door openings. Install a header track above the door; depending on the door and wall height, the framing may also need suitable reinforcement at the sides. A standard CW stud isn’t designed to support every heavy door frame.
Install wiring and insulation
Route cables and pipes through the designated openings in the stud tracks. Protect wiring from sharp edges and keep the required distance from screw locations. Electrical work must be carried out by a qualified electrician. Have cable outlets, boxes and connections checked before closing up the drywall.
If the wall needs sound or thermal insulation, fill the cavity evenly without leaving gaps. The insulation must be suitable for the track width and planned construction. Don’t compress it so much that it loses its shape. For a partition covered on both sides, install the drywall on one side first, run the wiring and add the insulation, then close up the other side.
“Buildings, both as a whole and in their individual parts, must be structurally stable.”
This provision comes from the Model Building Code and applies to buildings in general. The state building code for your area applies to your project. In practice, this means fastening tracks, ceiling framing and fixtures to a structurally sound base, using fixings that are suitable for the building material.
How do you install drywall on walls and ceilings?
Cutting and fastening drywall panels
Stand drywall panels upright whenever their size suits the wall. Leave a small gap above the floor so the panels do not rest directly on the flooring. Score the paper facing with a utility knife, snap the gypsum core over a straight edge, then cut through the paper on the back. Measure carefully before cutting any openings.
Fasten the panels with approved drywall screws. Follow the system specifications for screw spacing and edge distances. Set the screw heads slightly below the surface without tearing the paper. Start at one edge and work steadily across the panel to avoid putting it under stress. Panel joints must fall on a stud or framing profile. For a second layer, offset the joints from those in the first layer and fasten it according to the system specifications.
Plan the joints so that four panel corners do not meet at one point. Avoid horizontal joints where possible, or stagger them if they cannot be avoided. At doors and windows, do not end panel joints right at the corners of the opening, as this can lead to cracks. Cut panels to fit around openings and support the edges as specified in the system design.
Ceiling framing and cutouts
For a suspended ceiling, install a suitable frame made of profiles or furring strips. Direct-mount clips, hangers and fasteners must suit the substrate and the planned load. Follow the system's permitted spacing. Before installing the panels, check that the surface is level and that there is enough room for cables, ventilation and recessed lights.
When installing ceiling panels, work with a partner or use a panel lift. A drywall lift GTL 335
supports the panel while you position and fasten it. Cut holes for lights only after checking their exact locations. Lights and electrical components need suitable clearance and must not cause insulation or building materials to overheat. Find suitable lights in the ceiling lights category; still check the technical requirements for the specific model before installation.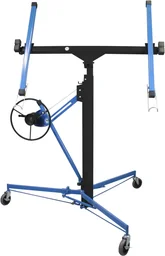
When moving long panels through narrow doors or stairways, suitable handling equipment can help. The transport and logistics category is a good starting point for moving materials around a workplace. Logistics and transport carts can also be useful for moving tools and materials. For drywall panels, use a purpose-built panel cart and secure the load to prevent it from shifting.
Taping and finishing drywall joints
Remove dust from the joints and use the joint compound recommended for the panel type and system. Where joint tape is required, embed it neatly in the compound. Cover the screw heads as well. Once dry, carefully sand any uneven areas without tearing the paper facing over a large area. Depending on the finish you want, you may need several coats of compound.
Prime the surface with a product suitable for the finish you plan to apply. Wallpaper, paint and tile each require different levels of smoothness and surface strength. Tile adds extra weight. Check that the panel layers and framing can support the planned finish, and follow the manufacturer's maximum load ratings.
Important note
Do not cut or drill in areas where you are unsure whether wiring or pipes are present. Safely turn off the relevant circuits before working on electrical boxes, and have a qualified electrician make electrical connections. For structural components, required fire protection or an uncertain substrate, seek professional advice before remodeling.
How can you improve sound insulation and safety?
Plan soundproofing for drywall construction
Soundproofing depends on a combination of mass, cavity depth, insulation and isolated connections. A single thin panel on a basic frame does little to block voices and other noise. Multiple layers of drywall can improve sound insulation when the joints are staggered and the assembly is installed correctly. Insulation in the cavity can also help, but it cannot make up for an unsuitable wall assembly.
Carefully seal the perimeter joints. Even small gaps at the floor, ceiling or side walls can let sound through. Electrical boxes on opposite sides of a wall should not be installed directly back to back. Avoid unnecessary rigid connections between the two sides of the wall. If you need high sound insulation for a music room, bedroom or shared apartment wall, choose a tested soundproofing system with a documented assembly instead of combining individual components by guesswork.
Soundproofing with drywall also depends on the connections. A well-built wall can lose its effectiveness if it meets a lightweight ceiling, pipes transmit structure-borne noise or joints are left open. Check the whole room, not just the drywall surface. For very high sound insulation requirements, have a building acoustics specialist assess the assembly and the structures around it.
Consider fire and moisture protection
Fire protection relies on tested assemblies with the right panel layers, profiles, insulation, screws and joints. Use components as specified in the system documentation. A panel with a special rating does not automatically make any wall a fire-rated assembly. If building regulations apply, have a professional verify the planned assembly.
“Buildings must be arranged, constructed, altered and maintained in such a way as to prevent the outbreak of fire and the spread of fire and smoke.”
The Model Building Code serves as a template; the regulations in your state and the requirements for your specific building are binding. In wet rooms, choose panels, waterproofing and connection details to suit the level of water exposure. A moisture-resistant panel alone does not replace waterproofing where walls or floors are exposed to splashing water. Make sure the sealing tapes, collars, coating and tile assembly are compatible.
Additional advice
Do not wait until after the wall is finished to hang heavy cabinets or bathroom fixtures wherever you can. Mark their positions before installing the panels and fit suitable cross braces or reinforcement profiles. Photograph the finished framing with measurements before closing up the wall.
How do you finish an attic with drywall?
Preparing sloped ceilings
When finishing an attic, start by checking the roof assembly. Make sure the insulation, airtightness and moisture protection are in place and appropriate for the construction. Repair damage to the roof covering, damp rafters or questionable connections before installing drywall. Drywall will conceal these problems and make later repairs more difficult.
Install the framing on the rafters or according to the specified system. Compensate for height differences and align the surface so that board joints have solid backing. With sloped ceilings, plan the transitions to the ceiling and gable walls as well. Use screws of the appropriate length and follow the system’s fastening spacing requirements.
Do not compress existing insulation or leave gaps when installing it. If there is a vapor retarder on the room side, seal overlaps, joints and connections airtight for the long term. Carefully seal penetrations for cables, lights or ventilation. Even small leaks can let warm, moist indoor air into the roof assembly. If you are unsure about moisture protection or the roof assembly, have a professional assess the structure beforehand.
Work sequence for walls and ceilings
A clear sequence saves rework: first determine measurements and requirements, then install the framing, add utilities and reinforcements, fit the insulation, and finally install the drywall. Before closing each side, check that wiring, fixing points and insulation are in the right places. Close the structure only after all necessary checks are complete.
Do not handle large ceiling panels alone. A second person or a panel lift makes positioning easier and helps protect the edges from damage. Set tools and screws within reach before lifting the panel. After installing the drywall, check the joints, screw heads and connections in good light before taping, mudding and finishing the surface.
With the right system and careful preparation, you can build many non-load-bearing drywall walls and ceilings yourself. The key is a solid substrate, properly aligned framing, correctly positioned board joints and sealed connections. For attic conversions, wet areas and special requirements, review the system documentation before buying materials. This helps ensure the finished assembly suits its intended use, finish and load requirements.
Frequently asked questions
- What framing do I need for a drywall wall?
- For a typical non-load-bearing interior wall, use UW track for the floor and ceiling connections and CW studs for the vertical framing. Choose the framing width and spacing to suit the wall height, drywall and system specifications. For special fire or soundproofing requirements, use a tested wall assembly.
- How far apart should the studs be?
- Stud spacing depends on the drywall size and thickness, as well as the manufacturer’s instructions for the system you choose. It is often 62.5 centimeters so that 125-centimeter-wide boards meet over the studs. Check the specifications before framing, and reduce the spacing if you are using different board sizes.
- How can I improve soundproofing in a drywall wall?
- Use sealing tape to isolate the perimeter tracks, fill the cavity completely with suitable insulation, and seal joints carefully. A second layer of drywall adds mass. Offset electrical outlets, seal connections and use a suitable system assembly to prevent sound from passing through small gaps in the wall.
- Can I use a drywall wall in a bathroom?
- Yes, if you choose boards and waterproofing that are suitable for the area’s moisture exposure. Areas exposed to splashing need an approved assembly with suitable waterproofing and sealed connections. Standard gypsum boards are not suitable for every wet area. Follow the product and system specifications.
- How do I hang heavy objects on a drywall wall?
- Plan for heavy loads before installing the drywall, and fit suitable wood blocking or reinforcement channels where needed. Appropriate hollow-wall anchors can be used for lighter loads. Check the anchor’s rated capacity for the board type and thickness, and spread heavy loads across multiple fixing points.
You may also be interested in
- Drywall for DIYers: How to build walls and transform rooms
- Finishing an attic with drywall: How to create extra living space
- How to build a walk-in closet with drywall
- Drywall sheets: The ultimate drywall guide
- How to wallpaper walls and ceilings properly
- How to attach drywall with adhesive: A simple guide