
In brief: To patch a bike inner tube, remove the wheel, locate the puncture, clean the area and apply a vulcanising patch. A clean, grease-free bonding surface and sufficient pressure when pressing it down are essential. After inflating the tyre, check that it is seated correctly. A bike cover will later protect your bike from the weather.
Fix a Bike Inner Tube: Quick Help for a Puncture
A flat tyre brings any ride to a halt. You are not helpless at the roadside. With a little preparation and the right materials, you can repair the damage quickly. This guide takes you through the process of bike tyre repair.
You will learn how to remove the wheel correctly, locate the puncture and patch the inner tube. The focus is on practical application. Theoretical knowledge takes a back seat.
What tools and materials do I need?
Before you start, gather all the necessary equipment. An incomplete toolkit delays the job. You need a few specific items.
The absolute minimum is a pair of tyre levers and a bicycle pump. Tyre levers protect your rim and save your fingers. Without them, removing the tyre is a difficult task.
A puncture repair kit is essential for the repair itself.
contains rubber strips and a drill bit for inserting them. It provides a robust solution on the go.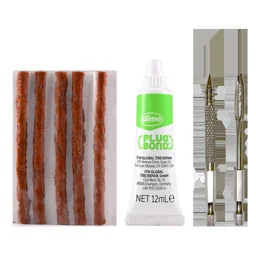
Traditional patches are ideal for a home workshop.
provides 20 iron-on patches. When used correctly, they create a durable bond.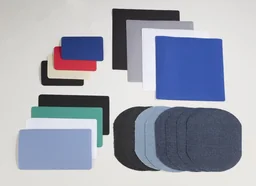
Expert tip
Always keep a small puncture repair kit in your bike frame or saddle bag. Do not forget a piece of sandpaper or a roughening surface. A mini pocket knife with a tool function expands your options at the roadside.
Also keep a bucket of water or a spray bottle nearby. This will help you find the smallest leaks. A dry cloth removes dirt and moisture from the bonding surface.
The right preparation saves time
Place your bike in a safe, well-lit area. Lay out all the parts in an organised way. Turn the affected wheel so that the valve is at the bottom.
Now remove the remaining air from the tyre. Press the valve in fully. With a Dunlop valve, unscrew the small union nut. With Schrader valves, simply press in the pin.
Loosen the wheel fastening. With quick-release skewers, open the lever and unscrew the locknut. With axle nuts, you need the correct spanner. Keep all small parts in a safe place.
How do I remove the tyre and inner tube?
Removing them requires a systematic approach. Proceed step by step. Haste can damage the inner tube or rim.
Place the first tyre lever between the rim edge and the tyre bead. Lift a short section of the tyre over the rim. Hook the lever onto a spoke.
Place the second tyre lever about 10 centimetres away. Lift the tyre bead again. Now use your hands to pull the entire tyre over the rim on one side.
The most common mistake is using force. The tyre bead is tight, but it is not stuck. With gentle, even pressure and the right levers, it will come away from the rim.
Carefully pull the inner tube out from under the tyre. Start at the valve. First loosen the union nut that fixes the valve to the rim. Then carefully push the valve out of the hole.
Pull out the entire inner tube. Set it aside. Now check the inside of the tyre. Carefully run your fingers over the entire tread.
Remove any foreign objects such as shards of glass or thorns. Check the rim as well. A displaced or torn rim tape repeatedly causes punctures. A protective tube used as a rim tape replacement can help here.
How do I find the hole in a bike inner tube?
Finding the fault is crucial. A missed hole will cause the pressure to drop immediately. Use a systematic method.
Inflate the removed inner tube slightly. It should have a recognisable shape, but should not be fully inflated. Now hold sections of it close to your ear and face.
Listen for a faint hissing sound. Feel for a weak current of air with your cheek. This method works for larger holes in a quiet environment.
Important note
Never fully inflate a damaged inner tube. The pressure can cause a small tear to expand explosively. The tube may then be impossible to repair. Always keep the pressure low.
The most reliable method is the water test. Fill a bucket or basin with water. Submerge the inner tube one section at a time.
Watch carefully. Small air bubbles will continuously rise from the leaking area. Mark the spot immediately with a pen or chalk. Continue turning the inner tube.
Check the entire inner tube. There are often several areas of damage. The area around the valve and the seams is particularly vulnerable. The side opposite the first mark may also be affected.
The cause determines the repair method
A small, round hole indicates a nail or thorn. A long cut is often caused by broken glass. Several small holes in a line are known as a snakebite puncture.
This occurs when the tyre is pressed against the rim at too low a pressure. In this case, you must also adjust the tyre pressure for the future.
How do I patch the inner tube properly?
The quality of the bond determines how long the repair will last. Take your time with this step. Every shortcut leads to failure.
Thoroughly clean and dry the surrounding rubber surface. The area should be about twice the size of the patch. Grease or dust will prevent proper adhesion.
Now roughen the area with the sandpaper from the puncture repair kit. Rub in circular motions with moderate pressure. Create an evenly matt surface without any shiny spots.
Remove the resulting rubber dust. Blow it away or wipe it off with a dry cloth. The surface must be completely clean and free of grease.
Many people use too little glue. Apply a thin, even layer that is slightly larger than the patch. Then wait until the glue has dried completely and is no longer sticky. Only then should you apply the patch.
Apply the glue from the kit to the roughened areas. Spread it thinly and evenly. Now leave the glue to dry.
This step is critical. The glue must be transparent and tacky. This means it is no longer liquid but still feels sticky. Depending on the product, this state lasts between one and three minutes.
Peel the protective film off the patch. Place it precisely over the prepared area. Press it down firmly, working from the centre towards the edges.
Use the blunt handle of a tyre lever or a rounded tool for this. Roll firmly over the patch to remove air bubbles and maximise adhesion.
Additional advice
After repairing the inner tube, leave it to rest for at least ten minutes before inflating it. The glue needs this time for its initial curing. Waiting longer—one hour—increases the final strength significantly.
How do I refit the tyre and inner tube?
Refitting requires care. A pinched inner tube will burst as soon as you inflate it. Check every step.
First insert the valve into the hole in the rim. Tighten the retaining nut by hand. It is only used to position the valve, not to create a seal.
Place the inner tube loosely inside the tyre. Make sure it is not twisted or folded. The inner tube must sit relaxed inside the tyre.
Now start pulling the tyre bead onto the rim by hand. Begin opposite the valve. Work evenly towards both sides with both hands.
The final 20 centimetres will be difficult. Never use screwdrivers or other sharp tools. They can damage the inner tube.
Use your tyre levers instead. Hook the last section of the tyre over the rim edge piece by piece. Make sure that the inner tube does not get trapped between the tyre and rim.
After fitting, run your hands around the tyre. Check that the inner tube is not bulging out from under the bead anywhere. If necessary, correct this by carefully pulling the tyre into position.
The final check before inflating
Make sure the tyre is seated evenly in the centre of the rim. An uneven fit will cause the wheel to run out of true. Tap the sides of the tyre to centre it.
Now slowly pump in some air. Listen for a crackling sound. This indicates that the inner tube has been pinched again. Stop immediately and fix the problem.
Inflate the tyre to the recommended pressure. This is shown on the tyre sidewall. Use a pump with a pressure gauge for accuracy. A water hose has different requirements, but it demonstrates the importance of using the correct pressure.
When should I replace the inner tube instead of patching it?
Not every type of damage can be repaired. Replacing the inner tube is sometimes the more economical and safer solution. Know the limits of patching.
Replace the inner tube if the hole is directly at the base of the valve. This area cannot be sealed reliably. Glue will not bond permanently to the metal.
The same applies to long cuts measuring more than two centimetres. Even a large patch will rarely withstand the strain. The inner tube deforms too much.
An inner tube with several old patches is vulnerable. The rubber ages and loses its elasticity. Buying a new one provides greater safety and less hassle.
If you decide to replace it, measure the correct inner tube size. It is shown on the sidewall of the old inner tube (e.g. 28x1.75). Also make sure you choose the correct valve type (Dunlop, Schrader, Presta).
Fitting a new inner tube follows the same steps as refitting a patched one. The advantage is that you save repair time and have a new, intact component.
Store spare inner tubes in a dry, dark place. Extreme temperatures and ozone cause the rubber to deteriorate. A bike cover protects your entire bicycle from the weather.
How can I prevent future punctures?
Prevention reduces punctures to a minimum. Incorporate simple checks into your regular bike maintenance. The effort is small, but the benefits are significant.
Check your tyre pressure weekly. Never ride with significantly underinflated tyres. This increases the risk of pinch flats and accelerates wear.
Invest in high-quality tyres and inner tubes. Cheaper products often have thinner walls and inferior rubber. The slightly higher purchase cost pays off through less downtime.
Give your tyres a quick inspection after every ride. Remove small stones or pieces of glass embedded in the tread. Otherwise, they will slowly work their way into the tyre.
An intact rim tape is essential. It covers the spoke nipple holes in the rim. A torn rim tape allows the inner tube to press into these sharp holes, causing it to burst.
For other areas of home and garden maintenance, such as watering, robust connections are essential.
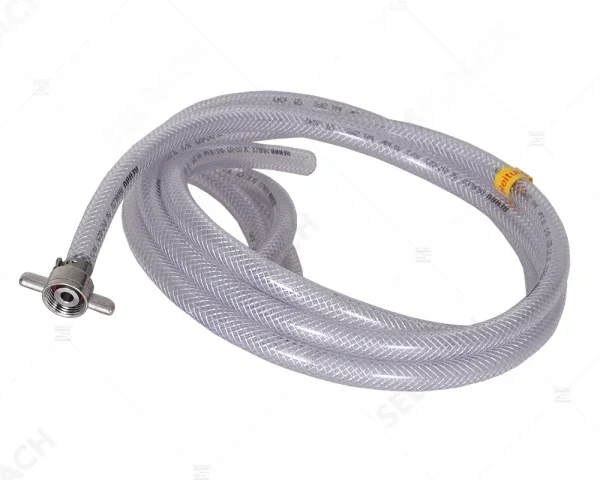
Also maintain the hose couplings on your pump. A faulty coupling can damage the valve. Store your bicycle in a dry, sheltered place. Continuous exposure to moisture damages rubber and steel.
With this knowledge, you are prepared for your next puncture. You save the cost of a mobile repair service and gain independence. DIY bike repairs improve your understanding of your bicycle and provide confidence on every ride.
Frequently asked questions
- How do I find the hole in a bike inner tube?
- Remove the inner tube and inflate it slightly. Hold it close to your ear and listen for a hissing sound. Alternatively, move the tube through a container of water, section by section. Rising air bubbles reveal the leak.
- Can I always repair a bike inner tube?
- No. If there are tears around the valve, large cuts or several holes close together, replacing the tube is safer. Patches often will not stick to old, brittle inner tubes. In these cases, replace the entire tube.
- Which tools do I need to change an inner tube?
- You need tyre levers, a pump and, optionally, a spanner for the axle nut. Tyre levers help protect the rim. A tube holder helps keep your tools organised.
- Why is my repaired inner tube losing air again?
- Common causes include a glueing surface that was not free of grease, not pressing the patch down firmly enough or missing a second puncture. Before applying the adhesive, thoroughly roughen the area with the sandpaper from the puncture repair kit.
- How can I prevent punctures?
- Check your tyre pressure regularly. Remove small stones from the tread. Check that the rim tape is seated correctly. Do not ride too close to the kerb. High-quality inner tubes and tyres are less prone to punctures.
You may also be interested in
- Repair your own bike: Fix common faults
- Stop drips: Quick help for leaks
- Repair cracks and leaks quickly: Allesdichter spray in action
- Pool, boat & garden furniture: Repair vinyl damage yourself
- Air bed losing air: Care tips and repairs
- Make your own wood filler: Easy recipes for long-lasting wood repairs