
In brief: Furniture upcycling transforms used cupboards, tables or seating into unique one-off pieces through repairs, paint and new functions. First check the material and stability, plan how you will use the piece and work with low-emission paints. This saves resources, extends the life of your furniture and helps create a home with a personal touch.
Furniture upcycling transforms used cupboards, tables or seating into unique one-off pieces through repairs, paint and new functions. First check the material and stability, plan how you will use the piece and work with low-emission paints. This saves resources, extends the life of your furniture and helps create a home with a personal touch.
An old piece of furniture does not have to end up at the tip. With thorough cleaning, a sturdy repair and a suitable finish, you can create a one-off piece that suits your room. Furniture upcycling combines practical skills, creativity and sustainable living.
The best furniture upcycling ideas start with the shape you already have. A chest of drawers becomes a vanity unit, an old door becomes a coat rack and a discarded chair becomes a bedside table. If you want to give old furniture a new look, decide on its function first and only then choose the colour and decoration.
Why is furniture upcycling worthwhile for sustainable living?
New furniture requires raw materials, energy, packaging and transport. When you repair an existing table or cupboard, you extend its useful life and avoid some of this environmental impact. The greatest benefit comes when you continue using the furniture for many years.
Save resources instead of buying new
Solid wood, veneer, metal hardware and sturdy wood-based panels often have more years of life left in them than their surface suggests. Scratches, faded paint or a loose handle do not automatically affect how well a piece works. Clean the surface, check the construction and replace only damaged parts.
Upcycling does not automatically save resources. Furniture with mould, severe pest damage or an irreparable construction often requires more materials and energy than proper disposal. Choose projects whose condition and workload you can realistically assess.
Create one-off pieces with a story
Mass-produced furniture serves its purpose, but rarely stands out. A refurbished piece of furniture carries visible traces of its origins. You decide whether to keep these marks, highlight them with a new colour or completely transform the surface.
Small details also shape the result. New wooden knobs, black metal handles or ceramic fittings can change a chest of drawers more than a completely new coat of paint. Combine existing parts with a few carefully chosen additions.
Plan costs and working time realistically
Make a short materials list before you start. Include abrasives, primer, paint or oil, hardware, screws and, where necessary, upholstery fabric. For seating, you will also need foam, upholstery webbing and a heavy-duty staple gun.
Also plan for drying times and space to work. During the project, furniture needs a dry, well-ventilated location. If you apply several coats, the project takes longer because of the drying time, not the hands-on work itself.
Pro tip
Photograph the furniture from every side before taking it apart. Label screws, fittings and drawers using small bags or masking tape. This allows you to reassemble the furniture accurately later and avoid unnecessary replacement parts.
Which old furniture is suitable for upcycling?
Start with furniture whose basic shape suits your idea. A straight cabinet works well as a sideboard, a low chest of drawers as a vanity unit and a sturdy door as a tabletop or coat rack. The less you need to alter the construction, the more manageable the project will be.
Solid wood, veneer or chipboard?
Solid wood can withstand many types of treatment. You can sand, repair, oil or paint it. Even so, check whether cracks run deep and whether the joints are still firm.
Veneer consists of only a thin layer of real wood. Sand carefully and use a fine grit. Once you sand through the veneer, you can only disguise the area with filler, a new coating or a partial replacement.
Coated chipboard needs thorough degreasing and usually a bonding primer. Edges absorb paint particularly strongly. Seal open cut edges before applying the topcoat.
Check stability before appearance
- Frame and legs: Apply light pressure to the furniture. It must not wobble or visibly twist.
- Joints: Tighten loose screws and check dowels, glued joints and brackets.
- Drawers and doors: Test their movement, alignment and hinges. Replace bent fittings.
- Surface: Look for blisters, flaking finish, deep cracks and water stains.
- Odour and damp: A musty smell, soft areas or dark marks indicate damp or mould.
For heavy furniture, a furniture dolly makes inspection and moving easier. Secure cupboards on the dolly and have two people handle tall or solid pieces.
Choose suitable finds
Second-hand shops, house clearances, family collections and flea markets often provide better starting pieces than impulse purchases. Take a tape measure and check whether the furniture will fit through doorways, stairwells and lifts. Photograph interesting details before collecting the piece.
Do not buy a piece of furniture just because it is cheap. Ask about its age, previous use and damage. If the finish is unknown or the odour is strong, choose another find.
“Have nothing in your house that you do not know to be useful, or believe to be beautiful.”
How do you redesign old furniture?
A successful project follows a set order. First, check the construction, then clean and repair the piece. Next, prepare the surface and choose a finish suited to how the furniture will be used.
1. Define the function and dimensions
Before you start, write down what the furniture should be used for later. A side table needs a level, sturdy top. A shoe cabinet requires stable shelves and adequate ventilation. Furniture for a child's room also needs safe edges and secure, tip-resistant fixings.
Measure the intended location. Take doors, sockets, radiators and space for movement into account. A great furniture upcycling idea can fail if drawers cannot open or a cabinet blocks the passageway.
2. Clean, dismantle and repair
- Document: Photograph the fittings, joints and arrangement of the parts.
- Clean: Remove dust, grease and old care products with a suitable cleaner. Allow the furniture to dry completely.
- Dismantle: Remove handles, doors and drawers if this makes the individual parts easier to work on.
- Repair: Glue loose joints, replace missing screws and realign hinges.
- Check: Carefully test the furniture under load before finishing the surface.
Use suitable materials for repairs. A thin back panel will not stabilise a wobbly cabinet. Load-bearing parts require a structural solution, such as new brackets, an additional brace or replacing the damaged component.
3. Prepare the surface
Remove loose paint and rough areas. Sand intact painted surfaces only enough for the new finish to adhere. When working with wood, sand with the grain and switch to a finer grit before applying primer.
Filler smooths out small holes and dents. Apply it thinly and sand the area flat once it has dried. With veneer, work particularly carefully around edges and corners.
Important note
Paint in furniture from very old buildings may contain lead. Do not dry-sand unknown old paint in living areas. Have the coating tested or have it removed professionally. Wear safety goggles and respiratory protection whenever working in dusty conditions, and keep children and pets away.
4. Choose paint, oil or varnish
Choose the finish according to the expected level of use. A dining table needs a durable, wipe-clean coating. A decorative wall shelf may be suitable for oil or wax. For heavily used surfaces, choose a suitable furniture paint and apply it in several thin coats.
Water-based paints usually produce less odour during application than solvent-based products. Nevertheless, ventilate the room thoroughly and follow the stated drying time. Do not mix products unless you have checked that they are compatible.
Test the paint, primer and sealer on a concealed area. This will reveal any unwanted reactions, uneven absorption or a colour that looks different in the room than it did in the shop.
5. Add fittings and finishing touches
New handles can instantly change the look of a piece of furniture. Measure the hole spacing of existing fittings before buying replacements. If you drill new holes, mark both sides and use a drilling template.
Use felt pads under chair and table legs. They protect the floor and make furniture easier to move. Suitable drawer runners can help if the cabinet is still straight and stable.
Which furniture upcycling ideas work in every room?
The best furniture upcycling ideas combine clear functionality with a manageable change. You do not need to completely dismantle every piece. Often, a fresh coat of paint, a different handle, a repair or an additional shelf is all it takes.
Living room: Rethink a chest of drawers, coffee table or sofa
A low chest of drawers can become a sideboard with a fresh coat of paint. Remove individual drawers and add baskets if you need open compartments. With new legs, an old tabletop can serve a second purpose as a coffee table or desk.
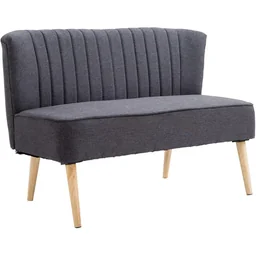
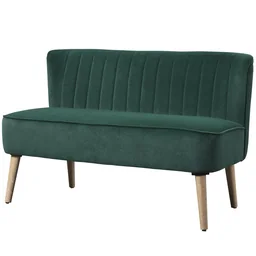
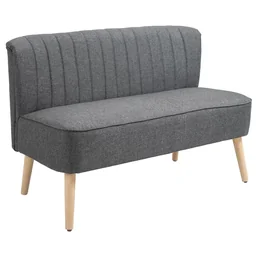
For upholstered furniture, first check the frame, upholstery and springs. Re-covering is only worthwhile if the load-bearing parts are stable. Choose a hard-wearing fabric and plan the seams and staple positions before cutting.
Suitable starting points for upholstered furniture projects include the shop examples
Hallway: Turn doors and drawers into practical storage solutions
An old interior door can become a coat rack with the addition of hooks. Only shorten it if the proportions work in the intended space. Sand the edges smoothly, attach the door with suitable wall anchors and test the load capacity of every hook.
Individual drawers can be stacked or mounted as small wall shelves. Secure each drawer to prevent it from slipping. A coloured back panel or a piece of wallpaper adds an accent without using additional furniture materials.
Bedroom: Build your own headboard and bedside table
Old boards, a door or an upholstered panel can be turned into a unique headboard. Attach it securely to the wall or bed frame and make sure there are no sharp edges. A headboard does not need to be load-bearing and can be purely decorative.
A small chest of drawers becomes a bedside table when you adjust the height to suit your mattress. Add a cable grommet for the lamp and protect the surface from water stains. This creates a practical DIY furniture piece with very little material.
Children's room: Safety before decoration
For children's furniture, round off the edges, secure tall cupboards to the wall and use safe coatings that have dried completely. Small parts such as knobs, hooks or magnets must not come loose.
For renovation ideas and suitable dimensions, use the children's furniture category as a guide. Low shelves, sturdy benches and open toy boxes are better suited to young children than tall, hard-to-reach furniture. Play furniture can also provide a design reference for creative storage.
Garden: Use old furniture outdoors with weather protection
Indoor furniture is not automatically suitable for outdoor use. Moisture, UV radiation and temperature fluctuations can damage wood, glued joints and upholstery. For outdoor use, only apply suitable primers, paints or oils and make sure water can drain away.
An old chair can serve as a plant stand if you reinforce the seat and use a pot with drainage. A discarded wooden bench can be given a second life with thorough cleaning, repaired joints and an exterior coating.
Protect refurbished garden furniture with a suitable garden furniture cover. Allow some air to circulate under the cover and never keep damp furniture covered permanently.
“A circular economy is based on the principles of eliminating waste and pollution from the outset, keeping products and materials in circulation and regenerating natural systems.”
How can you keep a DIY piece of furniture looking good for years?
An upcycling project does not end with the final brushstroke. The right care protects the surface and reveals early when a joint is starting to loosen. Small repairs prevent more serious damage.
Care for surfaces appropriately
Clean painted furniture with a soft, slightly damp cloth. Aggressive cleaning products can damage coatings. Oiled wood needs occasional refreshing depending on how it is used, while waxed surfaces can be particularly sensitive to standing water.
Do not place hot pots, damp plant pots or wet glasses directly on wood. Use coasters and wipe up spilled liquid immediately. Outdoors, regularly remove leaves and water from the cover and furniture surface.
Keep seating safe and comfortable
Regularly check the screws, legs and seat suspension of chairs and sofas. A creaking or wobbly piece of seating needs repairing before you continue to use it. Replace brittle foam and stretched webbing if the seat gives way noticeably.
A new cover should fit tightly without tearing at the seams. Work from the centre towards the corners and space the staples evenly. Keep a piece of leftover fabric so you can make repairs later.
When is a project not worthwhile?
Mould, severe insect infestation, a persistent damp smell and unstable load-bearing parts are all reasons against simply refurbishing a piece of furniture. Severely damaged chipboard often cannot be repaired permanently either. Decide based on its condition, the work involved and its future safety.
If you cannot save a piece of furniture, remove reusable fittings, wood and metal wherever local disposal regulations allow. This keeps individual materials in circulation, even when the original frame has reached the end of its life.
Additional advice
Plan your first project on a small scale: a drawer, stool or side table. Test cleaning, paint and sealant on this piece before working on a large sofa or an entire wardrobe. Make a note of the products and colours used for future repairs.
Start with a piece of furniture whose function you already understand. Repair the construction first, then work on the surface and finally check every joint. This creates DIY furniture that not only looks good but also stands up to everyday use for years.
Frequently asked questions
- Which old furniture is best suited to upcycling?
- Solid wood, sturdy veneered furniture, chests of drawers, chairs and shelving are particularly suitable. Before buying, check the frame, joints, surface and smell. Furniture with mould, severe pest infestation or an unstable construction requires more work and should be handled by a professional or disposed of appropriately.
- How do I prepare old furniture for painting?
- First remove dust and grease with a suitable cleaner. Then sand the surface evenly without sanding through the veneer. Fill holes, smooth sharp edges and remove the sanding dust. For unknown old paint coatings, avoid dry sanding indoors.
- What type of paint is suitable for DIY furniture?
- Depending on the surface, wood can be treated with paint, stain, oil or wax. Water-based paints usually have less odour, but they still need to dry completely. Use a suitable primer on metal and a thin primer coat on veneered surfaces. Always test each product on a concealed area first.
- Can I reupholster an old sofa myself?
- Yes, provided the frame, seat and joints are stable. Replace worn webbing, brittle foam and damaged upholstery. Choose a hard-wearing upholstery fabric and attach it evenly. If there is structural damage or an unknown risk from hazardous substances, have the seating professionally assessed before using it again.
- How can furniture upcycling really be sustainable?
- Sustainable furniture upcycling extends the useful life of furniture and saves new materials. Long-lasting repairs, low-emission finishes, replaceable covers and a construction that allows for future repairs are particularly effective. Only buy the materials you really need, and plan how you will care for the finished piece from the outset.
You may also be interested in
- Second-hand furniture: Furnish and upgrade sustainably
- Upcycling for the home and garden: Sustainable DIY ideas
- Build your own furniture: Creative ideas for your home
- Make your own upcycled lamp: Creative DIY lighting ideas
- Sustainable home furnishings: Durable furniture for eco-friendly living
- Make sustainable Christmas decorations: Upcycling ideas for Advent