
Briefly explained: During canning, you use heat to drive air out of the jar and create a vacuum seal. Clean jars, the correct processing time and proper storage in a dark place at 10-15 degrees are crucial. This lets you preserve fruit, vegetables or complete meals for months.
Home Canning: How to Preserve Food Safely
You have harvested a lot from the garden or taken advantage of a great deal when shopping. Now it is time to preserve these treasures. Canning is a tried-and-tested way to make food last longer. It is a physical process based on heat and a vacuum.
With the right instructions and a few basic tips, you can turn surplus fruit, vegetables or home-cooked meals into food that can be stored. The technique is simple but requires care.
What exactly does canning mean?
When canning, you heat filled and sealed jars in a water bath or oven. The air inside expands and escapes. As the jars cool, the air contracts and creates a vacuum inside the jar.
This negative pressure seals the lid tightly to the jar. At the same time, the heat deactivates enzymes and kills microorganisms responsible for spoilage. This preserves the contents for many months.
Expert tip
Test the seal after the jars have cooled. Press the centre of the lid down gently. A firm lid that does not spring back indicates a successful vacuum seal. A popping sound when you open the jar later confirms this.
What equipment do I need for canning?
The basic equipment is straightforward. You need a large pot or a dedicated canning pot with a rack. A thermometer is useful but not essential. The most important items are the right jars.
Choosing the right canning jars
Only use jars designed for canning. You can identify them by their glass lids, rubber rings and metal clips. Weck jars are the classic choice. Screw-top jars with twist-off lids are only suitable for oven canning.
Before every use, check the rubber rings for cracks or breaks. A damaged ring is guaranteed to result in a failed seal. Store replacement rings in a dry, dark place.
The quality of the rubber rings is crucial to success. They form the seal and should be replaced after several uses.
Other useful accessories
A funnel makes it easier to fill the jars cleanly. A jar lifter protects you from burns when removing hot jars from the water bath. Sharp knives and suitable garden tools are useful when preparing the food.
For storing your finished preserves, you can find suitable shelving and storage solutions in the business supplies range. Organised storage protects against light and helps you keep track of everything.
How do I prepare food for canning?
Preparation is almost as important as the canning process itself. Work cleanly and efficiently. Only use sound, fresh produce. Mouldy or overripe fruit or vegetables are unsuitable.
Preparing fruit and vegetables
Wash everything thoroughly. Remove stems, cores or damaged parts. Cut the produce into evenly sized pieces. This ensures an even cooking time. Blanch some vegetables first to deactivate enzymes.
Fill the jars to about two centimetres below the rim. The same fill level applies to liquid contents such as juice or syrup. For solid contents, press the mixture down gently to minimise air pockets.
Important note
Never fill the jars right to the top. The food and liquids expand when heated. Overfilled jars will overflow and a vacuum cannot form.
The importance of the canning liquid
The liquid transfers heat and protects the contents. For fruit, you often use a sugar solution or the fruit's own juice. Vegetables are usually canned in salt water or plain water.
Pour the hot liquid directly over the prepared food. This heats the entire contents more quickly and evenly. Again, leave space at the top.
Adding lemon juice or ascorbic acid (Vitamin C) to light-coloured fruit such as pears or apples prevents unattractive browning and preserves its appetising colour.
How does the actual canning process work?
You have two practical methods to choose from: a water bath on the stovetop or the oven. Both have advantages and disadvantages. The principles are identical.
Water-bath canning
Place the sealed jars in a large pot. The jars must not touch one another. Add lukewarm water until the jars are two-thirds covered. Heat the water slowly.
Once the water comes to a rolling boil, start the timer. The processing time varies depending on the contents and jar size. When the time is up, turn off the stovetop. Leave the jars in the cooling water until you can remove them.
For large quantities or regular canning, a dedicated electric canner is worthwhile. It makes temperature control easier. In the garden equipment section, you can often find practical tools for processing your harvest.
Oven canning
This method is particularly suitable for screw-top jars. Place the filled and sealed jars on a baking sheet with a little water. Preheat the oven to the required temperature.
The processing time starts once the oven has reached the required temperature. When the time is up, turn off the oven. Let the jars cool slowly with the oven door open. Avoid drafts, which could cause the jars to crack.
Additional advice
Write the contents and canning date directly on the lid with a waterproof marker, or attach a label. This helps you keep track of your pantry even after several months.
How should I store canned jars?
Storage determines how long your preserves will last. The ideal place is dark, cool and frost-free. A basement room with temperatures between 10 and 15 degrees Celsius is ideal. Avoid direct sunlight.
Store the jars without the metal clips. They are only used to seal the jars during processing. They could rust during storage. Check your preserves during the first few days after canning.
Checking and using your preserves
A bulging lid indicates that no vacuum formed or that it has been lost. Use the contents of such jars immediately. With intact jars, you will hear a distinct hiss or pop when opening them.
After opening, store partially used jars in the refrigerator. Use the contents within a few days. For storing dry goods or other kitchen utensils, take a look at the Shop.
Which foods are particularly suitable for home canning?
Almost everything from the garden is suitable for home canning. Classics include cherries, pears, cucumbers and beans. Sauces, chutneys and compotes can also be preserved exceptionally well.
Fruit and berries
Stone fruits such as cherries or plums can be canned with the pit still in. Berries such as strawberries or raspberries are often canned as purée or compote. The high temperatures largely preserve their flavor.
For harvesting and caring for your fruit bushes, you can find suitable equipment under Power Tools. Good care is the foundation for a plentiful harvest.
Vegetables and mushrooms
Cucumbers, bell peppers, carrots and mushrooms are all excellent choices. Blanch many types of vegetables before filling the jars. This shortens the canning time and preserves their color. Ready-made dishes such as goulash or ragouts are also suitable.
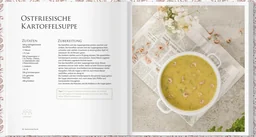
For hearty creations, the book
What common mistakes should you avoid?
Most failures can be traced back to just a few causes. Pay attention to these points to ensure your preserves turn out safely.
Processing times that are too short are the most common mistake. Every filling and jar size requires a specific time. Follow tried-and-tested tables. Excessively high temperatures destroy vitamins and can damage the jar.
Poorly cleaned jars or lids can lead to mold growth. Do not use damaged jars with small chips around the rim. The same applies here: the quality of your accessories is crucial. For other outdoor projects, such as safely covering supplies or storage areas, you can find suitable Tarps and Nets.
Safety comes first
If a jar breaks during canning, immediately remove all pieces of glass from the water bath. Always work with heat-resistant gloves. Keep children away from the hot canning pot.
For additional safety equipment for your home and garden, visit the Workplace Safety & Security category. A safe workspace is the foundation for successful food preservation.
With these steps and tips, you can master home canning with confidence. It is a rewarding activity that makes you less dependent on the seasons. Your homemade preserves taste better, and you know exactly what they contain.
Frequently Asked Questions
- What is the difference between home canning and bottling?
- There is no practical difference. Both terms describe the same process: preserving food in sealed jars using heat. The term 'bottling' comes from the brand name 'Weck', but it is synonymous with 'canning'.
- Can I use any jar for home canning?
- No. Only use special canning jars with intact rubber rings and flawless glass lids. Standard screw-top jars from the supermarket are often not designed for the high temperatures used in traditional water-bath canning.
- How long do home-canned foods last?
- When processed correctly and stored in a dark, cool place (10-15°C), home-canned supplies will last for at least one year. Once opened, use the contents within a few days, just as you would with an opened can.
- Why won't my canning jars seal?
- Common causes include damaged or dirty rubber rings, lid clamps that are not properly secured, processing times that are too short or a temperature that is too low. Overfilling the jars can also prevent a vacuum seal from forming.
- Can I can ready-made dishes such as stews?
- Yes, this is possible. For hearty dishes, make sure there is enough liquid and allow for a suitably longer processing time. Use fat sparingly, as it can reduce shelf life.
You might also be interested in
- Canning in a Pot: How to Preserve Fruit and Vegetables
- Best Electric Canners: Review & Comparison 2026
- Prevent Botulism: Safe Home Canning & Bottling
- Freezing Food: How to Keep Your Supplies Fresh for Longer
- How to Preserve Homemade Food: Make It Last
- Making Jam: How to Easily Preserve Sweet Fruit at Home