
In brief: As a DIYer, you need to know the basics of home electrics to work safely. This includes understanding the three most important conductors (live, neutral and earth), how circuit breakers and RCDs work, and the strict separation of work on junction boxes and sockets. Only work with the power switched off and follow the five safety rules.
Home Electrics Basics: What DIYers Need to Know
You want to connect a light, replace a socket or install a switch. Electrical installations in your own home can seem complicated. With the right basic knowledge, you can work safely and effectively. This article explains the essential principles.
How is electricity distributed throughout my home?
Electricity enters your home through the mains connection and reaches your meter cabinet. From there, it goes to the main distribution board, the heart of your home electrics. This is where the circuit breakers (MCBs) and RCD are located. Each circuit breaker protects its own circuit, for example the sockets in the living room or the hallway lighting.
The circuits run to the individual appliances through three-core cables. A cable consists of a live conductor (carries current), neutral conductor (return path) and earth conductor (safety). The RCD continuously monitors the flow of electricity. If some of the current diverts elsewhere, for example through your body, it interrupts the flow within milliseconds.
“The RCD is the most important invention for protecting people in domestic electrical installations. It saves lives where a conventional fuse fails.”
Understand this basic structure. You will then know why you must switch off the correct circuit at the distribution board before starting work. A look inside your distribution board will clarify which circuit is which. Label any unclear circuit breakers for future reference.
Which safety rules are absolutely binding?
Safety comes first. The five safety rules for electrical work are your law. They apply to every job, even something as simple as replacing a light fitting.
- Disconnect: Switch off the circuit at the distribution board (remove the fuse or switch off the circuit breaker).
- Prevent reconnection: Lock the distribution board or clearly mark it.
- Verify that all poles are de-energised: Use a two-pole voltage tester (Duspol) to test at the work location.
- Earth and short-circuit: Usually unnecessary in a home, but mandatory when working on the distribution board.
- Cover or barrier off adjacent live parts.
Important note
Never work on live circuits. An electric shock from 50 volts AC can be fatal. Test instruments can be faulty. Check your Duspol before and after testing against a known live source. The safety rules form a chain. Every link must hold.
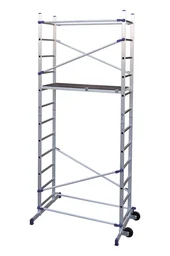
Equip yourself with the right protective equipment. This includes insulating footwear, a non-conductive ladder such as the and VDE-tested tools. Do not overestimate your abilities. The line between a DIY task and work requiring a qualified electrician is clear.
How do I read wiring diagrams and wire correctly?
A wiring diagram is the map of your installation. For typical DIY tasks, it is enough to understand simple symbols: a circle with a cross represents a lamp, a semicircular arc represents a switch, and a rectangle with plugs represents a socket. The connecting lines show how the cables are routed.
Correct wiring follows the colour code. Since 1965, the standard has been: live (L) = black or brown, neutral (N) = blue, earth (PE) = green-yellow. In older buildings, you may find grey for neutral and red for live. If in doubt, always check with a meter.
Pro tip
When routing cables through conduit, always use installation wire marked NYM-J. This sheathed cable is robust and approved for fixed installations in walls. For flexible connections to light fittings, use appliance wire (H05VV-F). Crimp the correct wire-end ferrule onto the cable end; never insert bare copper into the terminal.
When connecting a socket, the live wire goes to the right terminal (usually marked “L”), the neutral wire to the left (“N”) and the earth wire to the central, upper terminal (earth symbol). Tighten the screws firmly, but do not overtighten them. A loose connection generates heat and creates a fire hazard.
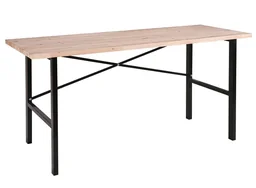
A sturdy gives you the perfect work surface for this kind of precise work. Keeping things organised and working systematically helps prevent mistakes.
Which tools and materials do I need?
Quality tools are non-negotiable. They are your life insurance. The core of your electrical tool set includes: a two-pole voltage tester (Duspol), a wire stripper for crimping or twist connectors, side cutters and screwdrivers in various sizes, all with VDE insulation rated up to 1000 volts.
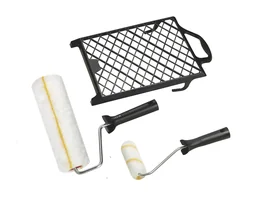
For routing cables, you will also need: a cable detector to locate existing cables in the wall, a rotary hammer with chisels for flush-mounted boxes and a cable puller. A often provides the essential basic tools in a practical storage case.
“Even the most expensive tool is cheaper than a hospital stay. VDE insulation is not a marketing gimmick, but physically tested protection. Use it.”
When buying materials, always follow the current VDE standard. For new installations, use only devices and cables bearing the VDE, GS or CE mark. Pay attention to the correct cable cross-section. For socket circuits, 1.5 mm² for lighting and 2.5 mm² for sockets are common. You will find suitable equipment in the electrical tools section.
What can I do myself, and when do I need a professional?
The Low-Voltage Connection Ordinance and DIN VDE 0100 define the limits. As a DIYer, you may carry out work as part of "maintaining operational readiness". In practical terms, this means you may replace or connect permanently connected devices such as lights, switches and sockets within existing circuits.
You may also feed and connect cables in pre-installed conduits (empty conduits). Installing a new flush-mounted box in an existing wall is also within your scope, provided you do not create a new circuit.
Additional advice
Document all your changes. Draw an updated wiring diagram or take photos of the wiring before closing the boxes. This will save a great deal of time and frustration during the next repair or upgrade. Keep the documentation by the distribution board.
Strictly off-limits and reserved for qualified electricians are work on the main service box and meter cabinet; expanding or modifying the distribution board (installing new circuit breakers); creating completely new circuits from the distribution board; and first-time installations in a new build. You should also leave work in particularly hazardous areas, such as bathrooms (protection zones 0 and 1), to specialist contractors.
When in doubt, always call a professional. The cost of an electrician is an investment in safety and legal security. For all other projects in the garden and outdoor area, you will find the right equipment here.
How do I plan a simple installation?
Good planning prevents mistakes. Start with a sketch. Mark the positions of switches, sockets and lights. Think about practical requirements: sockets in the kitchen for small appliances, sufficient lighting in the hobby room, and switches beside the bed.
Plan the cable routes. Ideally, they should run vertically and horizontally from the junction boxes. This helps prevent you from drilling into a cable later when hanging pictures. Use installation conduits (empty conduits), even if you do not fill them completely at first. They make future upgrades much easier.
Calculate the load. Add up the wattages of the planned appliances on a circuit. A standard socket circuit is protected by a 16 Ampere circuit breaker and handles around 3680 Watt. A washing machine with a tumble dryer often requires its own circuit. Do not overload any cables.
Gather all the materials before starting work. Nothing is more frustrating than discovering halfway through an installation that a cable or box is missing. With a systematic approach and good preparation, you can safely complete projects such as installing a garden irrigation system with its own power connection.
To sum up: Understanding the basics of home electrical systems means greater safety, independence and control over costs. You can identify hazards, complete simple tasks correctly and know when to call in an expert. Start with small projects such as replacing a switch. Work methodically, use the right tools and always follow the safety rules. Your home will become more functional, and you will gain valuable know-how.
Frequently asked questions
- Can I connect a socket myself as a DIYer?
- Connecting a socket to an existing circuit is permitted for DIYers, provided they comply with the VDE regulations. You must follow the five safety rules, understand the correct wiring (live, neutral and protective earth) and use a Duspol to check that the circuit is de-energised. First-time installations and modifications to the distribution board must be carried out by a qualified electrician.
- When must an RCD be installed?
- An RCD is now required for almost all household circuits, particularly in wet rooms such as bathrooms and kitchens and in outdoor areas. It protects against potentially fatal electric shocks by switching off immediately when it detects even small residual currents. Test the test button regularly. Retrofitting an RCD is advisable and significantly improves safety.
- What do the colours of electrical wires mean?
- In new installations, black or brown indicates the live wire (phase/L), blue the neutral wire (N), and green-yellow the protective earth (PE). This colour coding is mandatory. In older buildings, you will often find different colours, such as red for live and grey for neutral. Always use a measuring device to confirm the wiring before starting work.
- Why does my circuit breaker keep tripping?
- A tripping circuit breaker indicates an overload or short circuit. Check whether too many appliances are connected to the same circuit at the same time. Unplug all devices and switch the breaker back on. If it trips again immediately, there is a fault in the cable or a permanently connected installation. Call an electrician.
- What tools do I need for basic electrical work?
- Essential tools include a voltage tester or two-pole Duspol, insulated wire strippers, side cutters and screwdrivers with VDE insulation. Basic personal protective equipment, including insulating gloves and a stable ladder, is essential. Invest in quality tools—they are your most important safety barrier.
You may also be interested in
- Home electrical installation: Safe DIY tips for homeowners
- Electrical wire colours: What they mean for DIY safety
- Solar power for your home: Photovoltaics basics
- Remodelling and renovating your home: A homeowner's guide
- Workplace safety: Working safely on DIY projects
- Learn to weld: Basics and tips for DIYers