
In brief: Clean your concrete mixer immediately after every use: rinse the drum and mixing system with water and a brush, loosen dried residue mechanically and keep the motor area dry. Unplug the machine before every maintenance task, check the belt, bearings and protective guard, and store the dry construction machine in a sheltered place.
Direct answer: Clean your concrete mixer immediately after every use: rinse the drum and mixing system with water and a brush, loosen dried residue mechanically and keep the motor area dry. Unplug the machine before every maintenance task, check the belt, bearings and protective guard, and store the dry construction machine in a sheltered place.
A concrete mixer is one of the most frequently used pieces of equipment on many construction sites. Cement slurry, sand and gravel stick to the drum, mixing paddles, ring gear and frame. Cleaning the machine after every batch keeps mixing performance consistent and reduces wear.
The best machine care starts immediately after emptying the mixer. Fresh concrete residue can be removed with water, a brush and a plastic scraper. Hardened crusts require more force and can damage the drum, bearings or drive system.
Why does a concrete mixer need to be cleaned immediately?
Concrete starts to set during processing. Cement slurry sticks to the inner wall, runs into joints and builds up on the mixing system. The longer the residue remains, the harder and thicker the layer becomes.
A drum covered in hardened residue holds less mix. The mixing paddles move with greater resistance, putting more strain on the motor and potentially causing the belt to slip. On electrically powered models, there is also a greater risk of fine cement dust entering the ventilation openings.
Concrete residue hardens quickly
The areas between the drum floor and side wall, the back of the mixing paddles and the area around the discharge opening are particularly critical. Wet cement slurry collects there, and a standard water jet often cannot reach it completely.
So do not check only the visible drum wall. After switching off the machine, carefully turn the drum to the required position and inspect every mixing paddle. Keep your hands and tools away from moving parts.
Clean construction equipment remains easy to inspect
A clean concrete mixer can be checked more quickly before the next use. Cracks, loose screws, damaged paddles and worn teeth on the ring gear are immediately visible on a clean surface.
- Mixing performance: An unobstructed drum processes the intended mixing volume without unnecessary resistance.
- Drive system: Clean ventilation openings help keep the motor cool.
- Safety: An intact protective guard and a clearly visible switch can be checked reliably.
- Service life: Fewer concrete crusts mean less stress on bearings, belts and gears.
If you are working in the garden or on a private construction site, plan for water, a firm standing area and a cover. In Garden + Outdoor, you will find solutions for protected outdoor use. The Workplace supplies section also offers suitable equipment for cleaning and care.
Pro tip
Clean the drum while you are still on the construction site. Have a bucket, hose, long-handled brush and plastic scraper ready before starting the final mixing operation. This lets you begin cleaning while the cement slurry is still wet.
How do you clean a concrete mixer straight after mixing?
Divide cleaning into four stages: secure the machine, empty the drum, rinse off fresh residue and dry all surfaces. This sequence protects you and prevents concrete wash water from reaching sensitive components.
1. Secure the machine before using water
Switch off the concrete mixer and wait until the drum and mixing system have come to a complete stop. Then unplug the machine. For petrol-powered equipment, switch off the engine and secure it against accidental starting.
- Place the machine on a stable, level surface where it cannot tip over.
- Disconnect the power supply completely.
- Wear alkali-resistant protective gloves, safety goggles and safety footwear.
- Remove loose mix with a shovel or suitable hand tool.
- Never reach into a rotating drum or start the motor during cleaning.
Important note
Water and electricity are a dangerous combination. Do not direct a water jet at the motor, switch, plug, cable connections, bearings or belt. Allow electrical components to dry completely and check them before switching the machine on again.
2. Rinse fresh concrete from the drum
Empty the drum as far as possible before using water. First rinse the inner wall, mixing paddles and discharge opening with a hose or gentle water jet. Work from top to bottom so that loosened cement slurry can drain away.
Only move the drum as specified by the manufacturer. On some models, it can be safely turned by hand; on others, the position may only be changed using the designated controls. Do not use the motor as a cleaning drive unless the operating instructions expressly permit it.
Remove splashes from the frame immediately with a wet cloth or brush. Dried cement on the frame can block adjustment of the drum and encourage rust beneath the layer.
3. Brush the drum and mixing system
A stiff plastic brush removes fine cement slurry without unnecessarily scratching the drum. A long-handled brush is suitable for the inner wall. A plastic scraper with a rounded edge helps in tight areas.
- Work on the drum wall from the crust towards the clean area.
- Clean the front and back of every mixing paddle.
- Thoroughly brush out the discharge opening and the adjacent locking mechanism.
- Remove cement from the ring gear without damaging the teeth with hard blows.
Do not use a sharp-edged trowel on painted surfaces. It can cut through the coating. Moisture collects in the damaged area, and rust spreads beneath the paint layer.
4. Wipe down and dry the outer surfaces
Rinse the frame only as much as necessary to remove concrete residue. Then wipe the drum rim, frame, handles and wheels dry. Leave the concrete mixer with the drum open to air out before covering it.
Collect the wash water in a tub or suitable container. Allow solids to settle and dispose of the residue in accordance with local regulations. Do not discharge cement-containing water into storm drains or open bodies of water.
A cover from the Tarpaulins + Nets section protects the standing area from splashes. For brushes, scrapers and other cleaning accessories, you will find suitable tools in the Garden Tools section.
“Safe operation does not end when the machine is switched off: work equipment must be kept safe throughout its period of use. Cleaning and maintenance are therefore part of safe operation.”
Which Parts of the Concrete Mixer Need Special Care?
The drum is the first thing you notice when cleaning. However, the drive, bearings, guards and chassis are also crucial to the service life of the construction machine. Check these components regularly and clean them using as little water as possible.
Drum, Mixing Paddles and Ring Gear
Check the drum for cracks, deformations and damaged weld seams. Inspect the mixing paddles for thinned edges, loose fasteners and unusual gaps between the paddles and the drum wall.
The ring gear must be kept free of thick concrete residue so that the pinion engages properly. Remove sand and cement with a dry brush or plastic tool. Lubricate the ring gear only if specified in the operating instructions, and use only the recommended lubricant.
Drive, Belt, Motor and Switch
Keep the motor and switch dry. Remove dust and cement from the ventilation openings with a soft brush or compressed air, following the manufacturer's instructions. Do not blow the dust further into the housing.
Check the belt for cracks, frayed edges and incorrect tension. A squealing belt, jerky start-up or unusual smell indicates a problem. Do not open the motor housing unless you are qualified to carry out electrical work.
Bearings, Axle, Wheels and Frame
Bearings are sensitive to water and fine cement dust. Wipe bearing areas dry and check for play, cracking or grinding noises. After cleaning, turn the wheels and drum only as far as possible without tools and without putting yourself at risk.
Also check the axle, cotter pins, wheel fasteners, support feet and the drum lock. Tighten loose screws with the appropriate tool. Replace bent or damaged retaining components before continuing work.
Which Concrete Mixers Are Right for Your Needs?
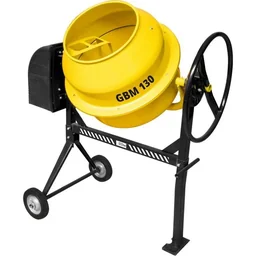
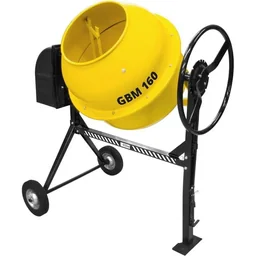
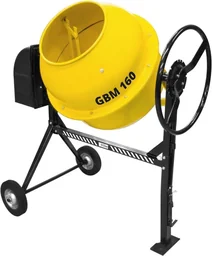
For different mixing quantities and site sizes, the range includes, for example,
, the BETONMISCHER MIX125, , the BETONMISCHER GBM 130, , the BETONMISCHER GBM 160, as well as , the Concrete mixer GBM 160 with 800 Watt.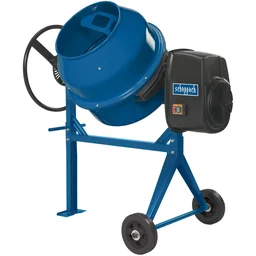
Before buying, compare drum capacity, motor power, design, transport options and the cleaning information. Accessories for electric construction equipment can be found in the power tools section. The operating instructions for the specific model remain the deciding factor.
| Component | Care | Check |
|---|---|---|
| Drum and mixing paddles | Rinse and brush clean | After every use |
| Ring gear and pinion | Remove concrete residue | Regularly |
| Belt and guard | Keep dry and inspect | Before use |
| Bearings and wheels | Keep away from water and observe lubrication points | According to the maintenance schedule |
How Do You Remove Hardened Concrete?
Hardened concrete residue takes time and controlled force to remove. Heavy blows can quickly damage the drum, ring gear or bearings. Therefore, start with the gentlest method and increase the effort only if the crust does not loosen.
Soak It Instead of Hitting It Immediately
Re-wet the crust repeatedly with water and allow the moisture to soak in. With a small drum, you can place a wet cloth over the affected area. Cover the area so that it does not dry out again immediately.
After soaking, the edges often come loose more easily. Work with a plastic scraper or wooden wedge from the outside in. Keep the drum still and disconnect the concrete mixer from the power supply.
Loosen Crust Mechanically
A rubber mallet is suitable for tougher deposits. Apply short, controlled blows to the concrete crust, not the drum wall. A plastic mallet may be the better choice for delicate or painted surfaces.
- Suitable: Plastic scraper, wooden wedge, rubber mallet, stiff plastic brush.
- Not suitable: Steel hammer, chisel, angle grinder and sharp-edged tools.
- Protect in particular: Ring gear, bearings, mixing paddles, drum rim and locking mechanism.
Work in small sections. If the drum deforms, the coating flakes off or a component visibly gives way, stop cleaning and have the concrete mixer inspected.
Use Concrete Remover Only with Approval
Acid-based concrete removers can damage metal, paint, seals and plastic parts. Use such a cleaner only if the manufacturer approves it for the material in question. Read the label, wear safety goggles and gloves, and test the product first on an inconspicuous area.
Never mix different cleaning products. Rinse approved products off completely and dry the treated surfaces afterwards. For thick layers or deposits in hard-to-reach areas, professional cleaning is worthwhile before you damage the machine.
Additional Advice
Prevent stubborn crusts by giving the mixer a quick clean after every batch. A clean concrete mixer requires less water, less force and no aggressive cleaning products. Also clean the drum rim, as cement dries particularly quickly there.
Which maintenance extends the service life?
Cleaning and maintenance go hand in hand. Cleaning reveals damage hidden beneath a layer of concrete. Maintenance then ensures that the concrete mixer runs reliably and safely the next time it is used.
Checklist after every use
Once the machine is dry, carry out a quick visual and functional inspection. These few minutes prevent a minor defect from causing a breakdown during the next mixing operation.
- Drum: No thick concrete residue, cracks or visible deformation.
- Mixing mechanism: Blades secure, not bent and able to move freely.
- Ring gear: Teeth clean and free from missing or heavily worn areas.
- Drive: Belt free from cracks, unusual play or abrasion.
- Electrical system: Cables, plugs, switches and cable strain relief undamaged and dry.
- Safety guards: Protective grilles and covers securely fitted.
- Running gear: Wheels, axle, support feet and split pins securely fastened.
- Stability: Frame and locking mechanism stable, with no noticeable wobbling.
Regular maintenance according to the operating instructions
Follow the manufacturer's maintenance intervals. Lubrication points vary depending on the model. Too little lubricant causes friction, while too much lubricant attracts dust and sand.
- Check screw connections, split pins and safety devices.
- Check belt tension and the condition of the belt guard.
- Clean ventilation openings with a soft brush.
- Check bearings, axle and wheels for play or unusual noises.
- Treat exposed metal parts against rust according to the manufacturer's instructions.
- Have electrical faults repaired by a qualified professional.
Store the concrete mixer in a dry, protected place
Place the cleaned machine on a firm, dry surface. Tilt the drum so that no water can collect inside. If possible, store the concrete mixer in a frost-free place and cover it with a breathable sheet.
A completely airtight cover can trap condensation. Therefore, allow air to circulate and keep the motor, switches and plugs dry. Wind up the cable without tight bends and do not place it inside a damp drum.
Take warning signs seriously
Stop operating the machine if you notice grinding noises, severe jolting, an unusual smell, sparks, leaking lubricant or visible cracks. A ring gear that runs irregularly is also a sign that repairs are needed.
Never permanently remove a safety guard or bypass a safety switch. A temporary repair using wire, adhesive tape or unsuitable screws does not make the construction machine safe. Replace damaged parts with suitable components.
“Before working on moving parts, the concrete mixer must be stationary, the power supply must be disconnected and accidental start-up must be prevented.”
Consistent tool care keeps the drum clear, protects the drive and makes every inspection easier. Clean the concrete mixer after every use, remove hardened residue with suitable tools and document any noticeable damage. This keeps machine maintenance manageable and ensures that your construction equipment is ready for the next project.
Frequently Asked Questions
- How often should I clean a concrete mixer?
- Clean a concrete mixer after every use. Fresh cement and concrete residue is much easier to remove with water and a brush than hardened crusts. Rinse the drum and mixing mechanism immediately, remove splashes from the frame and dry the machine before storing it.
- Can I clean a concrete mixer with a pressure washer?
- Yes, but only on suitable, non-sensitive areas and from a safe distance. Never direct the water jet at the motor, switches, plugs, bearings or belts. Switch off the machine beforehand, disconnect it from the power supply and follow the operating instructions. A brush and hose are usually safer.
- How do I remove hardened concrete from the drum?
- First soak the crust with water. Then loosen it with a plastic scraper, wooden wedge or rubber mallet, working from the edges towards the centre. Do not use a steel hammer and do not strike the ring gear, bearings or drum. For thick layers, use an approved concrete remover according to the manufacturer's instructions.
- Which parts of a concrete mixer need maintenance?
- Check the drum, mixing blades, ring gear, pinion, belt, bearings, wheels, frame, safety guards, cables and switches. Tighten loose screws, lubricate only the designated lubrication points and replace damaged parts. The operating instructions for the particular concrete mixer specify the maintenance intervals and lubricants.
- How do I store a concrete mixer over winter?
- Remove all concrete residue and rinse and dry the drum, frame and mixing mechanism. Store the concrete mixer in a frost-free place or at least somewhere dry and secure against tipping. Protect it with a breathable cover, keep plugs and the motor dry and inspect the machine before using it again.
You may also be interested in
- Concrete Mixer Review & Comparison 2026
- Mixing Concrete with a Concrete Mixer: How to Get Perfect Results
- Caring for Garden Tools: How to Make Your Tools Last Longer
- Cleaning & Caring for a Garden Sieve: How to Make Your XL Sieve Last for Years
- WNS45 Wet Grinder Care: How to Keep Your Machine Sharp for Longer
- Cleaning Paving Stones: Effective Methods for Gardens & Patios