
In brief: You install a security camera by first assessing the location and choosing the required equipment, such as the camera, network and power supply. For outdoor cameras, only drill into suitable exterior walls and protect the cables. Connect the camera to your Wi-Fi, configure the app settings for motion detection and notifications, and test the final viewing angle. The actual installation often takes just a few minutes.
How do I install a security camera?
Start with careful planning. Without it, you may drill holes in the wrong places or choose the wrong equipment. The first step is always to assess your security needs.
Which areas are vulnerable? The front door is often the main focus. A side entrance to the patio is another critical point. Or the garage driveway. Walk around your property systematically and note potential weak spots.
Then decide what equipment you need. Do you need live viewing only, or recording as well? Is Wi-Fi sufficient, or would you prefer a stable wired connection? The answers determine your camera model and the accessories you need.
The perfect location for your front door camera
Choose an elevated position. Above the front door or on a corner of the building are classic locations. The camera should be protected from direct exposure to weather such as heavy rain, for example under a small roof overhang.
The viewing angle is crucial. Position the camera so that it captures the entire entrance area, not just the door handle. Test the angle before mounting it using a temporary setup. Avoid backlighting, such as a lamp opposite the camera that washes out the image at night.
Important note
Point your camera exclusively at your private property. Filming public footpaths or neighbouring properties may breach data protection laws and lead to legal warnings. Carefully check the area captured after installation.
What do I need for the installation?
Depending on the type, you will need mounting materials in addition to the camera itself. For robust outdoor cameras such as the
a mounting bracket is often included. Check this before you begin.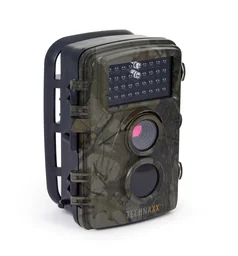
You will need suitable tools. A cordless drill is essential for mounting the camera on the wall, along with drill bits suitable for your wall type, such as stone or wood. A spirit-level app or a small spirit level will ensure a straight installation. Wall plugs and screws should be rust-resistant for outdoor use.
For the power supply, plan for an extension cable or a nearby socket if you are not using a battery-powered solution like those available with some models. PoE cameras require an Ethernet cable and, if necessary, a PoE switch.
“The biggest source of errors in a DIY installation is underestimating network quality. For a stable Wi-Fi camera, it is not only the distance from the router that matters, but above all a clear line of sight without thick walls.”
Wi-Fi, power or cable: Connecting your camera
Wireless cameras are easy to install. Mount them, connect them to your home Wi-Fi and you are ready to go. However, they depend on Wi-Fi stability and need regular charging. Products such as the
are perfect for indoor spaces.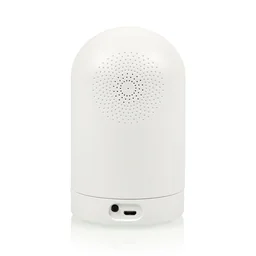
Wired solutions are more robust. With PoE (Power over Ethernet), an Ethernet cable supplies both data and power. This is ideal for a permanent, reliable outdoor installation such as with the
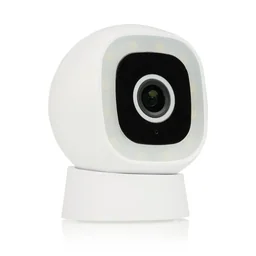
Hybrid solutions use Wi-Fi for data but a mains cable for a permanent power supply. This avoids charging cycles and often delivers better performance.
Mounting and securing the camera
Start by preparing the installation. Hold the camera bracket against the desired location. Mark the drill holes with a pencil. Use the spirit level to check that the marks are level.
Drill the holes using the correct bit for your wall. For exterior walls, make sure the holes are clean and deep enough. Insert the wall plugs. Screw the bracket firmly into place, but do not overtighten it, as this could damage the material.
Place the camera in the bracket and tighten the securing screw. Set the desired viewing angle precisely now. Many brackets allow you to tilt and swivel the camera. Tighten all adjustment knobs.
Pro tip
Always drill exterior holes with a slight downward angle (approx. 5 degrees). This prevents rainwater from running into the wall behind the wall plug and causing long-term damage. A small trick with a big impact.
Securing cables for outdoor cameras
For cameras with cables, protecting the cable is crucial. Feed the cable through the rubber seal often supplied with the camera bracket. This keeps the connection protected from the weather.
Run the cable along the facade using cable clips. Choose clips suitable for outdoor use. Route the cable as directly as possible into the next room, for example through an existing hole or a special cable entry.
Seal all points where the cable passes from outside to inside with suitable silicone. This keeps out not only moisture but also insects. A clean installation significantly extends the service life of your equipment.
Smart Home Setup and Configuration
Download the app specified by the manufacturer. Create an account if necessary. Switch on the camera. It will often be in setup mode, indicated by a flashing LED light.
Follow the instructions in the app. Usually, you will need to scan a QR code with the camera or select the device in your Wi-Fi network. Use a strong password for your camera account and home network.
Once connected, configure the essential settings. These include video quality (e.g. 1080p), activation times and motion detection sensitivity. The latter is important for minimizing false alarms caused by cats walking past.
“Camera default passwords are an open secret online. Don’t just change the app password; where possible, also change the login details for the camera’s firmware itself. That is the best protection against unauthorized access.”
Set Up Motion Detection and Notifications
Define a detection area. In the app, you can often draw a virtual fence or zone. Only movements within this area will then trigger a recording or push notification on your smartphone.
Adjust the sensitivity. Start with a medium setting. Monitor which events are recorded over several days. Then fine-tune the settings to filter out things such as moving leaves or shadows.
Schedule activation times. You may need higher sensitivity at night than during the day. Alternatively, you can turn off notifications during the times when you regularly work in the yard yourself.
Additional advice
Use your camera app’s test function. Ask a family member to walk through the monitored area while you adjust the settings. This lets you see live how changes to the sensitivity and detection zone take effect and helps you find the optimum configuration.
Maintaining Your Cameras and Protecting Your Privacy
Clean the camera lens regularly. Fine dust and cobwebs reduce image quality, especially at night. Use a soft, dry microfiber cloth.
For battery-powered cameras, check the charge level in the app and recharge them in good time. Battery performance can decline in extremely cold winter temperatures. Plan shorter charging intervals in that case.
Update your cameras’ firmware. Manufacturers release updates that close security vulnerabilities and add new features. Enable automatic updates in the app if available.
Legal Requirements for Private Video Surveillance
Inform third parties. If areas where delivery drivers or tradespeople work are being recorded, you must inform them. A small, clearly visible “Video Surveillance” sign at the property boundary or entrance fulfills this requirement.
Delete recordings regularly. Store recordings only for as long as necessary for security purposes. For many incidents, this means just a few days. Set up automatic deletion after 7 or 14 days in the app.
Protect your login details. Use strong, unique passwords for your camera app and home Wi-Fi. Two-factor authentication, if offered, provides an additional layer of security. Your security system should not become an entry point for attackers.
You can also find more useful products for a secure home in our Workplace Safety & Security category. For all kinds of work around the home and garden, it is worth taking a look at our Garden Tools section. And if you are looking for more technical devices for your smart home, browse our extensive Shop.
Conclusion: Feel Safer in Just a Few Steps
Installing a security camera is a manageable DIY project. The key is preparation: choosing the right location, selecting the right technology and carrying out careful installation. Products such as the outdoor digital security camera or the set provide a solid foundation.
Setting up a camera via a smartphone app is intuitive nowadays. Take the time to fine-tune motion detection and notifications. This maximizes the benefits and minimizes false alarms.
Don’t forget the legal and technical security aspects. A warning sign and secure passwords are part of responsible use. With a correctly installed camera, you can create an effective part of your home security system.
You can also find suitable tools in our Power Tools category. To protect your other valuables in the garden, take a look at Garden Equipment.
Frequently Asked Questions
- Do I need a power outlet for a security camera?
- Not necessarily. Many modern cameras are battery-powered and only need recharging every few months. Other models require a power outlet or PoE (Power over Ethernet), which delivers power and data through a single cable. The deciding factor is whether you prefer the flexibility of a wireless setup or a permanent power supply without charging cycles.
- Can I point my security camera at the street or sidewalk?
- No. Recording public roads or someone else’s property can create data-protection issues and may result in legal action. Position your camera so that it only monitors your private property, such as your driveway, patio or front door. The recording area should be clearly limited to your property.
- Which is better: a Wi-Fi camera or a wired system?
- Wi-Fi cameras are easy to install and flexible, but they can be unstable when network reception is poor. Wired systems, such as Ethernet (LAN), offer maximum reliability, high data rates for the best image quality and often PoE. For a permanent, critical outdoor location, a wired connection is often the more robust choice.
- Can I view my security camera at night?
- Yes, almost all outdoor cameras and many indoor models have infrared night vision. It activates automatically in darkness and delivers black-and-white but clear images several meters away. When buying, check the specified night-vision range. Strong backlighting, such as a streetlight in the image, can interfere with the function.
- Where is the safest place to store my camera recordings?
- Storing them locally on a microSD card in the camera is simple but risky if the camera is stolen. Cloud storage provides access from anywhere and protects against physical loss, but often costs a monthly subscription. A third, highly secure option is storing recordings on your own NAS (network-attached storage) within your home network, independently of external services.
You may also be interested in
- Smart Home Security: How to Use Security Cameras Correctly
- Home Surveillance with IP Cameras: Keep an Eye on Your Home
- Security Cameras for Your Home: Keeping Safety in Focus
- Security Camera Test & Comparison 2026
- Protecting Your Home from Burglary: Tips and DIY Measures
- Secure Your Front Door: Choosing and Installing Locks