
In brief: You install a toilet by first removing the old toilet properly and preparing the surface. Then you fit the toilet tank, secure the toilet bowl to the floor plate and connect it tightly to the waste pipe. Finally, connect the water supply and test the flush. Precise alignment and completely watertight connections are essential for a toilet installation that works reliably over the long term.
How to Install a Toilet: Step-by-Step DIY Guide
Installing a new toilet is a classic DIY project. You save money and gain valuable experience. This guide takes you precisely through every step of the toilet installation. You will learn what to prepare and how to avoid mistakes.
We begin with planning and finish with a function test. A well-prepared workspace is half the job. Lay out all parts and tools before you start.
What do you need before installing a toilet?
First, get the right toilet. Pay attention to the dimensions and type of waste outlet. Floor-mounted or wall-hung toilet? This decision affects the installation setup. Measure the distance from the center of the wall to the waste pipe. This is the rough-in measurement.
You need the right tools for the installation. A sturdy work surface is helpful. A
gives you the space you need to sort and work on all the parts.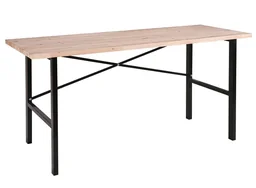
Important note
Shut off the main water supply before starting. Empty the old toilet tank completely. Have cloths ready to absorb any remaining water. Never work on a pressurized water line.
Make sure the new trap and all seals are included. They are often supplied with the toilet. Missing parts can significantly delay the installation.
Choosing the right tools
A
often contains basic screwdrivers and wrenches. However, plumbing work requires specific tools. Tongue-and-groove pliers are essential for the connections.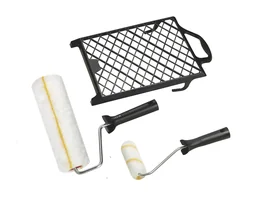
A level ensures a straight installation. A sealant scraper removes old silicone without leaving residue. For drilling into the wall or floor, you need a drill with a set of masonry bits.
How do you remove the old toilet?
Start with the toilet tank. Disconnect the water supply. Loosen the supply hose. Remove the mounting screws from the wall or cabinet. Carefully lift off the tank.
Now remove the bowl. Take off the caps covering the mounting hardware. Loosen the nuts. The bowl is often secured to the floor with silicone. Carefully cut through the joint with the sealant scraper.
Never use brute force when loosening old mounting hardware. Treat rusty nuts with rust remover first. This prevents the threaded studs from breaking and saves you a lot of trouble.
Lift the bowl straight up. Watch out for any water left in the trap. Set the old toilet aside. Now thoroughly clean the connection point on the floor. Remove old sealant residue and dry the surface.
Preparing the waste connection
Check the condition of the waste pipe. Is it clean and free of cracks? The trap must be intact. Insert an old newspaper as a temporary plug. This prevents unpleasant odors while you work.
Test-fit the new trap or connector. Do the diameters match? If necessary, get an adapter. You can find all the parts you need for sealing in our Plumbing + Irrigation category.
How do you install the new toilet tank?
For a floor-mounted toilet, you often install the bowl first. With a wall-hung toilet or an in-wall tank, installation starts with the tank. Follow the manufacturer's installation instructions carefully.
Mark the mounting holes. Use the level. Drill the holes and insert the wall anchors. Screw the bracket firmly in place. The tank must be completely secure.
Pro tip
Attach the support frame for wall-hung toilets directly to the load-bearing wall, not to the tile covering. Use special long-shank wall anchors for this. The load of a filled toilet is considerable and requires a stable hold.
Install the toilet tank. Secure it with the supplied screws. Tighten the screws evenly and do not overtighten them. Overtightening can damage plastic parts.
Installing the toilet tank plumbing
Now connect the water supply. A flexible stainless steel hose is the best choice. Hand-tighten it to the angle-stop outlet and the tank inlet. Then tighten the union nuts another quarter turn with the tongue-and-groove pliers.
Avoid kinks in the supply hose. Pay attention to the flow direction. An arrow on the hose shows it. The right hose is an important part of the toilet installation.
How do you install the toilet bowl?
Carefully place the bowl on the floor plate. Align the outlet over the floor pipe. Slide the bowl into position so that the mounting studs pass through the holes in the bowl base.
Place the seal between the bowl and the waste pipe. It is usually a tapered rubber seal. Press the bowl firmly and evenly downward until it is fully seated.
Now secure it in place. Put the washers on the studs. Screw on the nuts. Tighten them alternately and slowly. The bowl must not rock or be under tension.
The biggest source of errors is a crookedly mounted bowl. Check the alignment with a level after tightening each nut. A crooked toilet is not just an optical problem; it can also leak.
Put the decorative caps on the nuts. They often simply snap into place or are secured with adhesive. The toilet is now mechanically secured.
Connecting the toilet tank
Connect the bowl and tank using the flush connector. On floor-mounted toilets, this is often a short plastic pipe with rubber sleeves. Slide the sleeves over the ends.
Hand-tighten the union nuts. The same rule applies here: do not use force. The seal is created by the compressed rubber rings, not by the tightening force of the nut.
How do you connect the toilet to the water supply?
Slowly open the angle valve. Immediately check all the connections you have just made for drips. Pay particular attention to the inlet connection to the cistern and the flush pipe connector.
Fill the cistern. Adjust the water level using the float. A line inside the cistern usually marks the maximum level. The mechanism must be able to move freely.
Additional advice
Test the flush several times before permanently sealing the bowl. Observe the drain. Does the water drain quickly? Are bubbles forming in the siphon? This helps you identify air locks or blockages at an early stage.
Fix any leaks immediately. If water drips from the inlet, tighten the connection slightly. A small turn is often enough. If the problem persists, replace the sealing rings.
Final moisture seal
Once the test has been completed successfully, seal around the base of the toilet. Use sanitary-grade, fungicide-treated silicone. Remove any dust and dry the joint.
Apply an even bead of silicone. Smooth it immediately with a joint smoother or a damp finger. The result should be a smooth, water-repellent joint. Allow the silicone to cure according to the manufacturer's instructions.
For all your other bathroom projects, find inspiration and accessories in our bathroom shop.
Which mistakes should you avoid when installing a toilet?
The most common mistake is a leaking connection to the drain pipe. The seal must sit correctly and must not be pinched. Always fit it on the correct side of the adapter.
Overtightening the fixing can crack the porcelain base. Porcelain is hard but brittle. Work carefully. The nut must be secure, but you must not apply excessive pressure.
Do not forget to remove the protective film from ceramic parts. It prevents the silicone from adhering. Remove it completely before gluing or sealing.
After installation: initial use
Flush the toilet several times. Can you hear any unusual noises? Hissing or gurgling may indicate an incorrectly ventilated siphon. The water level in the siphon should remain stable after flushing.
After a few hours, wipe all the connections dry again. This will show you whether moisture is slowly developing. A dry environment is the best sign of a successful installation.
For garden projects requiring similar DIY skills, take a look at the Garden + Outdoor category. There you will find tools and materials.
Conclusion: installing a toilet as a rewarding DIY project
Installing your own toilet not only saves money. It also gives you the confidence that the work has been carried out carefully. Every step can be planned and completed with patience.
Follow the correct order: remove the old toilet, prepare the area, install the new cistern, position the bowl, connect it and seal it. With the right tools, such as a or , you can also handle firmly secured connections.
A successfully installed toilet will last for many years. You have not only installed a bathroom fixture, but also gained valuable experience for your next DIY project. For future projects, you will find everything you need in our large shop.
Frequently asked questions
- What tools do I need to install a toilet?
- You need an adjustable wrench or open-ended spanner for the fixing nuts, water pump pliers for the flexible hoses, pipe wrench, seal cutter, spirit level, a drill with a masonry bit for the wall plugs, silicone and a caulking gun. A toilet installation kit is often included. You can find specialist tools in our power tools category.
- How do I properly seal the joint between the toilet and the floor?
- After tightening the fixing bolts, seal the joint between the toilet base and the floor tiles with sanitary-grade, mould-resistant silicone. Do not fully tighten the bolts until you have accurately levelled the toilet with a spirit level. Apply the silicone evenly and smooth the joint with a joint smoother or damp finger for a neat finish.
- What should I do if the drain pipe does not fit the new toilet?
- Adapt the connection using a suitable transition fitting, such as a reducer or coupling. Measure the pipe diameter accurately. Special adapters are available for cast-iron and plastic pipes. The seal must always be inserted into the adapter, not fitted onto the pipe. If the difference is substantial, consult a plumbing professional to prevent leaks.
- Why does my newly installed toilet keep running?
- Water continuing to run indicates a faulty or incorrectly installed cistern mechanism. Check the float and valve. The flush valve in the cistern often fails to close properly because the rubber seal is misaligned or has limescale deposits. Remove and clean the mechanism. Replacement parts are available in the plumbing section.
- Can I install a toilet on tiled flooring?
- Yes, this is the standard situation. Carefully drill the holes for the wall plugs through the tiles with a masonry bit to prevent chipping. Mark the points with masking tape. Start drilling at low speed without impact. Use special tile plugs or long-shank plugs that anchor securely in the masonry behind the tiles.
You may also be interested in
- Build Your Own Composting Toilet: Simple Instructions
- How to Install a TV Wall Mount: A Clear Step-by-Step Guide
- Build Your Own Drywall Partition: Step-by-Step Guide
- How to Plaster Walls: Step-by-Step Guide for DIYers
- How to Install an Exterior Door: Step-by-Step Guide for DIYers
- Blocked Toilet: How to Fix the Problem and Prevent It Effectively