
In brief: When you insulate a roller shutter box, seal leaky joints airtight and fit correctly sized thermal insulation to the inner surfaces, inspection cover, and openings. Check the winder, shaft, and shutter curtain beforehand. This reduces drafts, heat loss, and heating costs without obstructing maintenance or the movement of the roller shutter.
Insulating a roller shutter box is one of the most effective small upgrades you can make during a renovation. An uninsulated or leaky box sits directly above the window and connects the interior with the outside air. Heat escapes through joints, strap openings, and thin covers, cold air flows in, and the heating has to work harder.
Why should you insulate the roller shutter box?
Roller shutter boxes in older buildings often have only a thin wood, plastic, or particleboard panel. The cavity houses the shaft, but many designs do not provide sufficient thermal or airtight insulation. Boxes above windows on the weather side of the building or windows that are opened frequently are particularly problematic.
Poor insulation first becomes noticeable through a cold interior surface. If the surface temperature drops significantly, moisture can collect on the wall or inspection cover. If the area remains damp for a long time, the risk of mildew and mold around the window reveal increases.
Even small leaks can have an impact. Air enters the room around the cover, strap, or side connections. This draft reduces comfort, spreads dust, and forces the heating system to constantly compensate for heat loss. If you want to save energy, you should therefore consider the roller shutter box together with window seals and radiators.
Expert tip
Check the roller shutter box on a cold, windy day. You will detect drafty areas much more quickly than in mild weather. Mark each joint with a small piece of masking tape before opening the cover.
Insulation is not a substitute for a faulty roller shutter. If the shutter curtain sticks, the strap is frayed, or the shaft is rubbing, the mechanism must be made to work properly first. An insulation panel must never obstruct the path of the shutter curtain, the shaft, or access to the inspection opening.
How can you detect drafts around the roller shutter box?
Start with a visual and tactile inspection. Lower the roller shutter fully, turn on the heating, and slowly move your hand along the edges of the box. In strong winds, even a thin strip of paper is often enough to show air movement at a leaky spot.
Which areas should you check?
Carefully open the inspection cover and photograph the construction. This will help you see later where insulation can be fitted and which cables, brackets, or fasteners must remain accessible. Pay particular attention to these areas:
- Inspection cover: Look for missing seals, warped edges, and widely spaced screws. A cover can be firmly closed and still let air through.
- Strap opening: The strap often runs directly into the box. A large gap around the opening creates noticeable drafts.
- Side connections: Open joints often appear between the box, masonry, and window frame after repairs.
- Underside and inner surface: Thin panels cool down quickly. Cracks, loose adhesive, or damp areas indicate that action is needed.
- Winding shaft and shutter curtain: Check that there is enough clearance for movement. Contact leaves abrasion marks and can damage the roller shutter.
How can you tell a draft from a cold surface?
A cold surface feels unpleasant even when no air is actually moving. Hold a narrow strip of paper against the joint. If it moves, there is a leak. If it remains still, the surface may be losing heat through the material even though the box is airtight.
A smoke test can reveal small leaks, but it should only be carried out with a suitable incense stick and great care. Never hold smoke near open flames, electrical components, or flammable insulation. With electric roller shutters, turn off the power before working near cables.
Important note
Do not cover any ventilation, drainage, or inspection openings. Moisture must be able to escape from the box, and access to the shaft must remain available. If you find mold, wet masonry, or damaged cables, stop work and have the cause professionally inspected.
“Roller shutter boxes are typical thermal bridges in the building envelope and should be checked particularly carefully during an energy-efficiency renovation.”
For window or door joints outside the box, a cut-to-size can be a quick addition. It reduces drafts along the bottom edge but does not replace insulation inside the roller shutter box. Treat the two measures separately so you can address the actual cause directly.
Which insulation fits inside a roller shutter box?
Choose insulation to suit the space available, rather than using the thickest panel possible. The roller shutter curtain must wind freely around the shaft, and you must still be able to remove the access panel later. A panel that is too thick won’t help if it touches the mechanism or presses against the panel.
You can buy pre-formed roller shutter box insulation kits made from flexible foam, or cut panels from suitable insulation materials to size. Flexible pieces adapt to curved interior surfaces. Rigid panels work well on straight surfaces, but need precise cuts and enough clearance from the shaft.
What properties should the material have?
- Good fit: The insulation should cover as much of the interior surface as possible without protruding into the path of the roller shutter curtain.
- Flexibility: Slightly flexible material is easier to fit around corners and uneven surfaces.
- Moisture resistance: The insulation must not swell or lose its shape if occasional condensation occurs.
- Surface compatibility: Adhesives and sealing tapes must be suitable for plastic, wood, metal and the existing surface.
- Fire safety: Follow the manufacturer's instructions and building regulations. Insulation must not improperly enclose cables or safety-related components.
Mineral wool and loose-fibre insulation are often impractical near moving parts. Fibres can get into the mechanism, and loose material won’t reliably stop draughts. Use a product designed for roller shutter boxes or similar cavities.
To choose the right insulation, take three measurements: the internal width, internal height and usable depth. Also measure the clearance to the shaft and to the roller shutter curtain when fully wound up. Note whether the box is straight, sloped or interrupted by cables.
Additional advice
Make a cardboard template before cutting the insulation. Place it inside the open box, test the roller shutter and adjust the edges as needed. This helps avoid costly offcuts and reveals any brackets in the way before you apply adhesive.
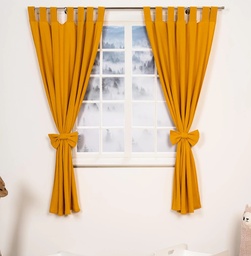
Curtains can also make the area around a window feel warmer by reducing cold radiation and light draughts. can add a decorative layer to your window, but won’t replace an airtight seal or insulation inside the box. Leave enough space in front of the radiator for warm air to circulate.
How do you insulate a roller shutter box step by step?
Allow half a day to a full working day to insulate a standard box that’s easy to access. The time needed depends on how the panel is fixed, the condition of the surface and the shape of the box. Have your insulation, sealing tape, suitable adhesive, utility knife, tape measure, screwdriver, brush and torch ready.
For tools and additional repair materials, browse the Operating Supplies section. Protect the floor, windowsill and furniture from dust and adhesive residue with suitable materials, such as those in the Tarpaulins + Nets section.
Which steps help you insulate a roller shutter box effectively?
- Position the roller shutter: Lower the curtain fully or move it to the position the manufacturer recommends for maintenance. If it has an electric drive, switch off the power before working near cables or connections.
- Open the panel: Loosen the screws evenly and put them in a small container. If the panel is stuck, don’t force a tool against the window frame. Carefully cut through old paint with a knife.
- Clean the interior: Use a brush and vacuum cleaner to remove dust, loose adhesive and crumbling seals. The surface must be dry, sound and grease-free. If you find moisture, identify the cause instead of simply waiting for it to dry.
- Make a template: Trace the inside contours onto cardboard. Account for brackets, the belt guide, cables and the path of the wound-up curtain. Check the template by carefully turning the shaft.
- Cut the insulation: Use a sharp utility knife to cut the insulation to size. Butt joints can fit closely, but must not extend into the moving area. Don’t compress the material so much that it loses its insulating performance.
- Secure the insulation pieces: Use only adhesive or tape that’s suitable for both the insulation and the surface. Secure the larger pieces first, then fit the smaller pieces around the edges. Let the adhesive cure according to the manufacturer's instructions before closing the panel.
- Seal the joints: Seal fixed joints between the panel and masonry with suitable sealing tape or permanently elastic sealant. Keep the access panel removable. Fit the belt opening with a suitable brush seal or other sealing solution, ensuring the belt can still move freely.
- Test operation: Open and close the roller shutter several times. Listen for scraping, jerky movement or unusual resistance. If the curtain catches, remove the insulation and adjust the cut.
Don’t apply highly expanding construction foam directly to the shaft, belt or access panel. Foam can stick moving parts together, deform components and make future access more difficult. A controlled application of sealant is usually better for small, fixed joints.
Once all the insulation pieces are secure, screw the cleaned panel firmly back into place. Tighten the screws evenly to prevent the panel from warping. Then check for draughts again with the strip of paper and reseal only where air is actually getting through.
What should you check after insulating?
A warm-feeling box alone doesn’t mean it’s well insulated. Check that there are no drafts, the roller shutter moves smoothly, and the access panel is airtight. Inspect the installation after the first cold evening and again after several heating seasons.
Which checks are useful after renovating?
- Air leaks: Check the panel, belt opening, and side gaps again. The strip of paper shouldn’t move noticeably anywhere.
- Mechanics: Raise and lower the roller shutter all the way. Scraping, cracking, or a crooked shutter curtain may indicate insufficient clearance or damaged mechanisms.
- Moisture: Check the inside surfaces and the adjacent window reveal. New moisture may indicate a structural problem or inadequate ventilation.
- Room comfort: Compare the temperature near the window with that near other exterior walls. A more even surface temperature and less cold air near the floor indicate that the insulation is working.
How much energy you save depends on the size of the box, its condition before insulation, your heating system, and the local climate. A single dollar estimate would be misleading. Compare energy use before and after insulating during periods with similar weather, or have a professional assess the heat loss.
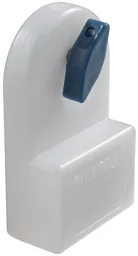
Pair this project with a few small jobs on your heating system. With you can quickly bleed radiators that gurgle or are only warm in some spots. This helps them heat more effectively, so you won’t need to turn up the thermostat because they haven’t been bled properly.
Find more useful tools in our shop. Check that each product is suitable for the part of the building where you plan to use it. A weatherstrip goes on a door or window, a curtain hangs in front of a window, and roller shutter box insulation goes inside the accessible box.
“An airtight building envelope reduces uncontrolled heat loss and improves living comfort.”
To insulate a roller shutter box, follow this order: identify the cause, take measurements, leave room for the mechanism, fit the insulation precisely, and seal all fixed gaps. This helps stop drafts, reduce heat loss, and provide a reliable starting point for other energy-saving improvements.
Frequently Asked Questions
- How much can insulating a roller shutter box save on heating costs?
- Savings depend on the box’s size, age, airtightness, and heating system. A leaky box causes ongoing heat loss, especially on cold days. Properly fitted insulation reduces this loss and makes the room more comfortable. A reliable dollar estimate requires an inspection or measurement.
- What type of insulation is best for a roller shutter box?
- Flexible insulation made for roller shutter boxes works well because it conforms to the sides, cover, and access area. Choose a material that fits the box dimensions and leaves enough room for the shutter curtain. Rigid panels must not touch the roller shaft or block access for maintenance.
- Can I insulate a roller shutter box myself?
- Yes, if the box is accessible and the roller shutter moves smoothly. You’ll need accurate measurements, suitable insulation, sealing tape, and tools. Work carefully around the access panel and belt opening. If you find moisture, damaged mechanisms, mold, or an unusual construction, have a professional inspect the box.
- How do I stop drafts from a roller shutter box?
- First, find the leak with a thin strip of paper or a smoke test. Seal gaps, the panel, and the belt opening, then fit insulation inside the box. Check that the roller shutter still moves freely. Weatherstripping helps on doors and windows, but it doesn’t seal the inside of the box.
- Should I hire a professional to insulate the box?
- You can often insulate an accessible, standard box yourself. Hire a professional if the box is damp, the roller shutter sticks, the shaft appears damaged, or the insulation could affect structural integrity or fire safety. A professional inspection for thermal bridges may also be worthwhile if you have several boxes.
You might also be interested in
- Insulate a radiator recess to save on heating costs
- Lower heating costs with roller shutters and curtains
- Insulate pipes for winter: Prevent freezing and save on heating costs
- Insulate your home yourself: DIY tips and instructions
- Insulate your roof to save on heating costs and improve comfort
- Blown-in insulation: Insulate efficiently and save on heating costs