
In brief: The easiest way to propagate oleander is from cuttings. Take a roughly 15 cm semi-hardwood shoot in spring or summer. Remove the lower leaves and place the cutting in a glass of water or directly into moist seed-starting mix. Roots form within a few weeks. This method produces new plants that are true to the parent plant.
How to Propagate Oleander: Why Cuttings Are the Best Method
Would you like to grow more of your favorite oleander or share a piece of your Mediterranean garden with a friend? Propagating it from cuttings is the fastest and most reliable method. Each cutting produces a genetic copy of the parent plant, with the same flower color and growth habit.
Unlike growing from seed, you save years of growing time. A rooted cutting may even flower the following season. You only need a few garden tools and a little patience to propagate this plant.
The process is simple enough for beginner gardeners. We’ll show you every step.
Propagating oleander from cuttings takes advantage of its remarkable ability to regenerate. Every small piece of tissue has the potential to become a new plant—we simply need to provide the right conditions.
Which Tools and Materials You Need
Gather everything before you start. This saves time and improves your chances of success. You’ll need a sharp, clean cutting tool. A special is ideal for making clean cuts on semi-hardwood shoots.
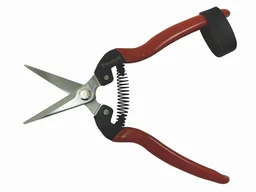
Blunt blades can crush plant tissue and create an entry point for fungi. Disinfect the blade with alcohol before cutting. To root the cutting, you’ll need seed-starting pots, a well-draining growing medium and, optionally, rooting powder.
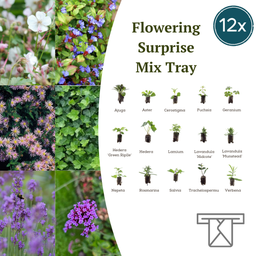
A set like the gives you different ways to experiment with propagating plants from cuttings. Also have a watering can with a fine rose and clear containers ready if you plan to root cuttings in water.
Important note
All parts of oleander are poisonous. Wear gloves when handling cuttings and avoid contact with the milky sap. Wash your hands and clean your tools thoroughly after use. Keep cuttings and plants out of reach of children and pets.
The Right Soil and Ideal Location
Oleander cuttings need a loose, low-nutrient, sterile growing medium. Mix seed-starting soil with sand or perlite at a 1:1 ratio. The mix retains moisture while letting excess water drain away, which helps prevent rot.
Choose a bright spot out of direct midday sun. A temperature of 20 to 25 degrees Celsius is ideal. High humidity encourages roots to form. You can create a humid environment with a clear plastic cover or a mini greenhouse.
Find everything you need to care for young plants in our Garden + Plant Accessories category.
How to Take the Perfect Cutting
The quality of the cutting can make or break your success. Choose a healthy, vigorous parent plant with no signs of disease or pests. The ideal shoot is from the current year, semi-hardwood and about as thick as a pencil.
Semi-hardwood means the base of the shoot has started to turn brown and woody, while the tip is still green and soft. Take a cutting 10 to 15 cm long, making the cut just below a leaf node.
Remove all the leaves from the lower third of the cutting. Leave only the top two or three pairs of leaves. You can cut large leaves in half to reduce water loss. Take care not to damage the dormant buds in the leaf axils.
Pro tip
Take cuttings early in the morning, when the plants are well hydrated and full of energy. Always use a sharp knife rather than scissors. A clean knife cut damages the tissue less than a crushing cut. Dip the cut end in water immediately to stop the sap from flowing.
Rooting in Water vs. Rooting in Soil
You can choose between two tried-and-tested methods. Rooting in water is easy to observe. Place the prepared cutting in a glass of room-temperature, soft water. Change the water every few days to prevent algae and rot.
Rooting in seed-starting soil takes a little more care but is closer to natural conditions. Insert the cutting 2 to 3 cm deep into the prepared, moistened growing medium and gently firm the soil around it. Both methods work reliably.
For the right nutrients once your young plants are growing, browse our range of Plant & Flower Fertilizer.
I recommend rooting cuttings in soil. The roots that form this way are sturdier and better adapted to their growing medium than the often brittle roots that develop in water. This also makes transplanting less stressful for the young plant.
Caring for Cuttings Until They Root
Patience is essential at this stage. Keep the growing medium evenly moist, but never waterlogged. Too much water is the most common cause of failure. Mist the cuttings and soil regularly with soft water to maintain high humidity.
Vent the cover for a few minutes each day to prevent mold. After four to six weeks, you should see the first signs of success. With water propagation, you’ll see white roots. With the soil method, new leaf growth indicates that roots have formed.
Gently tug on the cutting to check whether it has rooted firmly in the growing medium. If you feel clear resistance, it has rooted successfully.
Additional advice
For difficult varieties or to speed things up, use a rooting hormone (rooting powder). Before planting, briefly dip the moist cut end of the cutting into the powder and tap off any excess. These hormones stimulate cell division and can shorten the time it takes for roots to form.
Repotting and Further Care of Young Plants
Once enough roots have formed, repot the young oleander. Choose a small pot with a drainage hole. You can now use regular, well-draining compost for container plants. Oleander also tolerates heavier, loamy soil.
Carefully place the root ball in the pot and fill in around it with compost. Water thoroughly. Keep the plant in a bright, warm spot. Once it is growing strongly, you can start feeding it with a weak liquid fertilizer.
During its first summer, you can place the young oleander outdoors in a sheltered spot. Gradually acclimatize it to full sun. For practical watering aids during the growing season, visit the Garden Watering category.
How to Overwinter Young Oleanders
Successful propagation is just the first step. A young oleander’s first winter is critical because it is more sensitive to frost than an established plant. Prepare to overwinter it as soon as nighttime temperatures fall below 5 degrees Celsius.
The ideal winter spot is bright and cool, with temperatures between 2 and 10 degrees Celsius. A frost-free greenhouse, sunroom or bright basement is suitable. Water sparingly over winter—just enough to keep the root ball from drying out completely.
Do not fertilize while the plant is dormant. Check it regularly for pests such as scale insects and spider mites, which can thrive in dry indoor air. In spring, once the last nighttime frosts have passed, gradually acclimate the plant to outdoor conditions.
Common Problems and How to Fix Them
Cuttings rot at the base: This usually means the growing medium is too wet and lacks oxygen. Use a better-draining mix next time and water less. Cuttings wilt: Humidity may be too low, or the sunlight too intense. Shade the cuttings or increase humidity by covering them.
No roots after several weeks: The temperature may be too low. Add bottom heat, for example with a heated propagation mat. New shoots emerge but then die back: This may indicate a fungal infection. Use only clean pots and fresh growing medium, and remove affected cuttings immediately.
Our Pest and Plant Protection section offers solutions to help protect your plants from disease.
From Young Plant to Magnificent Container Plant
With the right care, your home-grown oleander can become an impressive container plant in just a few years. Repot it in spring every two to three years, each time moving it to a slightly larger container. Pruning in early spring encourages bushier growth.
Oleanders are heavy feeders. From April to August, fertilize weekly with a fertilizer for flowering plants. In summer, choose a warm, sheltered spot in full sun. Water generously with hard tap water, but do not let water sit in the saucer.
With this care, your oleander will reward you with masses of flowers from June to September. You will save money and build a personal connection with this Mediterranean beauty.
Frequently Asked Questions
- When is the best time to propagate oleander?
- The best time to propagate oleander is during the warm months from May to August. The plants are actively growing then, so cuttings root fastest. A bright, warm spot out of the intense midday sun helps. Avoid propagating in fall or winter, when low light and cooler temperatures can significantly slow growth.
- Can I grow oleander from seeds?
- Yes, you can grow oleander from seeds, but it is not recommended for home gardeners. Seed-grown oleanders often do not come true to type and may have different flower colors or growth habits from the parent plant. Growing from seed also takes longer and is less reliable. Cuttings, on the other hand, produce an exact copy of your favorite plant.
- Why aren't my oleander cuttings growing roots?
- Common causes include shoots that are too old or too soft, waterlogged growing medium, a spot that is too cold, or a fungal infection. Use only healthy, semi-ripe shoots. The growing medium should be moist but not soggy. A clear cover or mini greenhouse increases humidity and can significantly improve your success rate.
- How long does it take an oleander cutting to root?
- In good conditions, the first roots appear in water after about two to four weeks. In propagation mix, rooting takes a little longer—around four to six weeks. The cutting is fully rooted once it has developed a dense network of roots and starts producing new leaves. Repot the young plant at that point.
- Do rooted oleander cuttings need extra protection during their first winter?
- Yes, young oleanders are more sensitive to frost during their first winter than established plants. Overwinter them in a bright, frost-free spot at temperatures between 5 and 10 degrees Celsius. A cool sunroom, bright stairwell or greenhouse is ideal. Water only occasionally to prevent root rot. From May onward, the young plants can go outdoors again.
You might also be interested in
- How to Propagate Monstera: Grow New Plants Step by Step
- Propagating Rosemary: An Easy Guide for Your Garden
- Propagating Orchids from Keikis: A Step-by-Step Guide
- How to Propagate Snake Plants: Easy Methods for New Plants
- Caring for Chrysanthemums: Tips for Beautiful Autumn Blooms
- Build Your Own Raised Bed: A Step-by-Step Guide to Growing Your Own Harvest