
In brief: Replace a filter in 5 steps: switch off the appliance, locate and remove the old filter, clean the housing, insert the new filter correctly and close the appliance. Regular replacement helps your appliance run efficiently and improves air or water quality.
Whether it’s in an air purifier, vacuum cleaner, water system or air conditioner, a filter works hard behind the scenes. It traps dust, pollen, pollutants and other impurities to help keep your home clean and healthy. But every filter eventually reaches capacity. Replacing it on time helps your appliance work properly and supports good air or water quality. With this guide, you can replace the filter yourself.
A reliable all-purpose option for a range of uses is the . Its durable construction and effective filtration make it a great choice for many workshop and household appliances. Choose the right replacement part to help extend the life of your equipment.
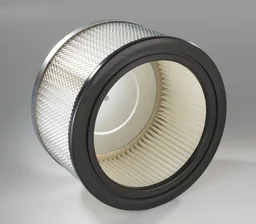
How can you tell when a filter needs replacing?
Your appliance gives you clear signs when its filter is full. You just need to know what to look for. A clogged filter makes the motor work harder, uses more energy and can shorten the appliance’s lifespan. Don’t ignore the warning signs.
Reduced performance
The clearest sign is a noticeable drop in performance. Your vacuum cleaner may struggle to pick up dirt, your air purifier may barely circulate air, or the water pressure from your water filter may drop. A clogged filter restricts airflow or water flow, reducing efficiency.
Unusual odors
A musty smell coming from your appliance is a warning sign. Organic particles, bacteria and mold spores can build up in the filter and smell unpleasant when exposed to moisture. This can mean it’s time for a replacement, especially in air conditioners and air purifiers.
Visible dirt
A quick look is often all it takes. A new filter is clean and light in color, usually white or pale gray. A used filter may be dark gray, black or brown, with a thick layer of dust and dirt. Check your filter regularly.
A filter is like an appliance’s lungs. When they become clogged, the machine can no longer breathe. Regular replacement is essential to keep your equipment running efficiently and extend its lifespan.
Appliance indicators
Many modern appliances monitor the filter for you. An illuminated LED, a message on the display or an audible alert will let you know when it needs replacing. Check your appliance’s manual to find out what each warning means.
Getting ready: What you need before replacing a filter
Good preparation makes the job easier. Before you start, gather all the tools and materials you need. This saves time and helps you avoid interruptions.
Make sure you have the right replacement filter. Each appliance requires a specific model. For air purifiers, for example, there’s the or, for specialty cooling towers, the . Check the model number in your user manual or on the old filter.
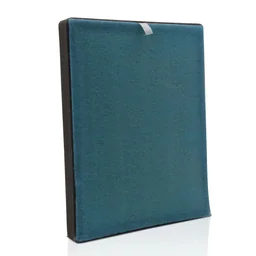
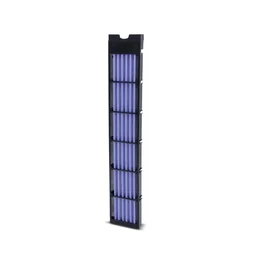
Use this checklist before replacing your filter:
- The correct replacement filter: Check that it’s compatible with your appliance.
- The appliance user manual: It shows where the filter is and how to open the housing.
- Tools: A basic screwdriver is usually enough. You may not need any tools.
- Protective gloves: Old filters can be full of dust and allergens.
- Soft cloth and a small brush: For cleaning the filter housing.
- Trash bag: To dispose of the old filter without spreading dust.
Important
Disconnect the appliance from the power supply before you start. For water filters, turn off the main water supply. Always put safety first.
How to replace a filter in 5 easy steps
Replacing a filter is usually simple and takes just a few minutes. Follow these five steps to get the job done.
Step 1: Prepare and secure the appliance
Unplug the appliance. If it has been running, wait a few minutes for moving parts to stop and hot components to cool down. Make sure the appliance is stable and that you can easily reach the filter compartment.
Step 2: Locate and remove the old filter
The filter compartment is usually behind a flap, grille or removable cover. Release the catches, clips or screws to open it. Before removing the old filter, check which way it’s fitted. A small arrow often shows the direction of airflow or water flow. Carefully pull out the old filter and put it straight into the trash bag to keep dust from spreading.
Step 3: Clean the filter housing
Before fitting the new filter, clean the empty compartment thoroughly. Use a dry or slightly damp cloth to wipe away dust and dirt. A soft brush can help remove stubborn buildup. A clean housing helps the new filter fit properly and keeps old contaminants from being drawn in.
Pro tip
Before removing the old filter, take a photo of how it’s fitted with your smartphone. Use it as a reference to make sure the new filter goes in the same way.
Step 4: Insert the new filter
Unpack the new filter and compare it with the old one to check that it’s the right model. Look for markings such as “front/back” or arrows showing the direction of airflow. Fit the filter into the clean compartment the right way around. It should click or slide into place easily—never force it.
Step 5: Restart and test the appliance
Close the filter compartment carefully and make sure all flaps and covers are secure. Reconnect the appliance to the power or water supply and switch it on. Check that it’s working properly; you should notice an improvement right away. If your appliance has a reset button for the filter indicator, press it as described in the instruction manual.
Why Is Regular Filter Replacement So Important?
Replacing a filter is more than just a tedious chore. It is an investment in your health, the lifespan of your appliances and the efficiency of your home. The benefits of replacing filters regularly are significant and should not be underestimated.
Protecting your health
The air and water contain countless particles that we cannot see but that can affect our health. High-quality filters such as the remove fine dust, pollen, pet hair, bacteria and viruses from indoor air. This is especially helpful for people with allergies and asthma. Clean water from fresh water filter cartridges also helps protect against contaminants and improves the taste.
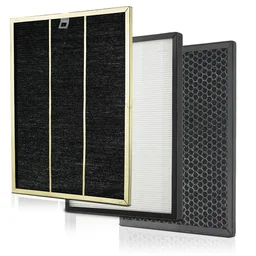
Extending the lifespan of your appliances
A clogged filter creates resistance. The motor of a vacuum cleaner, fan or pump has to work harder to force air or water through the blocked filter. This constant strain causes overheating and increased wear on mechanical components. A simple filter replacement can prevent costly repairs or premature failure of power tools and household appliances.
Additional advice
Write the date of the filter change directly on the new filter with a waterproof pen, or on a sticker attached to the appliance. This helps you keep track and ensures you don't miss the next replacement date.
Maximum efficiency and performance
An appliance can only deliver its full performance with a clean filter. That means stronger suction, better airflow and faster water flow. An appliance that runs efficiently also uses less energy, which can lower your electricity bill. Over time, you save money and help protect the environment.
When Is the Right Time to Replace Filters?
The answer depends on several factors. There is no universal rule, but there are clear guidelines you can follow. The manufacturer's instructions in the manual are always the most important reference.
How often you use the appliance matters. An air purifier in a smoker's home or a dusty hobby room needs a new filter every three months, while one in a clean bedroom may last a full year.
Factors affecting the replacement interval:
- Manufacturer's recommendation: This is the starting point. Replacement intervals are usually between 3 and 12 months.
- Usage: Does the appliance run around the clock or just a few hours a week?
- Environmental conditions: In homes with pets or smokers, near busy roads or in dusty workshops, filters need to be replaced much more often.
- Filter type: Simple foam pre-filters last longer or can be washed, while complex HEPA or activated carbon filters have a limited lifespan.
How to Dispose of Old Filters Properly
An old filter has done its job and is full of particles removed from your surroundings. Proper disposal is the final step in a successful filter replacement. Don't just toss the old filter carelessly.
Seal the used filter securely in the trash bag you have prepared. This keeps the collected dust and dirt from getting back into your indoor air. In most cases, used household air or water filters belong in the trash. They can't be recycled because they are contaminated with a mix of different substances. Different regulations may apply to special filters from commercial supplies. If you're unsure, contact your local waste management service.
Frequently Asked Questions
- How do I know when it's time to replace a filter?
- Look for reduced performance, unusual smells or noises from the appliance. Many modern appliances also have a filter replacement indicator. A filter that is visibly dirty or discolored is another clear sign that it needs replacing.
- Can I clean a filter instead of replacing it?
- Some filters, such as coarse foam pre-filters, can be washed. However, most fine filters, HEPA filters and activated carbon filters are disposable. Trying to clean them can damage their fine structure and permanently reduce their filtration performance. Always check the manufacturer's instructions.
- What happens if I forget to replace the filter?
- Failing to replace the filter reduces performance and increases energy consumption. The appliance motor has to work harder, which can cause overheating and premature failure. Air or water quality also deteriorates significantly.
- Does it matter which way I install the new filter?
- Yes, the filter must be oriented correctly to work properly. Many filters have arrows showing the direction of airflow or water flow. An incorrectly installed filter can significantly reduce performance or even damage the appliance. Follow the markings on the filter and inside the appliance.
- Where should I dispose of my old, used filter?
- Used filters generally belong in your household trash. They are often contaminated with pollutants, dust and allergens and can't be recycled. To be safe, check the manufacturer's instructions or the requirements of your local waste disposal service.