
In brief: Build a stable home network by carefully planning the cabling. First, determine the central distribution point and the locations of the network sockets. Choose the right network cable, ideally Cat 7 for future-proofing, and run it through conduits or cable trunking. Connect the sockets and test every connection carefully for optimum performance.
Wi-Fi is convenient, but a solid wired setup is essential for a truly stable and fast home network. Choppy video calls when working from home, lag during online gaming and interruptions when streaming 4K content are a thing of the past with a wired network. You create a reliable foundation for your digital home and a high-performance smart home.
Running network cables may seem complex at first, but with the right planning and materials, it is a manageable project for any DIY enthusiast. We show you how to build your own home network—from choosing the right cable to completing the installation.
Why a wired home network is the best choice
Although modern Wi-Fi standards are becoming increasingly powerful, a physical cable connection offers significant advantages. It is the professional solution for anyone who values maximum performance and reliability.
Stability and reliability: No more Wi-Fi dropouts
An Ethernet cable transmits data without the interference that can affect Wi-Fi signals. Thick walls, reinforced concrete ceilings and your neighbours' wireless networks do not weaken the signal. The result is a consistently stable connection that does not suddenly drop out. This is particularly important for stationary devices such as a work PC, smart TV or games console.
Higher speeds for streaming and gaming
An Ethernet cable delivers the full speed available from your internet connection and local network. While Wi-Fi speeds are often theoretical maximum values that are rarely achieved in practice, a wired connection provides lossless, low-latency data transmission. This makes a difference when downloading large files, streaming high-resolution content and playing fast-paced online games.
Security: A closed system
A wired network is inherently more secure. Access is only possible through a physical connection. This makes external attacks on the network considerably more difficult, as an attacker would need direct access to the cable or a network socket. This protects your sensitive data more effectively than a password-protected Wi-Fi network.
Careful planning is essential. Deciding on the cable routes and socket locations in advance saves a lot of frustration and rework later.
Planning correctly: The foundation of your home network
Before running the first metre of cable, thorough planning is essential. Take the time to assess your needs and sketch out your network infrastructure. A good plan saves time, money and hassle later on.
Take stock: Which devices need to be connected?
Go through your house or flat and make a list of all devices that need a LAN connection. Typical examples include:
- Computers and laptops in a home office
- Smart TVs and streaming boxes
- Games consoles (PlayStation, Xbox)
- Network-attached storage (NAS)
- Smart home hubs or bridges
- Security cameras
- Network printers
Plan at least one double socket for each room, even if you currently only need one connection. Your requirements can grow quickly.
The central point: Position your router and switch intelligently
The ideal location for your router or a central network switch is a point from which all rooms are easily accessible. This is often the utility room, a storage room or the hallway. From here, all network cables run in a star configuration to the sockets in the individual rooms. This central distribution makes troubleshooting and future expansion much easier.
Additional advice
If your router does not have enough LAN ports, simply expand your network with a network switch. This device acts as a multi-port distributor and provides additional ports without affecting the speed.
Plan the cable routes
Consider how the cables will get from the central point to the sockets. In a new build, conduits are the best option. In existing buildings, there are other possibilities:
- Along skirting boards: Special skirting boards with an integrated cable channel discreetly conceal the cables.
- In cable trunking: Surface-mounted cable trunking is easy to install and routes cables neatly along walls or ceilings.
- Through suspended ceilings: Voids above the ceiling provide ideal space for routing cables.
- Drilling through walls: Cleanly drilled holes are necessary for the direct route from one room to another. Check the wall construction beforehand and make sure there are no cables or pipes running through the wall.
Which network cable is right for you?
Choosing the right cable is crucial for your network’s performance and future-proofing. Labels such as “Cat 7” or “S/FTP” may initially seem complicated, but they are easy to break down.
Cat categories explained
The “Cat” designation (short for category) describes the performance of a network cable. For a new installation, you should use at least Cat 6a, or preferably Cat 7, to be prepared for the future.
- Cat 5e: Older standard, sufficient for Gigabit Ethernet (1 Gbit/s). No longer recommended for new installations.
- Cat 6a: Supports up to 10 Gbit/s over 100 Meter. A good standard for demanding home networks.
- Cat 7/Cat 7a: Also designed for 10 Gbit/s, but with higher frequencies and better shielding. The best choice for maximum performance and longevity.
Shielding: U/UTP, F/UTP, S/FTP – what you need to know
Shielding protects the cable signal from electromagnetic interference, for example from power cables. The better the shielding, the more stable the connection. The abbreviations describe the cable’s construction:
- U/UTP (Unshielded Twisted Pair): Completely unshielded cable. Inexpensive, but susceptible to interference. Not recommended for permanent installation.
- F/UTP (Foiled Twisted Pair): Has an overall foil shield around all the wire pairs. Provides good basic protection.
- S/FTP (Screened Foiled Twisted Pair): Each wire pair is individually shielded with foil, with an additional overall braided wire shield. This provides the best protection and is standard for Cat-7 cables.
Important note
Never run network cables directly parallel to power cables over long distances in the same channel. Always maintain a certain distance or use separate conduit. Crossings are not a problem, but parallel runs can cause interference, even with well-shielded cables.
Rigid installation cables vs. flexible patch cables
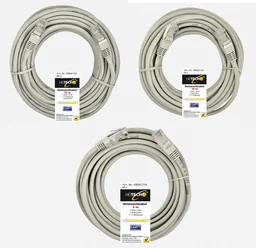
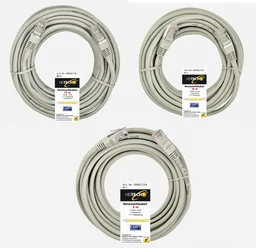
Use installation cables for permanent installation in walls or cable channels. They have a solid inner conductor and are optimised for connecting to network sockets and patch panels. Use flexible patch cables to connect your end devices (PC, TV) to the sockets. They are designed for frequent bending and come with plugs already fitted. We offer suitable lengths, such as the shielded 5m network cable
, the 10m network cable or, for longer distances, the 15m network cable .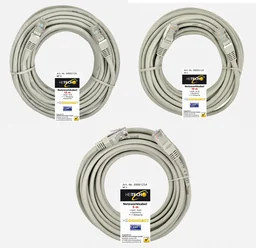
Running network cables: step-by-step guide
Once you have planned the installation and gathered the right materials, you can begin the actual work. Proceed systematically to avoid mistakes.
Tools and materials required
Make sure you have everything you need to hand. This includes:
- Installation cable in a sufficient length (allow for some spare)
- Network sockets (surface-mounted or flush-mounted)
- An LSA punch-down tool for connecting the wires to the sockets
- Wire stripper
- Drill and suitable bits from our range of power tools
- Pulling aid (draw wire) for conduit
- Network cable tester for checking the completed installation
- Cable ties for bundling the cables
Surface-mounted installation
This method is ideal for rented homes. Install cable channels or special skirting boards along the walls. Cut them neatly with a mitre saw. Insert the cable and close the channel. Route the cable to the surface-mounted network socket at the desired location.
Flush-mounted installation
For homeowners, concealed installation is the most elegant solution. If no conduit is already in place, you will need to cut channels into the wall. This work is time-consuming and creates a lot of dust. Once the conduit and cables have been installed, plaster over the channels again. Drill socket holes with a socket cutter and install the flush-mounted sockets.
Pro tip
Label both ends of every network cable with a clear identifier, such as “Living room socket 1”. This will save you a lot of guesswork and testing later when troubleshooting or connecting the cables to the central switch.
Connecting the sockets and testing the network
Once the cable has been installed, connect the wires to the network socket. Follow the colour scheme printed on the socket exactly (usually TIA-568A or B). Use the LSA punch-down tool to press each wire firmly into the insulation displacement connector. Once all sockets and the central patch panel are connected, check each individual connection with a network cable tester. This will immediately show whether all wires are connected correctly.
Smart home and home network: the perfect combination
A modern smart home depends on networking. Although many smart devices work via Wi-Fi, a cable connection is the more reliable foundation for central and data-intensive components. It ensures that your intelligent home runs smoothly and without delays.
Devices such as the control centre (bridge/hub), security cameras that continuously transmit video streams, or a central media storage device (NAS) benefit enormously from the stability and high data throughput of a LAN connection. A wired infrastructure ensures that commands are executed immediately and that your system remains responsive even when the network is under heavy load.
For security-critical smart home components such as cameras or the central control unit, a wired LAN connection is always the first choice. It is not only faster, but also significantly less susceptible to interference and attacks.
A well-planned home network is an investment in the future. It not only increases everyday convenience, but also the value of your property. With the right preparation, high-quality materials from our business supplies range and a little DIY skill, you can create a digital infrastructure you can rely on for many years to come.
Frequently Asked Questions
- Which network cable is best for home use?
- For most home applications, a Cat-6a or Cat-7 cable is the best choice. It offers high speeds of up to 10 Gbit/s and is future-proof for upcoming internet standards and data-intensive applications such as 4K streaming or large downloads. Make sure the cable has good shielding (S/FTP).
- Can you run network cables next to power cables?
- Avoid running network cables directly parallel to power cables over long distances. Electromagnetic interference can affect signal quality. Use well-shielded cables (S/FTP) and, where possible, keep a gap of a few centimetres between them or use separate cable ducts.
- Is a wired network faster than Wi-Fi?
- Yes, a wired network (LAN) is generally faster and more stable than Wi-Fi. It provides a consistent transfer rate without interference from walls or other wireless networks. For stationary devices such as PCs, smart TVs and games consoles, a LAN connection is always the superior option.
- What is the difference between a patch cable and an installation cable?
- Patch cables are flexible cables with connectors already fitted, which you use to connect end devices to a network socket. Installation cables are more rigid and designed for permanent installation in walls, ceilings or cable ducts. You fit network sockets or patch panels to their ends.
- Do I need a switch for a home network?
- Most routers have 3-4 LAN ports. If you want to connect more devices by cable than your router has ports for, you need an additional switch. It acts as a distributor and increases the number of available network ports in your home network.
You may also be interested in
- How to Install Cable Trunking Properly: DIY Tips
- How to Set Up a Wi-Fi Repeater: Easily Improve Your Home Network
- Which Cable for Home Wiring? How to Make the Right Choice
- Home Electrical Installation: Safe DIY Tips
- Wi-Fi Smart Plugs: Easily Upgrade to a Smart Home
- Understanding Smart Homes: A Guide to a Connected Home