
In brief: Wallpaper walls and ceilings in five key steps: prepare the surface, cut and paste the wallpaper strips, hang the first strip, align additional strips neatly and smooth the seams at the end. A dry, clean and smooth surface is essential for a perfect result. Work systematically away from the light source.
How to Wallpaper Walls and Ceilings: A Step-by-Step Guide
New wall and ceiling surfaces can transform the look of a room. Wallpaper adds texture, color and style. The job requires care, but no magic. This guide takes you through every step.
Why Is Preparation Everything?
The result of your wallpapering walls work depends 70 percent on preparation. An imperfect surface can ruin even the most expensive wallpaper. Old wallpaper, dust or cracks lead to bubbles, uneven seams and premature peeling.
Start by assessing the surface. Remove all old wallpaper completely. Do not soak non-woven wallpaper; peel it off dry instead. For paper wallpaper, water and wallpaper remover can help.
Important note
Mold or damp areas must be treated before wallpapering. Find and fix the cause of the dampness. Wallpapering over mold will only make the problem worse.
Once the wallpaper has been removed, smooth the surface. Fill holes and deep cracks with a suitable patching compound. For large areas, an electric sander is worthwhile. The final step is priming. Apply a bonding primer or deep-penetrating primer evenly. This layer binds dust, improves adhesion and regulates absorbency.
The time you invest in preparation will save you many times over when it comes to later repairs and frustration. A perfectly white surface is every wallpaper hanger’s dream.
How Do I Measure and Cut Wallpaper Strips Correctly?
Incorrectly cut strips waste materials and cause frustration. Measure the wall height from the baseboard to the ceiling. Add 5-10 centimeters at both the top and bottom for trimming. Place the wallpaper roll on the wallpapering table and mark the length of the first strip.
Cut with a sharp utility knife and a metal ruler. With patterned wallpaper, pay attention to the pattern repeat. This is the distance at which the pattern repeats. Each following strip must be cut so that the pattern matches at the seams. Always start at the same point in the pattern.
Pro tip
Number the backs of the cut strips with a pencil. Also mark which end is “top”. This prevents confusion and incorrect pasting, especially with patterned wallpaper.
The same applies when wallpapering the ceiling. Measure the room width at right angles to the planned wallpapering direction. Cut the ceiling strips with the same allowance for trimming. Work especially systematically here.
What Role Does Wallpaper Paste Play?
Choose the wallpaper paste recommended by the wallpaper manufacturer. Universal paste is suitable for many paper wallpapers. Heavy vinyl or textile wallpaper requires special heavy-duty paste. Mix the paste with cold water according to the instructions on the package. Stir thoroughly until no lumps remain. Allow the mixture to swell.
Apply the paste evenly and completely to the back of the wallpaper strip. With paper wallpaper, fold the pasted strip using the “soaking method”: first fold the top half inward with the pasted sides together, then fold the bottom half. This allows the paste to soak in evenly and keeps the strip easier to handle.
Non-woven wallpaper is not pasted; instead, the wall is pasted. That is the major advantage of these materials: you can position the dry strip precisely before it sticks.
How Do I Hang the First Strip Perfectly?
The first strip is the reference for the entire room. It must be exactly vertical. Use a plumb line or a long spirit level to find a vertical line. Mark it with a light pencil line. The distance from the wall edge should be approximately 20-30 centimeters less than the wallpaper width.
Apply the first pasted and soaked strip. Position the top edge at the ceiling with a few centimeters of excess. Let the strip hang down. Align its edge with the plumb line. Press the strip into place with a wallpapering brush, working from the center outward. Always push air bubbles toward the side.
Trim the excess at the ceiling edge and at the baseboard with a utility knife and a smoothing blade. A sharp knife is essential here for a clean cut.
Additional advice
For difficult corners or window cutouts, first cut the wallpaper generously. After pressing it fully into place, trim it precisely. This helps you avoid pieces that are too short.
How Do I Work My Way Along Strip by Strip?
Position the next strip directly against the first. Make sure the edges touch precisely without overlapping. With patterned wallpaper, check that the pattern matches. Roll the seam firmly with a seam roller. This prevents the edges from lifting later.
When wallpapering the ceiling, start at the window and work away from the light source. This means the later seams cast hardly any shadows. Hang the first ceiling strip parallel to the window wall. Work with a helper. A step ladder is essential.
shows how a ceiling lamp can later complete the look.
Heavy ceiling strips are challenging. Fold the pasted strip like an accordion. Your helper holds one end while you hold the other. Position the starting section and unfold it piece by piece while pressing the strip into place with the brush.
How do I handle corners and cutouts?
Inside and outside corners require a special technique. At an inside corner, measure the distance from the last full-length sheet to the wall. Add about 2 centimetres. Cut a sheet to this measurement plus an allowance for trimming.
Apply paste to this narrow strip and position it so that it extends approximately 1-2 cm around the corner. The next full sheet on the adjoining wall then starts in the corner and overlaps the narrow strip. This prevents the wallpaper from tearing at the corner.
Be sure to switch off the electricity before working around sockets and light switches. Wallpaper over the fitting. Feel for its position with your hand. Press the wallpaper firmly around the edges. Then use the utility knife to cut an X in the centre and neatly trim off the overlapping triangles.
What should I do after wallpapering?
Allow the paste to dry completely. Depending on the room climate and material, this process takes at least 24 hours. Avoid heating or draughts that cause one-sided drying.
Once dry, check all the seams. Any edges that are lifting can be reattached with special wallpaper paste. Prick small bubbles with a syringe, inject paste underneath and smooth them down.
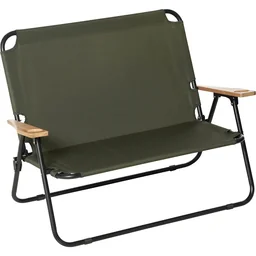
Finally, paint the ceiling and skirting boards. Protect your new wallpaper with masking tape. Use high-quality acrylic paint. Once the paint has dried, you can put the furniture back and enjoy the room's new look. A garden chair like the
For your next DIY projects, you will find practical storage solutions such as the
in our industrial supplies category. Well-organised tools make every project easier.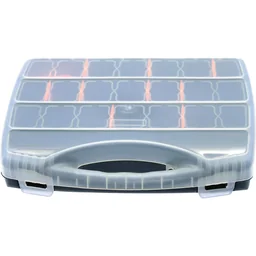
Frequently asked questions
- Can I wallpaper directly over old wallpaper?
- No. Old wallpaper must be removed completely. It creates an uneven, unstable surface. New wallpaper will not adhere reliably, and bubbles or peeling are inevitable. A smooth, dry surface is essential.
- How do I properly prepare a ceiling for wallpapering?
- The ceiling must be free of dust, dry and sound. Fill cracks and holes with deep primer and filler. For very uneven ceilings, a power tool such as a sander is useful. To protect against mould, apply a special ceiling primer.
- What tools do I absolutely need for wallpapering?
- Essential tools include: a wallpapering table, paste brush/roller, wallpapering table, spirit level, utility knife, wallpapering brush, seam roller, smoothing blade and a sturdy step ladder. For the preparation work, you will need a filling knife, sanding tools and a roller for the deep primer.
- How can I prevent bubbles under the wallpaper?
- Use enough paste, but not too much. Spread it evenly. Position the sheet from the centre outwards with the brush and always push air bubbles towards the sides. A dry surface and the correct soaking time for the wallpaper are other key factors.
- How long does wallpaper paste take to dry?
- Drying time depends on the room climate, type of wallpaper and paste. Vinyl or woodchip wallpaper often dries completely within 12-24 hours. Avoid draughts and heat the room moderately. Check that the wallpaper is dry in inconspicuous areas before starting painting work on the ceiling coving.
You may also be interested in
- How to wallpaper properly: Step-by-step guide to the perfect wall
- Choosing and hanging wallpaper: Here's how
- Painting a ceiling: Step-by-step guide to a perfect finish
- Gluing plasterboard: A simple guide
- How to hang photo wallpaper: Your guide to the perfect wall
- How to hang painter's fleece wallpaper properly: Smooth walls made easy