
Quick explanation: Salt snow lanterns are quick to make: coat the outside of a clean glass with craft glue, roll it in coarse salt and let the layer dry completely. Then place an LED tealight inside. On a balcony or patio, use this decoration only under a sheltered roof because moisture dissolves the salt.
Salt snow lanterns bring a frosty atmosphere to the windowsill, dressed table or sheltered balcony. The crystals reflect the light and resemble freshly fallen snow. You only need a few materials and a little patience while drying to make this DIY winter decor.
The simplest version consists of a glass, craft glue, coarse salt and an LED tealight. You can glue the crystals to the outside or pour them loosely into the glass. Both methods create a different look. The glued version resembles frost, while the loose filling evokes a snow-covered landscape.
Why are salt-covered jars ideal for winter decor?
Salt crystals have a light, matte surface. When warm-white LED light hits them, they create many small reflections. This makes the glass glow softly and unevenly. The decoration looks handmade and suits minimalist interiors as well as natural table settings with wood, linen and evergreen branches.
When making snow lanterns, the surface does not need to be perfect. Small gaps, different crystal sizes and slightly uneven edges are part of the charm. A thin layer of salt lets more light through. A thicker layer creates the impression of frosted glass and diffuses the light more strongly.
Two techniques for different effects
With the first technique, coat the outside of a glass with craft glue and cover it with salt. This method works well for votive glasses, jam jars and small storage jars. You can apply the glue all over or decorate only selected areas. This leaves clear windows and lets the LED light shine out in specific places.
With the second technique, pour dry salt into the glass and place a small LED tealight in the centre. The salt creates the base for a miniature winter landscape. Small pine cones, paper stars or a cardboard silhouette can complete the design. Keep flammable materials away from the light and never place them near an open flame.
Both versions work well as seasonal DIY decor for Advent, Christmas and the entire winter season. After the season, you can replace loose salt fillings or redesign the glass. The glued version lasts longer but needs to be stored in a dry place.
What materials do you need to make salt snow lanterns?
Work on a tray or covered surface. Salt spreads quickly and can scratch delicate surfaces. A dry glass provides better adhesion than one with grease or washing-up liquid residue. Wash it before crafting and let it dry completely.
Basic equipment for the glued version
- Glass: Use a clean, clear glass without cracks. Straight sides make it easier to apply the glue.
- Salt: Coarse white crystals create a clearly visible snow texture. Fine salt is suitable for filling small gaps and making thin corrections.
- Glue: Craft glue or a decorative glue suitable for glass adheres to the outside. Check the manufacturer's instructions.
- Brush: A flat, soft brush distributes the glue evenly. A small round brush is sufficient for dots and lines.
- Work surface: Parchment paper, a tray or a flat piece of cardboard catches excess salt.
- Light: A battery-powered LED tealight provides safe, warm illumination.
- Optional: Paper stars, a stencil, jute ribbon or a small wooden tag give the glass a personal touch.
Which salt creates the best snow effect?
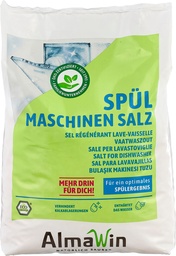
For a coarse surface, you can use . The larger grains look like individual ice crystals and create an irregular pattern on the glass. Before applying it, check whether the grain size suits your glass. Sprinkle the salt onto a test area so you can assess the effect and how much you will need.
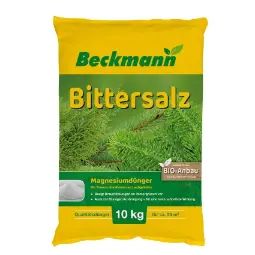
consists of Epsom salt and is intended as a magnesium sulfate fertilizer for garden plants. The light-coloured crystals can add a fine, crystalline accent. Use the product exclusively as a craft material, keep it away from food and store leftovers out of the reach of children and pets. For information about its actual use in the garden, see the Epsom salt range and the fertilizer range.
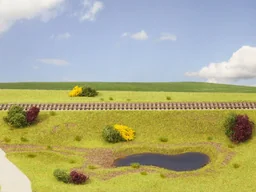
For a decorative base outside the glass, can be used. The craft pack is suitable at most for a miniature winter landscape on a tray. Do not use the included materials in the salt filling or near the LED housing. For more ideas, browse the garden and outdoor range or the Westfalia shop.
Expert tip
Place two types of salt separately on a test area. Coarse grains are suitable for the visible snow edge, while fine or crystalline particles fill small gaps. This creates a natural texture without covering the entire surface with a thick layer.
How do you make salt snow lanterns step by step?
Allow at least one hour of working time and several hours of drying time for the glued version. The glue must be completely dry before you move the glass. Drying takes longer in humid rooms, so do not work directly next to the sink or on a cold windowsill.
Method 1: Creating a frosted salt layer on the glass
- Prepare the glass: Clean the glass with warm water and a little washing-up liquid. Remove any label residue. Dry the inside and outside with a lint-free cloth.
- Plan the pattern: Decide whether the salt should cover the entire glass or form only a lower border. If needed, stick strips of paper or a stencil to the outside.
- Apply the glue: Spread a thin, even layer over the desired areas. Work in sections so that the glue does not dry before the salt sticks to it.
- Apply the salt: Place the glass in a shallow bowl and sprinkle salt over it from all sides. Turn the glass slowly. Alternatively, you can carefully roll it through the salt.
- Press it down: Lightly press the crystals down with a clean, dry finger or the back of the brush. Only touch areas where the glue is still wet.
- Leave to dry: Place the glass on baking paper and leave it to dry according to the manufacturer's instructions. Longer drying time improves durability.
- Remove excess salt: Carefully tap off loose crystals only after the glue has dried. Use a small brush and a little glue to fill in any bare spots.
- Insert the LED light: Place an LED tea light in the dry glass. Check that it is standing straight and that the on/off switch remains accessible.
Important note
LED tea lights are preferable for this craft technique. Craft glue, paper decorations and dry materials are not automatically heat-resistant. A real candle may only be burned in a suitable, stable glass while under constant supervision. Never leave a light unattended, and place the snow lantern out of the reach of children and pets.
Method 2: A snow-covered salt glass with LED light
For the loose-fill version, you need a glass with a wide opening and a small, sturdy glass container for the LED tea light. The inner container prevents salt from resting directly on the light. It also makes it easier to remove the LED tea light later and change the decoration.
- Add a two- to three-centimetre layer of dry salt to the large glass.
- Place the small glass container in the centre of the salt layer. Check that it is stable before adding more salt.
- Slowly fill the space around it. Gently tap the large glass from time to time to prevent large gaps from forming.
- Leave the upper edge of the small container uncovered. The LED tea light must stand securely and must not sink into the salt.
- Insert the light and add a narrow salt line or a paper star to the outside.
This version is especially easy to adapt. For a calm winter look, white salt with warm white light is all you need. Silver stars, a simple paper band or a small wooden pendant add stylish accents. Avoid loose glitter particles if children or pets can access the decoration.
How do you create a neat salt border?
You can create a straight border with masking tape or a wide paper stencil. Mask off the lower part of the glass, apply the glue above the edge and sprinkle salt over it. Remove the tape while the glue is not yet completely hard. This keeps the line sharp.
For a natural gradient, work in three sections. Apply a little more glue at the bottom, less in the middle and leave the upper section uncovered. Different grain sizes enhance the transition. Check the glass in the light before adding more crystals.
How do you use seasonal decorations indoors and outdoors?
At home, salt snow lanterns look good on a windowsill, sideboard, dining table or tray in the hallway. Group three glasses of different heights together. A large glass in the centre creates a focal point, while smaller glasses add further points of light. Leave enough space between the glasses so that the decoration does not look overcrowded.
Winter combinations for tables and windowsills
Wood, linen and matt ceramics complement the white salt surface particularly well. A dark tray makes the crystals stand out. Fir branches, eucalyptus or dried grasses add structure to the arrangement. Never place natural materials directly on a heat source, and keep them away from the light housing.
Warm white LED light creates a calm, cosy atmosphere. Cool white light emphasises the frosty character, but can quickly feel cold on a dining table. One light per glass is enough for a subtle decoration. Flashing or colour-changing LEDs distract from the salt texture.
What should you bear in mind for balconies, patios and gardens?
Outdoors, the salt glass needs a dry, sheltered spot. A covered patio or a balcony with protection from the sides is more suitable than an exposed garden table. Place the glass on a waterproof dish or tray. This keeps the surface underneath dry and prevents dissolved crystals from getting into the soil or planters.
Salt dissolves in rain, dew and high humidity. The liquid can cause wood to swell and metal surfaces to corrode. Do not place the snow lantern on a metal railing or directly next to sensitive plants. Bring the decoration indoors when frost or precipitation is forecast.
“Never leave candles burning unattended.”
This safety rule also applies to decorative lighting ideas. LED tea lights are the better choice for salt glasses because they do not produce an open flame and are suitable for both short and long lighting periods. Nevertheless, check the battery and housing regularly. Damaged or leaking batteries do not belong in the glass.
How do you clean, store and dispose of salt snow lanterns?
You can empty loose salt fillings completely after the season. Hold the glass over a bowl so that no crystals are scattered on the floor. Then wipe it out with a dry cloth. If there is visible moisture, leave the glass open to dry before sealing it or decorating it again.
A glued salt layer often remains stable for several weeks. If individual areas come loose, remove the loose crystals and touch up the surface with a small amount of glue. If the surface has become very damp, soak it in warm water. Work slowly so that the glass does not crack due to sudden temperature changes.
Additional advice
Label a storage box with the type of salt, craft glue and date of creation. This way, you can immediately see next winter which materials are still dry and usable. Store the decoration in a dry cardboard box, not in a damp basement and not directly next to heating pipes.
Which mistakes shorten its lifespan?
- Damp glass: Salt does not adhere well and begins to clump. Dry the glass completely before crafting.
- Too much glue: A thick layer stays soft for a long time and looks patchy beneath the salt. Less glue creates a finer surface.
- Not enough drying time: The crystals shift when the lantern is moved. Leave the glass standing for longer than it feels dry on the surface.
- Open flame: Glue and decorations can heat up or catch fire. Use LED lighting.
- Unprotected outdoor location: Rain and dew dissolve salt. Place the glass under cover and bring it indoors in bad weather.
- Salt on plants: Do not dispose of leftover salt on flower beds, lawns or in planters.
Salt residue mixed with glue or decorative materials does not belong in the garden. Follow the glue manufacturer's disposal instructions and local requirements. You can store pure, dry salt separately from craft waste if you want to reuse the glass later.
“Road salt harms plants, soil and waterways.”
A small amount of salt is enough for snow lanterns, but the decoration should still not end up in nature. Placing it on a bowl keeps it clean and makes it easy to move. With dry materials, a sturdy glass and an LED tealight, you can create a winter lighting idea that can be rearranged every year.
Whether you choose a glued frosted layer or a loose snowy landscape, both versions combine simple materials with a striking winter effect. Start by testing a small glass, choose a safe light source and protect the finished decoration from moisture. Then make your own winter decorations without much effort.
Frequently asked questions
- Which type of salt is suitable for making snow lanterns?
- Dry, coarse-grained salt is suitable for the outside because the crystals remain visible and create an irregular snowy texture. Water softener salt such as PRODUCT_59606 works well for this, provided it is clean and dry. Fine salt creates a smoother surface. Road salt, coloured salt and salt containing unknown additives do not belong in the glass.
- Can I place real tealights in a salt snow lantern?
- Always use an LED tealight. Glue, paper, dried twigs and salt dust should not be placed near an open flame. A real candle should only be used in heat-resistant glass with a stable base, sufficient distance from flammable materials and constant supervision. For children's rooms and balconies, LED is the safe choice.
- How can I make salt decorations last longer?
- Protect the snow lantern from rain, dew and high humidity. If you place it outdoors, choose a covered, dry area and use a waterproof base. After use, dry the glass and salt completely. Store the decoration in a dry cardboard box. Damp salt dissolves and can damage glue, metal and wood.
- Are salt snow lanterns suitable for the garden?
- Only to a limited extent. Place salt snow lanterns on a sheltered patio or covered balcony, never directly on soil, grass or a flower bed. Moisture dissolves salt and can damage plants, soil and metal surfaces. Outdoors, use only LED lighting and a sturdy bowl, and bring the decoration indoors during rain, snow or frost.
- How do I remove salt from the glass?
- For loose salt fillings, empty the glass over a bowl and wipe it dry. Soak a glued salt layer in warm water until the crystals come loose. Remove glue residue according to the manufacturer's instructions. Dry the glass thoroughly before decorating it again or using it for another purpose.
You might also be interested in
- Make paper snowflakes: DIY ideas for enchanting winter decorations
- Hygge in a jar: Make lanterns and DIY decorations
- Make Easter lanterns: Creative DIY ideas
- Creative winter decorations: Make ice discs with patterns
- Make your own winter decorations: Creative ideas for your home
- Make paper lanterns: Atmospheric DIY decorations for your home