
In brief: Identify oleander diseases by spots, curled or sticky leaves, shoot wounds and unusual leaf drop. Remove diseased plant parts, isolate affected plants, and improve light, air circulation and watering. Early checks, thorough rinsing and approved plant protection products used according to the label can help against aphids, scale insects and spider mites.
Short answer: Identify oleander diseases by spots, curled or sticky leaves, shoot wounds and unusual leaf drop. Remove diseased plant parts, isolate affected plants, and improve light, air circulation and watering. Early checks, thorough rinsing and approved plant protection products used according to the label can help against aphids, scale insects and spider mites.
Oleander (Nerium oleander) grows well in containers, but is sensitive to waterlogged roots, cold locations and dry heating air. Many problems initially look like a disease but are caused by care mistakes or pests. Check the overall condition before pruning or applying any treatment.
How can you tell whether your oleander is sick?
A sick oleander rarely shows just one symptom. First check its location, amount of water, roots and the undersides of the leaves. Only then decide whether the change is caused by a disease, a pest or natural leaf renewal.
Systematically check the leaves, shoots and roots
Start at the young shoot tips and work your way down. Lift the leaves because aphids, scale insects and spider mites usually sit on the underside. Then check the shoots for cracks, black areas, sticky deposits and dead buds.
| Symptom | Common cause | First measure |
|---|---|---|
| Older leaves turning yellow | Waterlogging, nutrient deficiency, cold or too little light | Check the roots and moisture level |
| Brown, dry edges | Lack of water, root damage or strong sunlight after a change of location | Adjust watering and location |
| Sticky leaves with a black coating | Honeydew from aphids, scale insects or whiteflies | Check the undersides of the leaves and remove pests |
| Fine pale speckles and webbing | Spider mites in dry, warm air | Rinse the leaves and check repeatedly for infestation |
| Dark, sunken areas on shoots | Bacterial infection such as oleander canker | Isolate the plant and cut back affected shoots |
Yellow leaves at the base are not automatically a sign of disease. Oleander renews its older leaves, especially in autumn or after a change of location. However, if many leaves fall at once, the soil smells unpleasant, or the roots remain soft and dark, this indicates serious root damage.
A sticky film is caused by honeydew. The black coating on it is called sooty mould and usually sits only on the leaf surface. First remove the pests responsible. The coating can then be washed off with water once no new honeydew is being produced.
How to examine the plant in five steps
- Place the container in a bright location, separate from other plants.
- Check the upper and undersides of the leaves with a bright lamp.
- Examine young shoots, flower clusters and cut surfaces for wounds.
- Carefully lift the root ball out of the pot and look for soft, brown roots.
- Note the date, symptoms and location so you can compare changes over time.
Expert tip
Photograph conspicuous leaves and shoots before pruning. Comparing them after seven days will show whether the infestation is spreading or the plant is responding to the change in care.
Which diseases affect oleanders?
With oleander diseases, the main conditions to distinguish are bacterial shoot diseases, leaf spots and root damage. Treatment always begins with hygiene and a dry, airy environment. A plant protection product cannot heal tissue that has already died.
Oleander canker on shoots and flowers
Oleander canker appears as dark brown to black areas, knotty growths, cracks and dead shoot tips. Flower clusters may also become deformed or dry out. Bacteria of the genus Pseudomonas often enter the plant through pruning wounds, frost damage or other injuries.
Cut affected branches back well into healthy, pale wood. Clean and disinfect the shears after every cut. Remove all prunings and do not put them on the compost heap, as the pathogen may continue to spread there.
If the main shoots also show extensive damage, there is often too little healthy wood left for worthwhile pruning. In that case, isolate the oleander and consider whether replacing the plant would be more hygienic and economical.
Leaf spots and shoot dieback
Round brown spots often develop after prolonged leaf wetness, overcrowding or poor air circulation. Remove heavily affected leaves, collect fallen foliage and water directly onto the soil. Allow the foliage to dry out between waterings.
If a single shoot dies back from the tip, cut it back to healthy tissue. Then check the cut surface. If it is brown inside or crossed by dark rings, inspect additional shoots and disinfect the tools again.
Root rot caused by waterlogging
Root rot usually develops when water remains in the pot and the roots are permanently deprived of oxygen. Typical signs include yellow leaves, limp growth despite damp soil, an unpleasant smell and soft brown roots.
Remove an affected oleander from its pot, cut away rotten tissue with clean shears and place the plant in fresh, free-draining substrate. The new pot needs a large drainage hole. Water sparingly after repotting and do not fertilise until new shoots appear.
“All parts of the plant are poisonous if eaten.”
How do you treat a sick oleander properly?
Do not treat only the visible symptom. Successful plant care combines isolation, pruning, root inspection and appropriate care. This prevents diseases or pests from spreading to other container plants.
The correct order for treatment
- Isolate: Place the oleander away from other plants. Use separate saucers and tools for it.
- Prune: Remove dead, severely infested or softened shoots down to healthy wood. Prune on dry days.
- Clean your tools: Wipe the blade with alcohol or a suitable disinfectant after each cut. Let the blade dry afterwards.
- Check the roots: If you suspect waterlogging, remove the root ball from the pot. Replace compacted or musty soil.
- Stabilize care: Place the oleander in a bright, warm location, water thoroughly but do not keep it constantly wet, and check it daily.
For a light infestation, first rinse the plant with a strong jet of water. Protect the soil with a cloth so that no pests fall into the substrate. Check again after two to three days, as eggs and hidden pests can otherwise form new colonies.
If you need a treatment, choose only a product approved for ornamental plants and the specific pest in your country. Follow the dosage, waiting periods, protective clothing and application instructions on the label. You can find information about suitable solutions in the plant protection section.
Important note
Oleander is poisonous in all parts of the plant. Wear gloves when pruning, keep children and pets away, and do not burn the prunings. Wash your hands and tools thoroughly after working. Dispose of diseased plant parts according to local regulations.
Avoid dishwashing-liquid mixtures and undiluted household remedies. They can damage the glossy leaf surface and cause burns in sunlight. Always test an approved product on a few leaves first, following the label instructions, and do not treat in extreme heat or full sun.
Which oleander pests are common?
The search term oleander pests mainly refers to aphids, scale insects, spider mites, mealybugs and whiteflies. They suck plant sap, weaken young shoots and leave behind honeydew. Check your oleander at least once a week in summer.
How to identify aphids on oleander
Oleander aphids usually gather in yellow-orange colonies on young shoots, buds and the undersides of leaves. The leaves curl, become sticky and continue growing in a distorted form. The search term aphids on oleander usually describes exactly this problem.
- Rinse small colonies off with a strong jet of water.
- Cut back heavily infested shoot tips and dispose of them with household waste.
- Check again after a few days, as new pests can hatch from eggs.
- Protect ladybirds, lacewings and hoverfly larvae as natural enemies.
Scale insects and mealybugs
Scale insects appear as brown, grey or white shields on shoots and leaf veins. Mealybugs live in white, cotton-like nests, often in leaf axils. Both pests produce honeydew and can make the oleander look weak despite receiving enough water.
Remove individual pests with a damp cloth or soft brush. Cut off heavily infested branches. For a larger infestation, treat the plant specifically with an approved product and check it again after the period stated on the label.
Spider mites and whiteflies
Spider mites cause fine pale speckles, dull leaves and delicate webs. They reproduce particularly quickly in dry, warm air during winter. Rinse the undersides of the leaves, increase the humidity in the room and keep the plant separate without leaving the foliage permanently wet.
Whiteflies fly up from beneath the leaves when disturbed. Yellow sticky traps show whether adult insects are present, but they do not replace checking for larvae. If the pests suck sap for weeks, the oleander becomes noticeably weaker. For a severe infestation, use a suitable approved plant-protection product and take care to protect beneficial insects.
You can find suitable information about pest control in the pest and plant protection section. Remove pests mechanically first if the infestation remains small. This reduces the need for treatments and protects the plant.
“Check plants regularly for pests and natural enemies.”
How can you prevent diseases and pests?
Healthy oleanders grow in a bright, warm and airy location. Prevention therefore does not start with a spraying schedule, but with a suitable spot, a well-draining pot and regular checks. This allows you to spot changes before an entire shoot or root ball is damaged.
Choose the right location and water correctly
Place your oleander in a sunny spot from May until autumn. After bringing it out of its winter quarters, gradually acclimatise it to direct sunlight to prevent the leaves from scorching. Good air circulation between the plant, walls and neighbouring plants allows the foliage to dry more quickly and makes it harder for fungi to spread.
In summer, water thoroughly as soon as the top layer of soil has dried out. In very hot weather, a container plant may need water every day, while it needs considerably less in overcast conditions. Allow excess water to drain away and empty it from the saucer if the location remains cool.
Feed and prune without causing new problems
Oleander is a container plant with high nutrient requirements. Feed it during active growth according to the manufacturer’s instructions and reduce feeding in late summer. Too much nitrogen produces soft, elongated shoots that are more easily colonised by aphids. Suitable products can be found under plant and flower fertiliser.
Cut out dead shoots immediately and remove fallen leaves from the pot. Suitable garden and plant care accessories help with clean cuts and good drainage. Never use soil from a diseased pot for other plants.
Choose healthy plants and overwinter them safely
If a severely damaged oleander needs to be replaced, you can compare different growth forms and flower colours:
, , and . When buying, check the leaves, shoots, undersides of the leaves and root area. Keep new plants separate from your collection at first and monitor them for several weeks.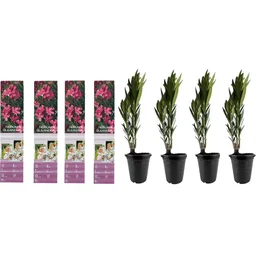
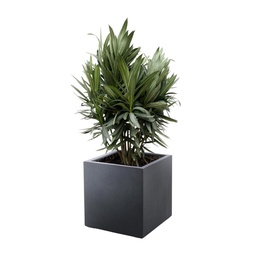
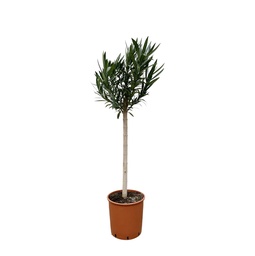
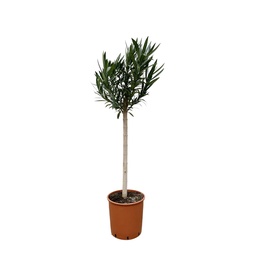
Overwinter oleanders in a bright, cool, frost-free place, usually at around five to ten degrees Celsius. Air the room regularly, avoid waterlogging and check the plant for scale insects and spider mites during winter as well. A warm, dark cellar encourages long, soft shoots and early pest infestations.
Care calendar for healthy oleanders
- March and April: Gradually acclimatise overwintered plants to more light, remove dead shoots and check the root ball.
- May to August: Check the undersides of the leaves weekly, water thoroughly when needed and feed according to the label.
- September: Reduce nitrogen fertiliser, remove diseased leaves and prepare the location for bringing the plant indoors.
- October to February: Overwinter in a cool, bright place, water sparingly and regularly check for scale insects, mealybugs and spider mites.
Additional advice
Never place a diseased oleander directly next to other Mediterranean container plants. Leave sufficient space between the pots, clean shared saucers and use clean tools for every plant.
Monitor the plant for at least two weeks after each treatment. New, vigorous shoots indicate that the oleander is recovering. If blackened areas on the shoots continue to spread despite pruning or the roots remain soft, remove the plant to protect healthy container plants.
Frequently Asked Questions
- How can I tell if my oleander has oleander canker?
- Typical signs include black or dark brown, sunken patches on the shoots, cracks, gummy discharge, deformed flower clusters and individual branches dying back. Cut infected shoots well back into healthy wood, disinfect the shears and do not put the cuttings on the compost heap.
- Why does my oleander have yellow leaves?
- Yellow leaves are often caused by waterlogging, insufficient light, cold temperatures, a pot that is too small or a nutrient deficiency. Check the moisture level and roots first. Soft, dark roots indicate rot. Water as needed, allow excess water to drain away and only start fertilising again once the plant is actively growing.
- What helps against aphids on oleanders?
- Wash small colonies off shoot tips and the undersides of leaves with a strong jet of water. Cut off heavily infested tips and check the plant again after a few days. Encourage ladybirds and lacewings. If the infestation persists, use only an approved product labelled for ornamental plants and the intended application.
- Can I still save a diseased oleander?
- Yes, provided the shoots and roots are not extensively damaged. Isolate the plant, cut back diseased sections and check the root ball. Place the oleander somewhere bright and warm, water carefully and avoid fertilising for the time being. If oleander canker continues to spread, a complete cutback or replacement is often the better option.
- How do I overwinter oleanders without disease?
- Overwinter oleanders in a bright, cool and frost-free place, usually at around five to ten degrees Celsius. Check the leaves and shoots regularly for scale insects and spider mites. Water sparingly, but do not allow the root ball to dry out completely. Ventilate the room and remove fallen or diseased leaves immediately.
You may also be interested in
- How to identify and successfully treat plant diseases
- Propagating oleanders: step by step to a new plant
- How to identify and treat orchid diseases
- Olive tree diseases: identify and treat fungi & pests
- Oleander care: how this Mediterranean plant thrives in an urban garden
- How to identify and effectively treat rose diseases