
In brief: Painting tiles works well when you thoroughly clean the surface, remove limescale and silicone, lightly sand the surface and use a suitable primer. Then apply suitable tile paint in two thin coats. Allow each coat to dry completely and do not use the surface until the stated curing time has passed.
Painting tiles works well when you thoroughly clean the surface, remove limescale and silicone, lightly sand the surface and use a suitable primer. Then apply suitable tile paint in two thin coats. Allow each coat to dry completely and do not use the surface until the stated curing time has passed.
Old tiles do not always need to be removed. With a suitable coating, you can change the colour and style without dust, building rubble or complete removal. This is particularly worthwhile for intact wall tiles in bathrooms, guest toilets or kitchens.
If you want to paint bathroom tiles, check the surface first. The tiles must be firmly fixed, the grout must show no signs of moisture damage and the surface must be completely dry. You can also find information and suitable solutions for the room in the Bathroom category.
The search terms bathroom tiles, paint bathroom tiles and paint over kitchen tiles often refer to the same task: applying a coating to sound wall tiles. The key factors are the location, the level of wear and the right coating system.
Why is painting tiles worthwhile?
Painting transforms a highly visible surface with relatively little effort. Beige tiles become white, a busy pattern is replaced by a calm colour and an outdated kitchen splashback once again matches the interior. You also avoid removing, disposing of and relaying the tiles.
Painting tiles is particularly suitable for smooth, glazed wall tiles. The surface absorbs very little water and can be coated after thorough preparation. However, paint will not conceal loose tiles, deep cracks or damp walls.
Which surfaces are suitable for painting?
Wall tiles behind the washbasin, around the bath or used as a kitchen splashback can usually be refreshed successfully. In the shower, the coating system must be approved for this application. Constant exposure to water, standing water and aggressive cleaning products place high demands on the coating.
Floor tiles need a particularly abrasion-resistant solution. Shoes, chair legs, sand and cleaning equipment put daily strain on the surface. Only use tile paint that the manufacturer expressly approves for floors and that is suitable for a slip-resistant surface.
Do not paint over sanitary silicone. It remains flexible, does not accept paint well and often peels off again. Remove old sealant joints, paint the tiles and apply new sanitary silicone after the paint has cured.
“Mould fungi need moisture, nutrients and a suitable temperature to grow.”
This also applies before painting. Paint will not eliminate water damage or mould. If moisture is collecting behind the tile, you must first identify and resolve the cause.
What tile paint and materials do you need?
The right tile paint depends on the level of wear. For a dry wall outside the direct splash zone, a robust one-component system is sufficient, depending on the manufacturer. For areas around baths, kitchen splashbacks that require frequent cleaning and floors, two-component coatings based on epoxy resin or polyurethane are often suitable.
Read the technical data sheet before buying. It states whether the paint adheres to ceramic, earthenware, porcelain tiles, floor tiles, grout and wet areas. Also check the recommended primer, maximum working time and required curing time.
What should be on your shopping list?
Plan the materials for the entire area. Missing a necessary item often leads to interruptions while the paint is already being applied.
- Cleaner: Use a suitable degreaser and remove limescale, soap residue, grease and care products.
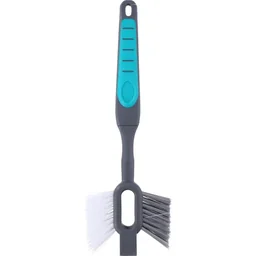
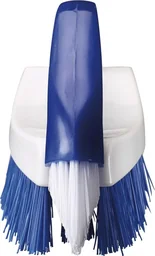
- Brushes: helps you clean tiles and grout, especially in hard-to-reach areas.
- Grout care: is suitable for thoroughly cleaning grout and tiles before painting.
- Abrasives: Fine sandpaper with approximately 180 to 240 grit mattes the glazed surface.
- Repair materials: Replace crumbling grout and fill holes with a product suitable for the substrate.
- Primer: A bonding primer for non-absorbent ceramic substrates improves the adhesion between tile and paint.
- Tile paint: Buy enough material for two thin coats and calculate the coverage according to the manufacturer's specifications.
- Application: A short-pile or foam roller and a narrow brush produce an even finish along the edges.
- Protection: Dust sheets, masking tape, gloves, safety goggles and a suitable respirator may be needed as part of your workshop supplies.
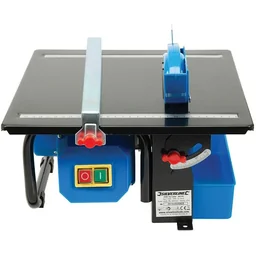
- Only if replacement is necessary: can help remove and replace a damaged tile. You do not need a tile cutter for painting.
An orbital sander can prepare large areas if the manufacturer permits sanding. You can find suitable equipment in the Power Tools section. Use light pressure so you do not chip the tiles or create deep sanding marks.
Expert tip
Test the tile paint and bonding primer on an inconspicuous area first. After the stated drying time, check the adhesion with a careful tape test. This helps you identify incompatibilities between the substrate, primer and paint before coating the entire area.
How do you prepare bathroom tiles properly?
Preparation has a greater influence on durability than the paint itself. Grease, limescale and silicone prevent reliable adhesion. Therefore, allow at least as much time for cleaning, repairs and drying as you do for the subsequent painting.
1. Clear the area and check for damage
Remove toiletries, towels and movable furniture from the room. Remove hooks, shelves, socket covers and fittings wherever this can be done safely. Do not mask anything that can be removed without significant effort.
Check every tile for cracks, hollow spots and movement. A loose tile must be secured or replaced. is only relevant in this special case, when you need to replace a damaged tile before painting.
Completely remove old silicone around the bath, shower, washbasin and worktop. Also remove thin residual films. Apply new sealant joints only after painting and the coating has fully cured.
2. Clean the tiles and grout thoroughly
First remove dust and loose dirt. Then dissolve limescale, soap residue, grease and care products with a suitable cleaner. Kitchen tiles often have greasy films, while limescale and skincare products build up in bathrooms.
Clean the grout with a small brush. The 2-in-1 brushes and are especially helpful along edges, in corners and around grout lines. Then rinse the surface thoroughly with clean water so that no cleaner residue remains.
Do not simply clean over mould. Remove the mould according to the applicable recommendations, dry the substrate and identify the cause. The range of Plumbing and Irrigation products can be useful for equipment related to repairs and water management, but it does not replace investigating the underlying cause.
3. Roughen and repair the surface
Glazed tiles will still be shiny after cleaning. Sand the surface evenly with fine paper until it is matt. Work carefully around the edges and do not apply so much pressure that you deeply damage the glaze.
Remove sanding dust with a vacuum cleaner and a slightly damp, lint-free cloth. Then allow the tiles to dry completely. Moisture beneath the bonding primer can cause bubbles, adhesion problems and later flaking.
Repair damaged grout before priming. Allow grout, filler and adhesive to cure according to the manufacturer's instructions. Then check that the surface is even, sound and free from dust.
4. Mask the edges and surrounding areas
Protect walls, fittings, sockets, worktops and the floor with dust sheets and carefully applied masking tape. Press the tape edge down firmly to prevent paint from running underneath. Remove the tape carefully later, while the paint edge has not yet fully hardened.
Important note
Never paint damp, mouldy or loose tiles. Paint does not seal the cause; it only conceals it temporarily. Ensure good ventilation, wear the personal protective equipment specified in the safety data sheet and keep children and pets away during application.
How do you paint tiles step by step?
Once the surface is dry and prepared, you can begin painting. Work systematically from the edges towards the open surface. Keep the room temperature and humidity within the ranges specified in the technical data sheet.
1. Apply bonding primer
Stir the primer slowly and thoroughly. Apply it to edges and corners with a narrow brush. Then roll the open surface in a thin, even coat.
Avoid puddles and visible runs. Primer applied too thickly dries slowly and can weaken the subsequent paint application. Allow the bonding primer to dry for exactly as long as specified by the manufacturer.
“The substrate must be clean, dry, sound and capable of supporting the coating.”
2. Apply the first coat of tile paint
Mix the tile paint according to the instructions. With a 2-component system, combine the base component and hardener in the specified ratio. Note the time, as the paint must not be applied once the working time has elapsed.
Start at the edges and then work in small sections. Apply the paint in a thin coat and spread it in even strokes. Use little pressure to prevent overlaps and roller marks.
Only paint over the grout if the system is approved for this purpose. Brush over corners, edges and tight spots with a small brush while the surface is still workable. Then lightly roll over the area so that the brush texture blends with the roller finish.
For a small DIY tile painting project, it is worth putting only as much paint on the roller as you can spread in one section. This keeps the coat even and prevents it from drying on the roller surface.
3. Apply the second coat
Wait for the specified interval between coats. If the first coat still feels soft or sticky, do not begin the second application. Applying the second coat too early can soften the surface and cause it to crack or remain sticky later.
Apply the second coat just as thinly as the first. It improves coverage and protection, but does not replace proper priming. Before rolling, check whether dust, hairs or small imperfections need to be removed.
If you are planning a pattern or color boundary, the base color must dry completely first. Mask off the pattern with high-quality painter’s tape and press the edges down firmly. Remove the tape carefully before the new coat of paint has fully cured.
4. Check the edges and reopen the room
Check the surface in side light. Small imperfections can usually be corrected while the paint is still workable. Avoid repeatedly rolling over a coat that has already begun to set.
Remove coverings only once the paint no longer runs. Install hooks, shelves and fittings only after the curing time has elapsed. Do not drill into the freshly coated surface while the paint is still sensitive.
How long does tile paint take to dry, and how do you care for the surface?
Drying and curing are not the same thing. A surface may feel dry after a few hours while the coating underneath is still soft. The exact times depend on the product, coat thickness, temperature and humidity.
Allow several hours to a day between coats, unless the technical data sheet specifies otherwise. Many systems require at least 48 to 72 hours before they can be used carefully for the first time. Full resistance may not be achieved until several days later.
What should you bear in mind while the paint cures?
Keep the surface dry and avoid splashing water. Ventilate regularly without directing strong drafts straight at the fresh coating. Do not place objects against the wall or clean the surface while the paint is still curing.
During this time, use another shower in the bathroom if possible, or protect the freshly painted surface consistently from water. In the kitchen, keep splashes of oil, acid and hot pans away from the surface. Also follow the specified temperature and humidity requirements.
How do you care for painted tiles?
Once the paint has cured, use a mild, pH-neutral cleaning product and a soft cloth. Cream cleaners, hard brushes, aggressive acids and abrasive pads can dull or damage the surface. Wipe away water regularly in areas subject to heavy use.
Check the joints several times a year. If the silicone shrinks, comes loose or allows water to get behind the joint, remove the old sealant and replace it. A new coat of paint is not a substitute for a watertight seal.
When is replacing tiles better than repainting them?
Replace tiles if they are loose, cracked throughout or allowing water to penetrate the substrate. Surfaces that are very uneven, chipped or permanently damp are also unsuitable for simple painting. In these cases, a new coating will not provide reliable results.
For a sound, stable wall surface, however, tile paint remains a quick way to visibly transform a room. Clean thoroughly, choose the system according to the level of use and observe every drying and curing time.
Additional advice
Plan the painting so that you do not need to use the surface for several days. Write down the product name, color, mixing ratio and application dates. This information will help you make a suitable repair or buy the right product later.
Frequently Asked Questions
- Can I paint all bathroom tiles?
- You can paint many glazed wall tiles if they are firmly fixed, clean and dry. For floor tiles, shower areas and heavily used surfaces, you need a 2-component system approved for this purpose. Check the technical data sheet. Loose tiles, cracked grout and silicone should be repaired beforehand.
- What type of tile paint is suitable for floors?
- For floor tiles, you need an abrasion-resistant, slip-resistant coating, usually on a 2-component basis. Ordinary wall tile paint often cannot withstand the mechanical stress caused by shoes, chairs and water. Before buying, check that it is approved for floors, as well as the coating system and curing time.
- Do I need to sand tiles before painting them?
- Yes, lightly sanding glazed tiles removes their sheen and improves adhesion. Use fine-grit sandpaper, remove the dust thoroughly and then apply the appropriate bonding primer. For sensitive surfaces, the technical data sheet will state whether sanding is permitted or whether a special cleaner is sufficient.
- How long do painted tiles need to dry?
- The surface should not be subjected to any load until the time specified by the manufacturer. Depending on the system, you often need to wait several hours to 24 hours between coats; the coating is often not fully cured until after several days. Keep the surface dry during this time, ventilate the room well and avoid rubbing, drilling and cleaning.
- Can I paint over kitchen tiles without painting the grout?
- Yes, if you mask off the grout carefully and its surface is sound. This takes longer and creates visible edges, which is why many systems are rolled over both the tiles and grout. Remove old silicone before painting and apply new sanitary silicone to the joints after the coating has cured.
You may also be interested in
- Plastering over tiles: How to create a rustic wall design with textured plaster
- How to paint wood properly: Step-by-step guide to the perfect finish
- Painting a kitchen worktop: The easy way to achieve a new look
- Laying tiles: Step-by-step guide for walls and floors
- Repairing tiles: How to replace damaged tiles
- Tiling over tiles: The smart renovation solution