
In brief: Paper is the ideal material for Christmas crafts. You do not need expensive tools. With scissors, glue and a little patience, you can create unique stars, garlands and tree decorations. These projects are perfect for crafting with children and give your home a warm, handmade atmosphere.
Make paper Christmas decorations: Why it is worthwhile
Paper is versatile, affordable and easy to work with. It requires no special tools. Material costs stay low.
Crafting creates unique pieces. No shop-bought decoration looks exactly the same. You choose the colours, sizes and patterns yourself.
The project brings the family together. Children enjoy helping. Spending time together at the craft table creates memories.
Crafting with your hands, especially in the run-up to Christmas, creates a special sense of calm and focus. It is a wonderful balance to the hectic digital world.
What materials do you need to get started?
The basic equipment is simple. You will find it in any household. A good pair of scissors is the most important tool.
Blunt children's scissors provide safety. Cutting mats protect table tops. A ruler and pencil help with drawing outlines.
You need glue to join the pieces. Water-based liquid glue is suitable for children. Hot glue provides strong, fast adhesion.
The choice of paper determines the result. Cardstock is sturdy enough for stars and figures. Translucent paper lets light through for window decorations.
Expert tip
Mix different types of paper. Combine smooth card with textured wrapping paper or glittery origami paper. This creates interesting surfaces and a sense of depth in your decorations.
Choosing the right paper thickness
Thin paper is suitable for delicate paper cut-outs. It is easy to fold. Baking paper or tissue paper are good choices.
Medium weights of 120-190 g/m² are the all-rounders. They hold shapes such as stars or small boxes. This card is easy to cut.
Heavier card from 250 g/m² requires sharp scissors or a craft knife. It stands firmly for larger objects. Use it for decorative letters or sturdy hanging decorations.
How do you make simple paper stars?
Folded stars are a classic. You only need strips of paper. The technique is quick to learn.
Cut eight strips of equal length and width. The length determines the size of the star. A width of 1 cm works well.
Glue the strips into eight narrow loops. Arrange four loops in a cross. Insert the remaining four loops diagonally between them.
Carefully pull on the loops. The star will take on its three-dimensional shape. Secure the crossing points with a dab of glue.
For extra sparkle, dust the tips with glitter. Alternatively, dip the star tips in glue and then in glitter powder. Leave to dry and hang up.
Important note
Always use a protective covering when crafting with glitter. Glitter particles spread easily and are difficult to remove. Work over a large sheet of paper or a tray.
Window stars made from translucent paper
These stars catch the winter light. You stick them directly to the window pane. The material is inexpensive.
Cut two identical stars from cardstock. Cut patterns or simple windows into the inner star. Use a craft knife for this.
Glue a piece of translucent paper between the two cardstock stars. The paper can be plain or colourful. The edges of the stars conceal the glued areas.
Attach the stars to the window with double-sided tape. Light shines through the translucent paper. This creates a warm, cosy glow.
Why are paper garlands perfect for beginners?
Garlands use simple, repeating elements. The process is meditative. You can see the result straight away.
You can make chains as long as you like. They decorate stair rails, fireplaces or door frames. The effect is large-scale and festive.
Everyone knows the classic paper chain. Cut strips of paper. Glue the first strip into a loop.
Thread the next strip through the first loop. Glue it into a loop as well. Continue the chain in this way.
Change the colours according to a pattern. Red, green and white are a traditional combination. Gold and silver add elegance.
The repetition of simple, identical actions when making garlands calms the mind. It is a wonderful activity for a peaceful Advent afternoon that children can easily join in with.
Modern garland ideas
Cut many circles of the same size from sturdy paper. Fold each circle in half once. Glue the folded circles together along the straight edge.
This creates a wavy, voluminous garland. It looks modern and decorative. Use different patterned papers for each circle.
Another idea is a bunting garland. Cut triangles from card. Punch holes along the upper, long edge with a hole punch.
Thread string through the holes. Label the flags with Christmas greetings or guests' names. This makes the garland personal.
For extra stability, glue the triangles around the string. This prevents them from slipping. The garland hangs straight.
How do you create festive paper tree decorations?
Tree decorations need to be lightweight. Thin card or sturdy paper are ideal. Create flat or simple 3D shapes.
Cut out two identical shapes. These can be stars, Christmas trees, bells or snowflakes. Decorate one side of each shape.
Glue the shapes together around the edges. Leave a small opening at the top. Add some cotton wool or small bells for volume.
Close the opening. Attach a hanging loop made from ribbon or craft cord. The decoration is ready.
Additional advice
Laminate your handmade paper decorations. A laminator completely seals the paper. The decorations become sturdy, easy to clean and can be used for many years.
Quilling technique for delicate decorations
Quilling involves rolling narrow strips of paper. You need a quilling tool or a thin needle. The glue must be applied precisely.
Roll a strip of paper tightly. Then let it loosen slightly. Secure the outer end with glue.
These small rolls form the basic building blocks. Press them into teardrop, eye or triangle shapes. Combine different shapes to create a design.
Glue the individual pieces onto a firm paper base, such as a small cardboard circle. This creates delicate, artistic Christmas ornaments. The technique requires patience but rewards you with impressive results.
For children, simplify the process. Use wider strips. Roll them more loosely. Larger designs are easier to glue.
Where Can You Find Inspiration and Templates?
The internet is a treasure trove of ideas. Pinterest features countless images. Search for "paper christmas crafts".
Craft blogs often offer free printable templates. These PDFs contain the outlines. All you need to do is cut and fold them.
Children's books with craft ideas are a great offline resource. You can find them in libraries. The instructions are explained in a child-friendly way.
Look around your home and garden. Pine cones, twigs and snowflakes provide natural templates. Trace their outlines onto paper.
Use simple geometric shapes. Circles, triangles and squares can be combined in many ways. A circle with a triangle underneath becomes a Christmas tree.
Ideas for Personalised Decorations
Include photos in your decorations. Print out small portraits of family members. Stick them onto star-shaped card.
Create a paper chain featuring the names of all your guests. Put each letter on its own flag. Hang the chain above the dining table.
Ask children to trace their handprints onto paper. Cut them out. These hands become the branches of a large paper Christmas tree on the wall.
For special gifts, make personalised wrapping. Decorative gift bags or paper gift tags make every present unique.
and provide a practical base that you can paint and decorate to your heart's content.

How Can You Get Children Successfully Involved?
Choose age-appropriate tasks. Young children can paint and glue. Older children can cut out simple shapes.
Prepare in advance. Cut out difficult pieces beforehand. This allows children to focus on assembling and decorating.
Accept imperfections. A wonky star has charm. Praise the effort, not just the result.
Create a safe environment. Use non-toxic materials. Cover the table with newspaper.
Plan short, productive sessions. Children quickly lose concentration. Finish the project at a point when something is complete.
For decorating rooms with children's crafts, you can find plenty of ideas in our hanging decorations category. There you can see how to showcase your children's artwork to great effect.
Projects for Different Age Groups
From age 2: Hand and footprint art using finger paints on paper. These can be turned into Christmas trees or reindeer.
From age 4: Simple gluing of pre-cut paper pieces. Colourful paper chains made from wide strips.
From age 6: Cutting out simple shapes with children's scissors. Folding paper to create simple 3D effects.
From age 8: More precise paper cutting. Working with templates. Simple quilling elements.
Suitable for all age groups is decorating pre-made paper lanterns or painting paper stars.
shows how LED lights and paper decorations can work together – an inspiration for your own lighting projects.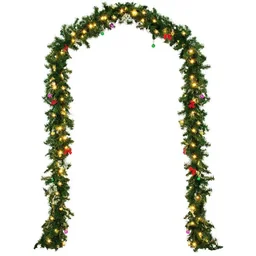
Making paper Christmas decorations combines creativity with cosiness. You create something personal. The process is often just as enjoyable as the finished result. Start with a simple project. Let the festive atmosphere inspire you.
Frequently Asked Questions
- What type of paper is best for Christmas crafts?
- Sturdy card in festive colours such as red, gold or green provides a good base. Tracing paper or baking paper is suitable for lanterns and window decorations. Crepe paper adds volume to garlands. For intricate paper cutting, use thinner but tear-resistant paper.
- How can I safely make paper Christmas decorations with young children?
- Use children's scissors with rounded tips. Prepare paper pieces that children can glue together or paint. Larger designs, such as handprints turned into Christmas trees or cut-out circles for garlands, are ideal. Make sure you use water-based glue.
- What are the easiest paper projects for Christmas craft beginners?
- Paper garlands made from threaded stars or rings. Window decorations made from symmetrically folded and cut paper. Simple three-dimensional stars made from two cut-out pieces slotted together. Decorative gift tags made from card.
- How can I make paper Christmas decorations last longer?
- Spray finished pieces with clear varnish or hairspray. This protects them from moisture and gives them a shine. For load-bearing elements such as hanging loops, use sturdy parcel tape or thin wire. Store the decorations flat and dry.
- Can I use paper Christmas decorations outdoors?
- Paper cannot withstand direct rain or snow. It can be used under a sheltered porch, on a covered patio or behind window panes. Use weatherproof paints and apply several coats of varnish. Alternatively, use special plastic paper.
You May Also Be Interested In
- Creative Christmas crafts: Make your own DIY decorations
- Make folded paper stars: DIY paper Christmas decorations
- Christmas craft ideas: Templates & instructions
- Make your own Christmas garland: Your guide to festive DIY decorations
- Create your own Christmas tree decorations: Paint baubles
- Make Christmas tree decorations from corrugated cardboard