
In brief: Start by drawing your plot to scale and checking sunlight, water, paths and your allotment association’s rules. Divide the garden into growing areas, paths and a small place to sit. Choose a few clear allotment garden ideas, pick plants suited to the site, and leave room for compost and maintenance.
An allotment garden is easier to use when paths, beds and seating work well together from the start. So begin with a plan instead of making impulse purchases or planting on a whim. First, check your site’s rules and the conditions on your plot. Then decide which areas you really need and how much time you want to spend on maintenance.
How do you start planning your plot?
Measure the plot and note its conditions
Sketch your plot on paper or use a simple planning tool. Note its length and width, boundaries, entrance, shed, existing trees, water supply and permanent paths. Mark any changes in level and spots where water collects after rain. This will show you early on which areas are actually available for beds or a seating area.
Observe the sunlight over several days. Note which areas get sun in the morning, at midday and in the afternoon. A sunny spot is often ideal for fruiting vegetables and many herbs. Other vegetables, perennials or a seating area may suit shadier spots. Also consider whether large trees cast shade or draw water from the soil.
Check your allotment documents before you start drawing up a plan. Your lease, association rules and garden regulations may set out how you can use your shed, hedges, fencing and shared areas. Rules vary from one site to another. If anything is unclear, ask the committee before removing trees, planning structural changes or making major purchases.
Set priorities before assigning areas
Write down what matters most to you in the garden. Do you want to harvest vegetables, pick fruit, spend time outdoors with children or sit quietly after work? Choose two or three main goals. If you try to do everything at once, you may leave too little room for paths and maintenance.
- Note which vegetables and herbs you actually eat.
- Estimate how often you visit the plot and how much time you have there.
- Mark any existing plants you want to keep.
- Set aside space for compost, garden tools and access to water.
Next, sketch the main areas with rough measurements. Leave enough space between beds to get past with a watering can, wheelbarrow or harvest basket. Your plan doesn’t need to be perfect. It should help you make decisions before marking out beds or buying materials.
Top tip
Take photos of your plot at different times of day. Add notes about shade, wind and damp spots. These snapshots will help you assess sunny areas and potential problem spots more accurately than relying on the memory of a single visit.
How do you make the most of a small allotment garden?
A well-planned allotment garden arranges areas according to how you use them. Vegetable beds need sunlight and should be easy to reach. Compost and tool storage should be in a convenient spot without blocking paths. A seating area works best somewhere peaceful with a pleasant view. Plan short routes between the entrance, water supply, beds and shed so everyday tasks don’t mean lots of walking.
Compact shapes work well on a small plot. Rectangular beds are easy to tend and clearly separate from one another. A main path can lead from the entrance to the shed and seating area, with narrow side paths giving access to the beds. Choose path widths to suit how you use them. If you regularly use a wheelbarrow, the path needs to be wide and sturdy enough for it.
“An allotment garden is a garden used by the tenant for non-commercial gardening, especially to grow garden produce for their own use, and for recreation.”
This legal definition combines growing food with recreation. Use it as a guide when deciding how much space to give vegetables, ornamental plants and seating. Check your lease and garden regulations for the specific rules at your site. A well-considered layout can bring both uses together: for example, with herbs beside a path, berries along a boundary or a bench next to a bed.
Make thoughtful use of vertical space and transitions
Vertical space matters in small gardens too. Place supports where they can give climbing plants room to grow without taking up extra bed space. First check whether a trellis is allowed along a boundary or beside a building. Position tall plants so they cast as little shade as possible over neighbouring plots and shorter crops.
Transitions help keep your plot organised. A low strip of herbs can line a path; a bed beside the seating area can have a border of flowering plants. Use these features with care and keep the centre open. This keeps the plot feeling spacious and lets you reach every area without stepping on plants.
Avoid creating too many small, separate areas. Frequent changes in edges, narrow leftover spaces and winding paths waste room and make maintenance harder. Group similar uses together: vegetables in one continuous bed area, perennials in a clearly defined planting strip and tools in a designated storage spot. A few well-connected areas feel calmer and are easier to maintain.
Which beds and plants are right for your garden?
Plan your beds around sunlight, soil and water. Many heat-loving crops thrive in a sunny spot, provided the soil and water supply are suitable. Partially shaded or shady areas call for plants that are suited to those conditions. Don’t buy plants just because they look good at the store. Check that they suit your site and that you can meet their care needs.
Start with a few beds that are easy to reach. You should be able to tend each bed from the paths so you don’t have to step on the soil while weeding or harvesting. Choose a width that lets you reach the middle from one or both sides. Before building, test the spacing with string or temporary markers.
Choose a manageable mix
To get started, a few vegetables you enjoy eating and can harvest regularly are enough. Add herbs and flowering plants if you have the space and time to care for them. A small selection is easier to monitor: you’ll see which plants do well in your soil and weather, and where you might make changes next year.
Plan crop rotation and companion planting around the crops you’ve chosen. Don’t grow heavy feeders in the same spot every year. Record sowing, planting and harvest dates in a garden calendar. This is especially helpful if you tend several beds or leave long gaps between visits.
Perennials, berry bushes or a small herb bed can provide recurring harvests and blooms. For woody plants, check the permitted size and the required distance from boundaries, paths and the garden shed. In a community garden, consider how far a plant will spread or how much shade it will cast. Check your garden’s rules before planning hedges or larger shrubs.
Use mulch where it suits the plants and soil. The right ground cover can help prevent the soil from drying out and reduce weed growth. Keep it away from sensitive plant stems and check regularly that the soil underneath stays moist. Mulch doesn’t replace watering or weeding, but it can make garden care easier.
Pollinators and other beneficial wildlife also benefit from a diverse garden. Flowering herbs and suitable native plants provide food if you stagger their blooming times. Leave room for them in your planting plan. Make sure plants don’t overgrow paths or block sightlines, and that they meet your garden association’s maintenance requirements.
How do you plan paths, water and practical supplies?
Paths determine how easily you can reach your beds and work areas. Choose a durable surface that suits how you’ll use it and doesn’t direct rainwater where it shouldn’t go. Keep transitions level so you can move safely with tools and harvest baskets. Avoid making paths unnecessarily wide, but leave enough room to make garden tasks manageable.
Plan how water will get from the connection to your plants. If you use a watering can, make sure you can carry it to the beds without obstacles. For a hose, consider its reach, connections and where you can store it safely. Find suitable options in the garden irrigation category. Check with your garden association and landlord in advance about rules for rainwater use and permanent installations.
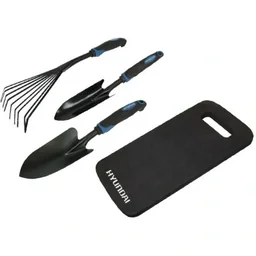
A dedicated place for tools saves time. Decide where to keep gloves, a spade, pruning shears and watering accessories. A selection of garden tools can help you find the right equipment for your planned tasks. The garden and plant supplies category may be useful for bed edging, trellises and other accessories.
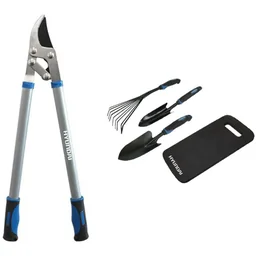
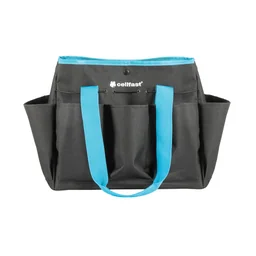
A good storage spot stays dry and is easy to reach. For pruning woody plants, for example, you could use the 2-piece aluminum loppers or the 68cm geared loppers . Keep small tools organized in something like the garden tool bag . Check the dimensions and intended use of each product before buying, and make sure larger tools will fit in your storage space.
“In an allotment garden, a simple garden shed with a floor area of no more than 24 square meters, including a covered patio, is permitted. Its design, particularly its fittings and furnishings, must not make it suitable for permanent residence.”
Include the garden shed and seating area in your plans before laying permanent paths or beds. The law sets requirements for the shed; your lease and garden rules may include additional requirements. Confirm the dimensions and planned changes with the relevant people in your garden association. Make the most of open space by using it in different ways instead of filling every area with permanent structures.
Your compost pile needs to be accessible and in a suitable spot. Place it where you can easily bring garden waste and conveniently collect finished compost. Keep it far enough from paths and seating areas to meet your garden’s requirements. Browse the garden equipment category for practical helpers. The garden and outdoor overview brings together more useful categories.
Important note
Don’t build a garden shed, privacy screen, permanent bed edging or other structures until you’ve checked the applicable rules. Your lease, garden association bylaws and garden rules may include additional requirements. Ask the board to confirm any open questions before ordering materials or starting work.
How do you plan your allotment garden step by step?
Work in stages
Start with the areas that matter most for everyday use: the entrance, main path, water supply and first vegetable beds. Mark out your design on site with string, stakes or a clearly visible line. Walk the paths with a watering can or wheelbarrow. This helps you check whether the curves, spacing and transitions work before making any permanent changes.
In the first year, put in only the basic layout. Clear the paths, set up a few beds and observe how the plants grow through the season. Avoid laying a large lawn or planting extensive hedges until you know how much time you have for maintenance. Taking things step by step leaves room to adjust if sunlight, watering needs or workload turn out differently than expected.
After each day in the garden, make a note of which tasks were easy to reach and where you lost time. Was the shed too far from the bed? Was the hose in the way? Did the seating area get too hot in the afternoon? These small observations help you decide what to change next, without having to redesign the whole garden.
Plan for maintenance and the seasons
A garden plan should show not only what grows, but also when the work needs doing. Note the dates for sowing, planting, harvesting, pruning and watering. Schedule regular tasks so you can fit them into your usual visits. If you rarely get to your plot, choose hardy plants, simple beds and short routes to the water supply.
Break maintenance into smaller jobs. You can weed a bed, harvest from it and then water it, rather than giving the whole plot a thorough going-over in one day. Keep frequently used tools close to hand and store materials you rarely use somewhere dry. Review your plan after a season: Which plants stayed healthy? Which areas saw little use? Which paths were too narrow?
Revise your sketch at the end of the season. Remove areas that took more work than expected, and expand successful beds only if you can manage the extra maintenance. This way, your allotment garden ideas develop from how you actually use the plot, rather than from an idealised drawing. A clear plan creates a garden that suits your goals, location and available time.
Extra tip
Keep your sketch, photos and garden calendar together. At the end of each season, add notes on harvests, problems and changes. Over time, you’ll see which parts of your plot work well and what you’d like to adjust next year.
Frequently asked questions
- How do I plan the layout of an allotment garden?
- Measure your plot and mark the shed, existing trees, water supply and paths on a sketch. Observe how the sun moves across the garden. Then divide the space into growing beds, paths, storage and a seating area. Before making structural changes, check your allotment association’s rules and your tenancy agreement.
- How should I make the most of a small allotment plot?
- First decide what you’ll use regularly: vegetable beds, fruit, compost or a seating area. Place frequently used areas near the entrance and water supply. Narrow paths, compact beds and climbing plants keep the middle of the plot open and make a small allotment easier to access.
- Which plants are suitable for an allotment garden?
- Choose plants to suit the amount of sun, the soil and the water available. Many vegetables and herbs grow well in sunny beds; shady corners are better suited to shade-tolerant leafy vegetables and perennials. Check your association’s rules before planting trees or hedges, too.
- What can I build on an allotment?
- This depends on the Federal Allotment Gardens Act, your tenancy agreement and the rules of your allotment site. Among other things, the law sets out requirements for the size and use of garden sheds. Before building beds, privacy screens, paths or permanent structures, ask the association committee which rules apply.
- How much time should I set aside to maintain an allotment?
- The workload depends on the size of the plot, your choice of plants and the season. Vegetable beds, hedges and lawns need regular care, while perennials suited to the site and mulch can reduce the work. Plan paths for watering, harvesting and composting so you can get things done without taking detours.
You might also be interested in
- What is an allotment garden? A simple guide
- Planning a vegetable garden: How to create a thriving growing bed
- Getting an allotment: A checklist for the start of the gardening year
- How to find and rent an allotment
- How do I plan and design my dream garden step by step?
- Redesigning a small garden: How to make the most of every inch