
In brief: A garden sieve can significantly improve soil quality. Use it to remove stones, weed roots and coarse material. The result is fine, loose soil that retains water more effectively, distributes nutrients efficiently and makes it easier for roots to grow. This creates the ideal foundation for healthy, vigorous plants.
Are your plants struggling, your vegetables refusing to grow and your lawn looking more like a steppe? The cause is often right beneath your feet: the soil. Compacted, stony or nutrient-poor soil holds back plant growth. But before you resort to expensive soil replacement, there is a simple yet extremely effective tool that can work wonders: the garden sieve.
With a garden sieve, you can transform problem areas in your garden into fertile beds. You create the perfect foundation for strong roots, lush growth and a plentiful harvest. It is the first and most important step towards improving your garden soil sustainably.
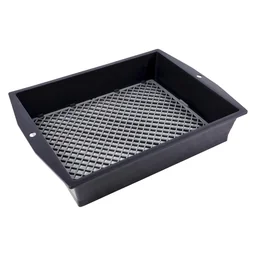
For this job, you need a reliable partner. The is made for exactly this purpose. With its two interchangeable inserts for coarse (12 mm) and fine (6 mm) mesh, you can adapt it flexibly to any task. Whether you want to refine compost or remove stones from a vegetable bed, this sieve is the ideal tool for every keen gardener.
How can you tell if your garden soil is poor?
Good soil smells fresh and earthy, has a loose, crumbly structure and is full of life. Poor soil, on the other hand, shows clear warning signs. Look out for these indicators in your garden:
- Waterlogging: Puddles remain in the bed for a long time after a rain shower. The water cannot drain away because the soil is too compacted. This leads to root rot.
- Hard, cracked surface: In dry conditions, the soil splits open and becomes rock-hard. Roots can barely penetrate this barrier.
- Stunted plant growth: Plants remain small, leaves are yellowish and the harvest is poor. The soil lacks essential nutrients.
- Many stones and building debris: In new-build areas in particular, soil often contains building waste that blocks root growth.
- Dominance of indicator plants: Persistent weeds such as horsetail or ground elder indicate compacted, often acidic and nutrient-poor soil.
If you notice one or more of these symptoms in your beds, it is time to take action. A soil test can also provide information about the pH value and nutrient content.
Why is sieving soil so important?
Sifting garden soil is about more than mere cosmetic improvement. It is a fundamental soil-preparation step with direct benefits for your plants. You create a uniform, fine-crumb structure that forms the foundation for a healthy garden.
Sieved soil allows the delicate roots of seedlings and seeds to spread unhindered. They do not encounter stones or hard clods of soil, allowing them to develop faster and more vigorously. At the same time, soil aeration improves, which is crucial for root respiration and microorganism activity. Water and nutrient uptake are also optimised, as water seeps away more evenly instead of simply running off the surface.
Well-aerated, fine-crumb soil is the lungs and stomach of a plant. Without this foundation, no plant can reach its full potential.
The 7 best tips: How to improve your soil with a garden sieve
A garden sieve is more versatile than you might think. Here are seven practical ways to use this simple tool to significantly improve the quality of your garden soil.
Tip 1: Remove stones and coarse debris
The most obvious benefit: you can free your beds from stones, old root remains and rubble. These foreign objects not only restrict root growth, but also store heat from the day and dry out the soil further. Shovel the top 15-20 cm of soil from your bed onto a tarpaulin or straight into a wheelbarrow. Then put the soil through a coarse-mesh sieve, one shovelful at a time. The fine soil falls through, while stones and larger clods remain in the sieve.
Tip 2: Remove weed roots selectively
Persistent weeds that spread through their roots, such as ground elder, couch grass and bindweed, are the nightmare of many gardeners. Even the smallest piece of root left in the soil can sprout again. When digging over the soil, you often just break up the roots and make the problem worse. Sieving the excavated soil reliably catches the tell-tale white root networks. This gives you a clean bed to start the season and significantly reduces the effort required for plant protection.
Important note
Never dispose of the roots of ground elder, couch grass and similar weeds on the compost heap! They will survive there and be distributed throughout the garden again with the finished compost. Put these roots in your household waste.
Tip 3: Refine your own compost
Well-rotted compost is a gardener's gold. However, it often still contains incompletely decomposed twigs, nut shells or eggshells. Sieve the compost before spreading it on your beds. Use the fine, nutrient-rich compost directly for your plants. Return the coarse material to the compost heap, where it acts as an inoculant containing valuable microorganisms and speeds up the next composting cycle.
Pro tip
Mix sieved compost with a little sand and garden soil. This mixture is the perfect start for young plants and a nutrient-rich foundation for any vegetable bed. You can also mix in specialist plant and flower fertiliser.
Tip 4: Make your own perfect seed-starting mix
Shop-bought seed-starting mix is expensive. With a garden sieve, you can make your own high-quality mix. Use one third well-rotted, finely sieved compost, one third garden soil (also finely sieved) and one third sand. The fine mesh size of the sieve (e.g. the 6-mm insert) is crucial here. The result is a loose, low-nutrient, well-aerated soil in which young seedlings find ideal conditions for strong root growth.
Tip 5: Improve soil structure in a targeted way
Is your soil either rock-hard clay or does it run through your fingers like sand? A garden sieve is the first step towards improving it. With heavy clay soil, sieve the dry soil to break up clumps. Then work in coarse sand and compost to loosen the structure. With soil that is too sandy, sieve it as well to remove organic material such as pieces of wood. Then mix in plenty of compost and, if necessary, some clay meal (bentonite) to increase its ability to retain water and nutrients.
Additional advice
Organic material is the key to any healthy soil. Alongside compost, rotted manure such as horse manure pellets or green manure can also help activate soil life and improve the structure over the long term.
Tip 6: Prepare your lawn area properly
A perfectly prepared seedbed is essential for a dense, green lawn. After digging over and levelling the area, it is time to use the garden sieve. Remove all stones, roots and clods of soil from the top layer. Grass seed can only germinate evenly and develop a dense root system on this fine surface. This also prevents uneven areas that could later become trip hazards.
Tip 7: Fill raised beds and planters properly
Loose, high-quality soil is particularly important in raised beds and planters, as the root space is limited. The top layer (approx. 20-30 cm) should always consist of a mixture of finely sieved garden soil and well-rotted, sieved compost. This ensures that your plants have the best possible conditions from the outset and do not have to waste energy growing through compacted areas or around obstacles.
Which garden sieve is right for you?
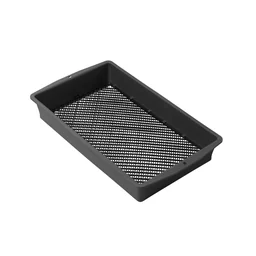
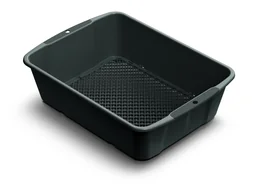
Choosing the right sieve depends on your garden and what you plan to do. For most jobs, a versatile model is the best choice. The covers the most common applications with its two inserts (6 mm and 12 mm), from coarse soil preparation to making fine seed-starting mix.
If you are looking for a slightly larger model, the 2-in-1 garden sieve is a good alternative. For smaller quantities or working directly on the bed, the handy RESPANA garden sieve. A sturdy frame and robust mesh that will not give way even when dealing with heavy, clay soil are essential. The right garden equipment makes the work easier and delivers better results.
After sieving: How can you enrich the soil further?
Sieving creates the perfect physical foundation. The next step is to give the soil a boost biologically and chemically. The sieved, loose soil is now ready to absorb nutrients and organic material effectively.
Work in plenty of well-rotted compost, horn shavings or organic fertiliser. These materials not only supply plants with nutrients, but also feed the soil life. Earthworms and microorganisms are essential for a stable soil structure and for converting nutrients into forms that plants can absorb. A mulch layer made from grass clippings, leaves or bark mulch protects the soil from drying out, suppresses weeds and continuously supplies organic matter.
The wise gardener does not fertilise the plant, but the soil. Healthy soil nourishes the plant all by itself.
A garden sieve is a small investment with a huge impact. You not only improve conditions for your plants in the short term, but also lay the foundation for healthy, fertile and living garden soil in the long term. Take the quality of your soil into your own hands.
Frequently asked questions
- How often should I sieve my garden soil?
- Sieve the soil before each new planting or when preparing beds in spring. For established beds, it is enough to improve the top layer every two to three years. For compost, sieving before each application is recommended to separate mature material from coarse leftovers.
- What mesh size is ideal for a garden sieve?
- For most gardening tasks, a mesh size of 10-12 mm is ideal for removing stones and coarse weeds. For fine seed-starting soil or sieving sand, you need a finer mesh of around 5-6 mm. Adjustable sieves offer the greatest flexibility for different gardening tasks.
- Can I sieve wet soil?
- Try not to sieve wet soil. Clay-rich, damp soil clogs the sieve mesh and makes the work laborious and ineffective. Let the soil dry out first until it is only slightly damp and crumbly. It will then pass easily through the sieve.
- What should I do with the stones I have sieved out?
- Do not throw the stones away. Larger stones are ideal as the bottom drainage layer in raised beds or planters to prevent waterlogging. You can use smaller pebbles as a decorative mulch layer or to secure paths.
- Does sieving help with very clayey or sandy soil?
- Yes, sieving is the first step. With clay soil, sieve the soil and then mix in sand and compost to loosen it. With sandy soil, sieving helps remove organic debris before you work in compost and clay powder to improve its ability to retain water and nutrients.
You might also be interested in
- XL 2-in-1 Garden Sieve: Guide to Perfect Compost & Garden Soil
- Choosing Potting Soil: The Best Soil for Healthy Plants
- Green Thumb: 7 Tips for Successful Gardening
- Make Gardening Easier: 10 Clever Tips for Garden Bags
- 7 Genius Garden Hacks: How to Use Garden Fixing Pegs Correctly
- Garden & Balcony: 7 Clever Ideas Using Privacy Netting