
In brief: Replace a damaged tile by first removing the grout, carefully breaking out the tile and cleaning the substrate. Then apply flexible tile adhesive, insert and align the replacement tile, and regrout the area once the adhesive has cured. This keeps the surrounding tiles undamaged.
Repairing tiles is easy when only one or two tiles are damaged. Remove the grout, carefully break out the damaged tile, prepare the substrate and insert a suitable replacement tile. Then renew the grout and clean the surface.
Cracks, chips and loose tiles are often caused by a hard impact, movement in the substrate or moisture. So do not just inspect the surface. If you overlook the underlying cause, the new tile may also come loose after a short time.
Why is it worth replacing individual tiles?
A damaged tile affects the entire tiled surface. Water can seep through a crack into the adhesive or substrate. In bathrooms, this can result in loose tiles, mould stains or damage to the waterproofing.
Replacing a single tile saves time, materials and mess. You do not need to open up the entire wall or remove the whole floor. This method is suitable for ceramic wall tiles, floor tiles and many porcelain stoneware surfaces.
Which types of damage justify replacing a tile?
- Cracks: Replace tiles with cracks running all the way through, especially in wet areas.
- Chips: Sharp edges and missing pieces increase the risk of injury and allow water to penetrate.
- Hollow-sounding tiles: Tap the surface carefully. A clearly hollow sound indicates poor adhesion.
- Loose tiles: Do not move the tile any further, as every movement puts strain on the grout and surrounding tiles.
- Permanent discolouration: Remove tiles with deeply ingrained stains when cleaners can no longer restore the surface.
A fine surface line without any movement does not always require immediate replacement. If the crack spreads, runs over a grout joint or allows moisture to penetrate, replace the tile. For bathroom tiles, also check the silicone seals around the bath, shower and washbasin.
Pro tip
Keep a few spare tiles from the installation. Tiles from later production batches may vary slightly in colour, surface finish and dimensions. Also note the manufacturer, size and colour number on the packaging.
Which tools and materials do you need to repair tiles?
Prepare all your tools and materials before opening the first grout joint. This allows you to work in a controlled way and avoid interruptions while the adhesive is already setting. To repair tiles, you mainly need tools for cutting, removing, cleaning and aligning.
Tools you will need
- Grout scraper or oscillating multi-tool for removing the old grout
- Safety goggles, work gloves and a dust mask
- Masking tape to protect the adjacent tiles
- Tile drill bit or a small masonry drill bit for opening up the damaged tile
- Hammer and narrow flat chisel
- Putty knife, scraper and hand brush for removing adhesive residue and dust
- Tape measure, square, pencil and spacers
- Rubber mallet and small spirit level
- Mixing bucket and notched trowel for the tile adhesive
- Sponge, clean water and rubber float for grouting
For straight cuts on a replacement tile, use the 450-W tile cutter
. This tool is useful when the new tile needs to be trimmed along an edge. You can find more suitable equipment in the Power Tools category.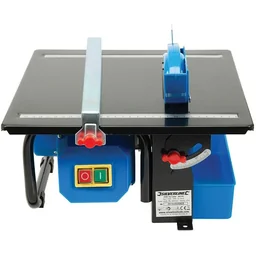
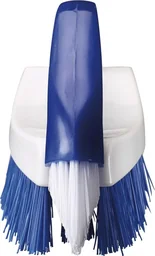
Old grout residue and dust prevent proper adhesion. The 2-in-1 tile and grout brush
or the 2-in-1 grout and tile brush helps you clean grout edges and tile surfaces. For more practical helpers, you can also browse the Cleaning and Business Supplies section.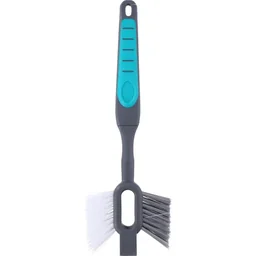
Materials to add to your shopping list
- A replacement tile with the same size, thickness and, if possible, production batch
- Flexible tile adhesive or thin-bed mortar suitable for the substrate and application
- Primer if the substrate is absorbent or required by the adhesive manufacturer
- Grout in a suitable colour and grain size
- Sanitary silicone for corner, connection and movement joints
- Waterproofing material for wet areas, if required
- Cement haze remover for cleaning after grouting
Choose the adhesive and grout according to the type of tile. Porcelain stoneware, natural stone, large-format tiles and surfaces with underfloor heating have different requirements from small ceramic wall tiles. In the bathroom section, you will find additional products under Plumbing + Irrigation.
Important note
Always wear safety goggles when breaking the tile. Before drilling or chiselling, check whether pipes or cables run through the wall or floor. In wet areas, continue only once the substrate is dry and the waterproofing shows no visible damage.
How do you remove a damaged tile without loosening neighbouring tiles?
Removal poses the greatest risk to the surrounding covering. An intact neighbouring tile can crack because of the wrong chisel angle, vibration or pressure on the edge. Therefore, remove the grout first, then work outwards from the centre of the damaged tile.
Open the grout and secure the tile
- Check the damage: Tap the tile and mark the affected area. Move a loose tile only as much as necessary for the inspection.
- Clean the area: Remove soap residue, grease and loose dirt. A clean surface prevents the tool from slipping.
- Protect neighbouring tiles: Mask the adjoining tiles with painter’s tape. Leave the grout lines visible so you can work precisely.
- Scrape out the grout: Remove the grout on all four sides down to the adhesive bed. Work slowly and hold the tool perpendicular to the grout line.
- Create a break zone: Drill several holes in the centre or carefully strike it with a hammer and punch. Do not drill deeply into the substrate.
- Break up the tile: Place the narrow chisel in one of the holes and remove small pieces. Always guide the chisel towards the clear centre, never against the edge of a neighbouring tile.
- Remove the adhesive: Lift out the remaining tile pieces and scrape away the old adhesive bed. Smooth the substrate without unnecessarily removing plaster or screed.
What should you check after removing the tile?
Shine a light into the open area and check the surface for cracks, hollow spots and moisture. Carefully press the substrate with a screwdriver. If it crumbles, moves or shows dark signs of moisture, stop replacing the tile and investigate the cause first.
Remove dust with a hand brush or a suitable vacuum cleaner. Then wipe the area with a barely damp cloth and allow it to dry completely. The new adhesive will bond only to a firm, clean and sound substrate.
“For lasting adhesion, the tiled surface requires a firm, dry, clean and sound substrate. Any substances that reduce adhesion must be removed before bonding.”
You can level small chips and hollows with a suitable repair mortar. Observe the drying time specified by the manufacturer. Laying the tile too soon traps residual moisture beneath it and weakens the bond.
How do you install the new tile and renew the grout?
Test-fit the replacement tile dry before mixing the adhesive. Check the size, colour, thickness and grout gap on all sides. The new tile must neither protrude above the adjoining surface nor sit lower than it.
Prepare the substrate
Level small uneven areas with a suitable repair or levelling mortar. Remove loose particles and vacuum up the dust. Apply a primer only if the substrate or adhesive system requires one.
Measure the depth of the old adhesive bed. Apply enough adhesive later for the replacement tile to sit flush with the neighbouring tiles. A layer that is too thick will shift the tile, while one that is too thin will create hollow spots.
Apply the adhesive and align the tile
- Mix the adhesive: Mix the flexible tile adhesive with clean water according to the manufacturer’s instructions. Allow the mixture to mature briefly, then stir it again.
- Spread the adhesive: Apply the adhesive evenly to the substrate with the appropriate notched trowel. Comb through the area in one direction.
- Check the back: For larger floor tiles or uneven formats, also apply a thin contact layer to the back of the tile.
- Install the tile: Slide the tile slightly into the adhesive bed. Use spacers to keep the grout lines to the neighbouring tiles the same width.
- Check the height: Align the tile with light pressure and, if necessary, a rubber mallet. Check the surface with a small spirit level.
- Remove adhesive residue: Immediately wipe squeezed-out adhesive from the grout lines. Do not allow any residue to dry on the visible surface.
Do not press the tile down and lift it again repeatedly. Each movement shifts the adhesive and can create air pockets. Observe the product’s open time and use only adhesive that is still workable.
Renew the grout and clean the area
Wait until the tile adhesive has fully cured before grouting. The exact time is stated on the packaging. Then remove the spacers and any loose adhesive residue from the grout lines.
Mix the grout in small quantities. Press it diagonally into the grout lines with a rubber float so that it fills the entire joint. Remove excess grout diagonally across the direction of the grout lines.
When the grout starts to turn matte, clean the surface with a slightly damp sponge. Change the water frequently and avoid using too much, otherwise you will wash the binder out of the grout. Remove the dry haze only after the grout has fully cured.
Use flexible silicone instead of rigid grout in corners, at wall junctions and around sanitary fittings. Remove the old silicone joint completely, clean and dry the connection, then smooth the new joint evenly.
Additional advice
Before removing the tile, photograph the grout width and the tile’s position. The image will help you align the replacement tile. Store spare tiles in a dry, frost-free place and keep them upright so you can use the same covering if damage occurs later.
Which mistakes should you avoid when replacing tiles?
Replacing a tile successfully involves more than fitting a new tile. The adhesive, substrate, grout and moisture levels all need to be compatible. The most common mistakes happen when preparation is rushed or the cause of the damage is overlooked.
These mistakes waste time and materials
- Fitting the replacement tile without testing it: Compare the size, thickness, colour and surface before applying adhesive.
- Skipping the grout joints: If you strike the tile directly, the force is transferred to the surrounding tiles.
- Chiselling too deeply: Remove only adhesive residue that is loose or too high. Protect plaster, screed and waterproofing.
- Covering a damp substrate: Dry the area and repair leaks, leaking connections or damaged waterproofing first.
- Choosing the wrong adhesive: Check the tile type, substrate, indoor or outdoor use and possible temperature changes.
- Applying too much adhesive: A thick layer shifts the tile and extends the drying time.
- Grouting too soon: Allow the adhesive to cure for the specified time before applying grout.
- Rigidly grouting movement joints: Transitions and connections need an elastic sealant.
- Using cleaning products too soon: Aggressive acids can damage fresh grout and sensitive surfaces.
Pay particular attention to floor tiles in doorways, in front of the shower and where they meet other flooring. Movement and moisture have a greater impact in these areas. If a crack keeps recurring, the cause is often in the substrate, screed or a movement joint.
When should you hire a professional?
Hire a professional if several tiles are loose, the substrate gives way or the waterproofing is visibly damaged. The same applies to mould, damp masonry and damage to pipes or cables. In these cases, repairing a single tile is not enough.
Professional support is also worthwhile for natural stone, very large tiles, heated floors and demanding mosaics. A professional can investigate the cause of the damage and select the appropriate adhesive and waterproofing system. This helps you avoid consequential damage beneath the tiles.
“A new tile does not fix moisture damage. Before replacing it, the cause, substrate and waterproofing must be checked to ensure the tiled surface lasts.”
For your preparation, you can find suitable tools and consumables in the shop. Work carefully, observe the drying times and check the substrate before every step. This ensures that the tile replacement remains limited to the damaged area.
Frequently Asked Questions
- Can I replace a single damaged tile?
- Yes, you can usually replace an individual wall or floor tile if the replacement tile, substrate and adhesive are compatible. Remove the grout completely and work from the centre outwards. If the substrate is hollow, damp or moving, repair the underlying problem first; otherwise, the new tile may also come loose.
- Which adhesive is suitable for replacing bathroom tiles?
- For ceramic bathroom tiles, use a flexible tile adhesive with the appropriate flexibility and moisture resistance. Prime absorbent substrates according to the manufacturer's instructions. In wet areas, choose a compatible waterproofing system. Natural stone, large-format tiles and underfloor heating require suitable products and often a professional assessment before installation.
- How long does tile adhesive need to dry before I can grout?
- The waiting time depends on the adhesive, layer thickness, temperature and absorbency. Follow the manufacturer's instructions; many cement-based flexible adhesives can be grouted after about 24 hours. Do not put pressure on the tile beforehand. Drying takes longer in a cool bathroom or on a low-absorbency substrate.
- How do I remove grout without damaging neighbouring tiles?
- Completely cut or scrape out the grout around the damaged tile. Use a grout saw or oscillating tool and keep away from the edges of the neighbouring tiles. Protect the surface with masking tape. Then break out only the centre tile, working from the inside outwards.
- What should I do if bathroom tiles come loose because of moisture?
- Remove the loose tile and check the substrate, grout and surrounding areas for moisture. Dry the area and fix the cause first, such as a leaking silicone joint or pipe. If the masonry is damp, there is mould or the waterproofing is damaged, stop the repair and hire a professional.
You May Also Be Interested In
- Installing Tile Over Tile: A Smart Renovation Solution
- How to Install Tile: A Step-by-Step Guide for Walls and Floors
- How to Cut Porcelain Tile and Other Tiles Correctly
- Installing Modern Tile: A DIY Guide
- Choosing Tile: The Complete Guide for Your Project
- Plastering Over Old Tile: A Guide to Smooth Walls