
In brief: Sandpaper grit indicates the number of abrasive grains per square inch. A low number such as K40 means coarse grit for removing material. A high number such as K240 indicates fine grit for smoothing. Choose coarse paper for preparation, medium grits for intermediate sanding and fine sandpaper for the final finish. Always work from coarse to fine.
Sandpaper Grit: Which Sandpaper for Your Project?
The number on the back of sandpaper is not random. It is the key to successful woodworking projects, renovations and repairs. Choose the right grit according to clear rules, not guesswork.
This guide explains the system. You will learn why you should never start with fine paper and how to achieve the perfect surface finish step by step. Whether you are restoring an old piece of furniture, making new wooden toys or treating decking boards – the principles remain the same.
What does sandpaper grit mean?
The grit rating, shown as a “K” followed by a number (e.g. K80), indicates the number of abrasive grains per square inch of the abrasive backing. In simple terms, it defines the size and density of the abrasive particles.
A low number means coarse grit. The individual abrasive particles are large and spaced further apart. They bite deeply into the material and remove a lot. A high number means fine grit. The particles are small and closely packed. They leave barely visible scratches and create a smooth surface.
Grit is the sanders’ alphabet. Coarse grits write the broad strokes, while fine grits add the full stops and commas for a perfect finish.
The main sandpaper grit ranges
Sandpaper is divided into three main ranges. This classification provides a useful starting point.
- Coarse sandpaper (K40 – K80): For aggressive material removal. Removes old paint layers, deep scratches and rust, or roughly shapes wood. Not suitable for smooth surfaces.
- Medium sandpaper (K100 – K150): The all-rounder for intermediate sanding. Removes the scratches left by coarse sanding and levels the surface for further treatment. This is the most important stage for an even result.
- Fine sandpaper (K180 – K400+): For fine sanding and final smoothing. Prepares the surface for stain, oil or varnish. Creates a silky feel under your fingers.
Important note
Do not skip a grit grade. Jumping directly from K60 to K180 does not work. The deep scratches left by K60 are too deep for K180. You will not smooth them out; you will only smear dust into the recesses. Always plan 2-3 consecutive grades.
How do I choose the right sandpaper grit?
Your choice depends on three factors: the starting material, the desired result and how much effort you want to invest. Always begin by analysing the workpiece.
For working with wood: From coarse to fine
For rough-sawn wood, start with K40 or K60. This paper efficiently removes saw marks and larger uneven areas. Then switch to K80 or K100 for the first smoothing pass.
With wood that has already been planed or pre-smoothed, you can start with K100 or K120. Your aim is an even, matt base for further treatment. For the final sanding before oiling or waxing, use K180 or K220. For high-gloss surfaces, go up to K320 or finer.
Keep your projects in mind: the same rules apply when renovating garden furniture from the Garden + Outdoor range or preparing wood for the BBQ + Smoking range.
Pro tip
Always sand in the direction of the wood grain. Sanding across the grain creates scratches that are difficult to remove even with fine paper. For the final pass with very fine paper, you can reduce the pressure almost completely and work only with the weight of the sanding block.
For paint, varnish and finishes
If you want to sand off old paint or varnish, coarse paper (K40-K80) is the quickest way. For sanding between coats, always use fine paper (K180-K240). This ensures good adhesion for the next coat without leaving deep scratches.
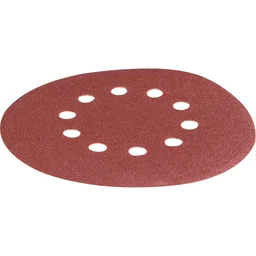
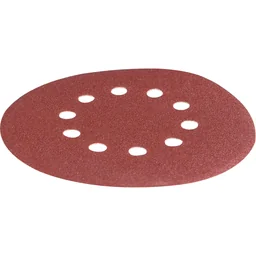
When sanding filler or putty on plaster, start with K80 to remove excess material, then smooth with K120. A sandpaper set with several grits, such as our
(K80), (K100) and (K240), provides the ideal basic equipment for these projects.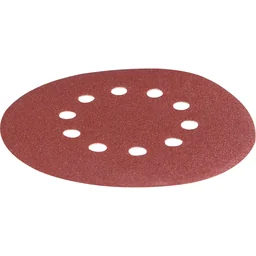
Step-by-Step Guide: The Systematic Sanding Process
Good sanding is a method, not magic. Follow these steps for consistent results.
- Preparation and safety: Clean the workpiece. Wear a dust mask and safety goggles. Ensure good ventilation or use a vacuum cleaner with a sanding dust filter.
- Coarse sanding: Choose the coarsest grit you need. Work with even pressure and overlapping strokes. The aim is not smoothness, but removing major imperfections.
- Cleaning: Thoroughly remove the sanding dust after each grit stage. Use a brush, vacuum cleaner or lint-free cloth. Residual dust acts like sandpaper during the next, finer stage.
- Intermediate sanding: Move to the next finer grit (e.g. from K80 to K120). Repeat the process. You will feel the surface becoming more even. The scratches from the previous stage disappear.
- Fine sanding: Finish with the fine grit suited to your finish. Use increasingly lighter pressure. At the end, the surface should feel like fine paper.
For transporting sanding dust and waste during large projects, a robust wood waste Big Bag from our range is ideal.
The most common mistake is impatience. Anyone who saves time while sanding will spend it twice or three times over trying to correct a poor finish with paint. The surface never lies.
Which Sandpaper Is Suitable for Which Material?
It is not just the grit that varies, but also the abrasive material itself. The right choice depends on the material.
- Wood & paint (universal): Aluminium oxide. Durable, versatile and the first choice for most DIY projects. Ideal for our sandpaper sets.
- Metal (rust removal, deburring): Zirconia alumina or ceramic. Harder and more wear-resistant than aluminium oxide. For steel, aluminium or brass.
- Paint & varnish between coats (fine sanding): Silicon carbide. Often available as wet-and-dry paper. Very sharp-edged grains for an extremely smooth finish.
Additional advice
Always test your chosen grit sequence on an inconspicuous area first. This is especially useful with old furniture or unfamiliar types of wood, helping you avoid surprises. After fine sanding, check the surface with your palm and in raking light.
Special case: Wet sanding
Wet-and-dry sandpaper has a waterproof backing. You use it with water as a lubricant to prevent clogging. It is essential for sanding high-gloss paintwork or levelling body filler on a car.
In DIY projects, use it when sanding off old paint layers that tend to become sticky. The water immediately washes away the sticky dust. Start wet sanding with K400 and work up to K2000 for a mirror-smooth result.
Sanding Tools and Accessories
The best sandpaper is of little use without the right tool. For small areas and corners, use a handy sanding block. It distributes pressure evenly.
For larger surfaces such as table tops or floorboards, a random orbital sander is well worth using. It combines rotating and oscillating movements, helping to prevent sanding marks. For fast material removal, a belt sander is unbeatable.
Do not forget the preparation and finishing work. Protect surrounding surfaces with a wood cover tarp. You can find all the tools you need and more in our power tools category.
The Most Common Mistakes and How to Avoid Them
An uneven finish, deep scratches or a clogged sanding sheet can usually be avoided.
- Mistake 1: Staying in one place for too long. The sander digs in and creates a dip. Always keep the tool moving.
- Mistake 2: Applying too much pressure. More pressure does not mean faster material removal, only more wear and heat. Heat can cause resins in the wood to seep out or make paint stick to the surface.
- Mistake 3: Forgetting to clean between stages. Sanding dust is the enemy of the next sanding stage. Clean the workpiece and sandpaper regularly.
- Mistake 4: Incorrect storage. Store sandpaper in a dry, flat place. Moisture and creases damage the backing material.
With the right knowledge and suitable equipment, such as our versatile sandpaper sets, you can master any sanding project. From simply sanding a garden chair to extensively restoring an antique cabinet, the principle remains your reliable guide.
Frequently Asked Questions
- What does the number on sandpaper grit mean?
- A number such as K80 or K120 indicates the number of abrasive grains per square inch. The lower the number, the coarser and more aggressive the material removal. The higher the number, the finer and smoother the surface becomes. K80 has large, widely spaced grains, while K240 has many small, closely packed grains.
- What grit should I start with when sanding wood?
- Start with a coarse grit between K40 and K80 to remove old paint, deep scratches or uneven areas. With new, already smooth wood, you will often start with K100 or K120. The first sanding stage is for rough shaping and material removal, not smoothing.
- What grit should I sand to before painting?
- For opaque paint, an intermediate sanding with K120 to K150 is sufficient. For transparent stains, oils or waxes, sand more finely, at least to K180 or K220. The final finish determines the required fineness. Test on a hidden area first.
- Can I start directly with fine sandpaper?
- No. Fine sandpaper such as K180 or higher will only smear the coarse dust and quickly become clogged. It does not remove any significant amount of material. You will waste time and achieve an uneven result. Work systematically from coarse to fine.
- What is the difference between wet-and-dry and dry sandpaper?
- Dry sandpaper is intended for universal dry use on wood, plaster or metal. Wet-and-dry sandpaper has a waterproof backing and is moistened with water. This prevents clogging when sanding paint or washes away sanding dust, making a very smooth finish possible.