
In brief: A Swedish fire log is a log that burns upright. Split the top of a log in a cross shape and light the center. It burns slowly from the inside out, gives off steady heat and turns into a natural wood torch. For stability and safety, use a suitable fire pit.
How to Make a Swedish Fire Log for Your Garden
A Swedish fire log can make an evening in your garden feel special. This upright wood torch can burn for hours, without the need for a large campfire. One log provides plenty of warmth and creates a welcoming atmosphere outdoors.
Here’s how to make one, from choosing the wood to lighting the fire. With the right tools and these instructions, you can enjoy a safe garden fire. You’ll also find the garden tools you need to get ready in our shop.
What is a Swedish fire log?
A Swedish fire log is a log that stands upright. Split it from the top down to about two-thirds of its height, then light the center. The fire gradually burns down and inward.
Flames rise through the opening while the log stands like a pillar. This design makes it a portable alternative to a traditional fire pit. There’s no need to dig a pit.
A Swedish fire log is one of the most efficient ways to enjoy an open fire. The vertical burn uses the natural chimney effect for a clean burn, less smoke and plenty of heat.
Swedish woodcutters first used this method to stay warm in winter without having to clear deep snow. Today, it’s a popular choice for garden parties and cozy evenings outdoors.
Which wood should you use for a garden fire?
The type of wood affects burn time, the look of the flames and the scent. Hardwood is usually the best choice. Birch, beech and oak burn steadily for a long time and produce plenty of hot embers.
Birch bark makes a natural fire starter and can catch even when it’s slightly damp. Beech burns steadily and gives off plenty of heat, while oak burns the longest.
Important
Never burn treated, painted or pressure-treated wood. It can release toxic fumes. Softwoods such as spruce and fir are also poor choices: they burn unevenly, spit resin and can send out dangerous sparks.
Use dry wood. Freshly cut wood contains a lot of moisture, so it will smoke and struggle to burn. Let the log dry for at least a year—two is even better.
A log 30 to 50 centimetres in diameter is ideal, with a height of 40 to 80 centimetres. These dimensions help keep the Swedish fire log stable. A log that’s too tall could tip over.

How do you split the log?
You’ll need a sharp splitting tool. A sturdy axe or splitting maul works well. For precise cuts, our
deliver excellent results. They can cut through hard wood, too.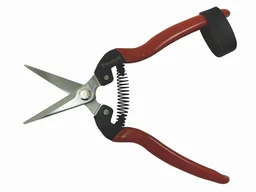
Set the log on a stable, level surface. Strike the axe into the center of the end grain, aiming for the middle of the log. The first cut splits it in two.
Make a second cut at a right angle to the first to form a cross. The depth matters: split the log to about two-thirds of its length.
Pro tip
Mark the cutting depth with chalk first. That makes it easier to split all four sections to the same depth and helps the log burn evenly. You can also drill a hole down through the center from the top to improve airflow and make lighting easier.
Leave the bottom third intact to form a stable base. Once split, the log should look like a cut-open orange, with all four sections still joined at the bottom.
How do you light a Swedish fire log safely?
Choosing the right spot is essential. Never set a Swedish fire log on a flammable surface. Concrete, paving stones or gravel are safer options. For added protection and stability, use our
.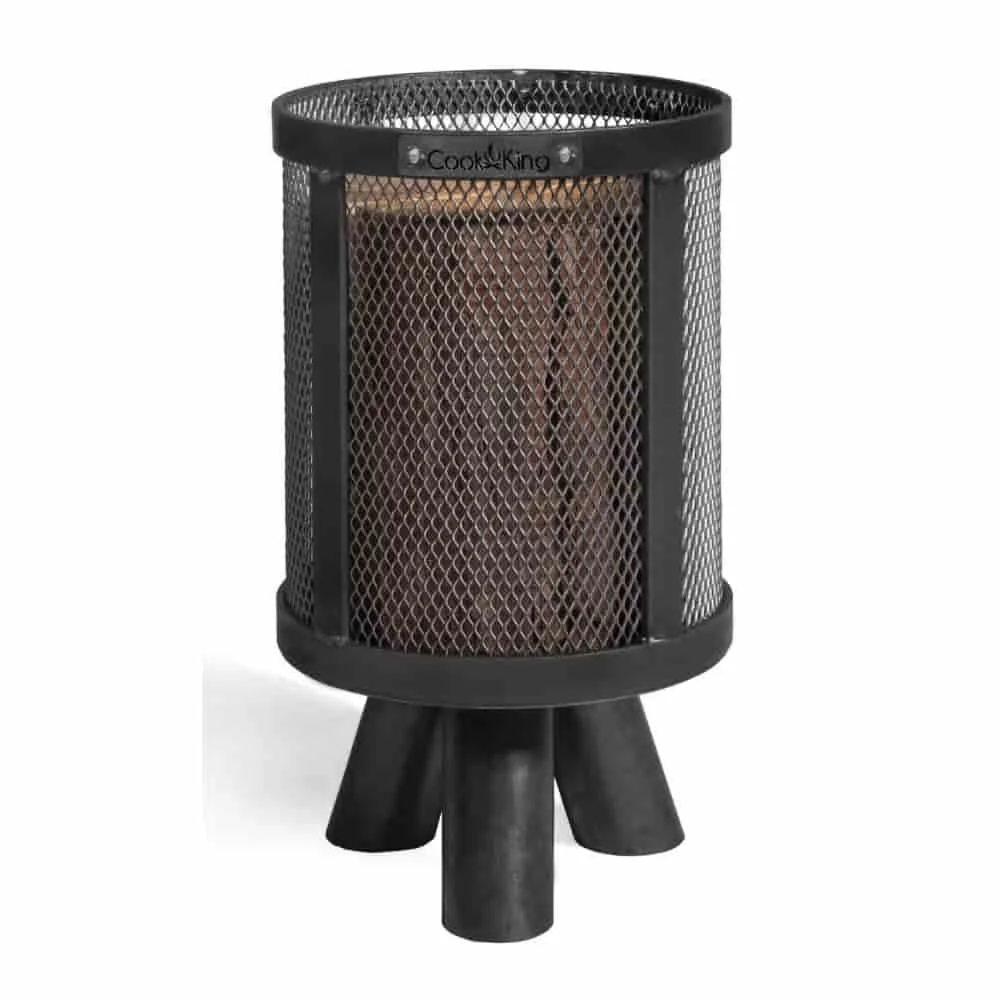
This natural steel fire basket catches embers and ash, helping protect your lawn or patio. It also gives the Swedish fire log a steady base and adds a decorative touch to your garden.
Fill the center gap with fire-starting material such as dry birch bark, wood shavings or firelighter cubes. Don’t pack it too tightly; air needs to circulate.
Light the material in a few places using a long lighter or matches. The flames will catch in the center first, then spread to the split sections of wood.
Patience is key when lighting the fire. Give it time to catch from the inside out. Once the embers at the center are glowing strongly, carefully add a few small pieces of wood if needed. This helps keep the fire going.
After ten to twenty minutes, the Swedish fire log should be burning steadily. Flames rise from the opening as the embers slowly move down through the log. Now you can enjoy the warmth.
How do you tend a Swedish fire log?
A well-prepared Swedish fire log needs little attention. Don’t poke it with metal tools, as this can make it burn faster than you want. Let the fire burn at its own pace.
If the flames die down, add a few small pieces of wood or cones to the center. Use the same type of wood as the log; other materials can disrupt the burn.
Keep a bucket of water or sand nearby as a basic safety measure. A fire extinguisher or fire blanket is even better. Keep an eye on children and pets while the fire is burning.
Find practical garden equipment in our shop and get ready for a great evening outdoors.
What are the advantages of a Swedish fire log over a campfire?
A Swedish fire log saves space. You don’t need a large open area. The log stays in one spot, making it a good fit for a small patio or front yard.
It’s safer. The flames are concentrated in the center, and there are very few sparks, especially when you use hardwood. Its stable position reduces the risk of tipping over. Using it in a fire pit makes it even safer.
It’s portable. Simply carry the cold log to another location. You’d have to rebuild a traditional campfire from scratch each time. This saves time and effort.
It produces heat efficiently. The chimney effect inside the Swedish fire log directs heat upward. You can sit around it and enjoy the warmth. It works like a small patio heater.
Additional advice
Pair your Swedish fire log with seating made from weather-resistant materials. Protect cushions with a patio furniture cover. That way, you’re ready for spontaneous evenings in the garden, even when the weather is unpredictable.

Cooking and grilling on a Swedish fire log
The glowing surface makes a natural cooking area. Place a sturdy grill grate over the opening. It must be heat-resistant and sit securely in place.
A cast-iron pan works even better. Our
is designed for cooking over a fire. The solid steel distributes heat evenly. Cook meat, fish, or vegetables directly over the flames.
To make bread on a stick, wrap the dough around a long stick and hold it over the embers. You can do the same with marshmallows. The intense radiant heat roasts them to perfection.
Coffee lovers can set a camping coffee pot on the grate. The water boils quickly, so you can enjoy freshly brewed coffee under the open sky. It’s the perfect outdoor experience.
How do you extinguish and dispose of a Swedish fire log?
Let the fire burn out completely. This is the safest method. The embers go out on their own as they burn down to the ground. This can take a long time with large logs.
If you need to put out the fire sooner, do it carefully. Slowly pour water into the center, starting where the embers are. Avoid sudden bursts of steam.
Stir the ash with a metal rod to put out any hidden embers. Keep adding water until no more steam rises. The ash must be soaking wet and cold.
Dispose of the cold ash the next day. Put it in a metal container. Our bulk bag for firewood is suitable for larger quantities. Ash is a valuable fertilizer.
Ideas for the perfect outdoor ambiance
Pair your Swedish fire log with atmospheric lighting. Solar string lights in the trees add a soft glow. Torches or lanterns around the fire complement the flames.
Drape warm wool blankets over seat cushions and set up a side table for drinks. A small selection of snacks completes the evening.
The right music can enhance the atmosphere. Choose quiet sounds that won’t drown out the crackling fire. Nature sounds make the perfect accompaniment.
For families with children, we offer safe outdoor toys. They help make the evening fun and cozy for everyone.
A Swedish fire log can turn any garden into a welcoming retreat. With our instructions, you can build one safely. Westfalia products can help along the way. Enjoy unforgettable evenings under the open sky.
Frequently asked questions
- What type of wood is best for a Swedish fire log?
- Use only dense, well-seasoned hardwood such as birch, beech, or oak. Softwood such as spruce burns too quickly, spits resin, and produces lots of sparks. The wood must be dry, ideally after being stored for two years. Fresh or damp wood burns poorly and produces a lot of smoke.
- How long does a Swedish fire log burn?
- Burn time depends on the type and diameter of the wood. A 40 cm-thick beech log burns for around three to five hours. The harder and thicker the wood, the longer the fire lasts. The vertical cuts create a special design that helps the log burn slowly and steadily from the inside out.
- Can you use a Swedish fire log on grass?
- No. Never place a Swedish fire log directly on a flammable surface such as grass, a wooden deck, or leaves. It generates intense heat. Always use a fireproof base such as our PRODUCT_24998 or a large steel fire bowl. This protects the ground and improves stability.
- Can you cook or grill on a Swedish fire log?
- Yes, the glowing surface works well as a cooking area. Place a grill grate or a cast-iron pan such as PRODUCT_24907 on top. The heat is concentrated and intense. Cook sausages or make pancakes. Make sure the grate is stable and use heat-resistant grilling utensils.
- What should you do with the ash after using a Swedish fire log?
- Let the ash in PRODUCT_24998 or the fire bowl cool completely; this can take a day. Cold wood ash is an excellent source of potassium for flower beds or compost. Dispose of it in the yard waste bag. Never put hot ash in trash cans.
You may also be interested in
- How to build a fire pit in your garden for cozy evenings
- Fire bowl, fire barrel, or fire basket: Which one is right for your garden?
- How to make upcycled garden lanterns
- How to build a dry-stone wall in your garden: A sustainable guide
- How to make your own lanterns: Creative ideas for your home and garden
- How to build your own outdoor grilling area