
In brief: When learning to sew, start with a straight seam on cotton fabric. Practise threading, stitch length, starting a seam and backstitching before cutting out a project. A cushion cover, fabric storage basket and tote bag are ideal first easy sewing projects. Work slowly, measure accurately and press every seam.
Learning to sew does not begin with complicated patterns, but with a controlled straight seam. Once you can control the sewing machine, fabric and speed, you can quickly make things of your own. Three easy sewing projects offer a particularly safe introduction to DIY sewing: a tote bag, a cushion cover and a small fabric storage basket.
You do not need a large amount of equipment. A properly threaded domestic sewing machine, cotton fabric, matching thread and a hot iron are enough for your first exercises. This guide explains the most important techniques, useful materials and a manageable process for your first project.
How can beginners start sewing with a sewing machine?
Place the sewing machine on a stable table with sufficient light. The fabric must lie freely in front of the presser foot without hanging over the edge of the table. Keep the foot pedal, handwheel, stitch length control and reverse button within easy reach.
Before sewing your first seam, read the sections on threading and winding the bobbin in the instruction manual. Each machine guides the upper thread slightly differently. An incorrectly threaded machine can cause loops, thread breaks and uneven stitches, even when it is technically working perfectly.
Prepare the machine correctly
First wind the lower thread onto the bobbin provided. Insert the bobbin into the bobbin case or bobbin area and follow the unwinding direction specified by the manufacturer. Then thread the upper thread with the presser foot raised. This opens the tension discs so the thread sits correctly.
Pull the upper and lower threads about ten centimetres towards the back under the presser foot. Place a fabric scrap under the presser foot, lower the presser foot and select the straight stitch. For woven cotton fabric, a stitch length of approximately 2,5 to 3 millimetres is suitable.
Spend the first 15 minutes on the straight stitch
Use a washable pen to draw several lines on a fabric scrap. Start with straight lines parallel to the fabric edge. Then sew a square and turn the fabric at the corners with the needle lowered. The needle remains in the fabric while you raise the presser foot and turn the material.
- Sew the first few centimetres slowly.
- Secure the beginning of the seam with two or three backstitches.
- Guide the fabric gently and do not pull it.
- Finish the seam with backstitches as well.
- Cut the threads with sharp scissors.
Focus on the distance from the fabric edge. A marking on the presser foot or a strip of tape on the needle plate can help. Do not constantly watch the needle; instead, guide the fabric along a fixed reference point.
Pro tip
Sew each practice seam without thread first. This lets you feel how quickly the fabric is fed through and practise turning at the corners. Then repeat the same line with thread. This short dry run saves material and makes your first stitches smoother.
When the stitch pattern looks even on both sides, increase the speed only slightly. Speed is no substitute for control. For beginners, a slowly running motor provides more confidence than sewing a seam as quickly as possible.
What equipment do you need for easy sewing projects?
A small, carefully selected basic setup is all you need. Buy materials to suit the project rather than the number of possible presser feet. With just a few tools, you can complete your first steps neatly.
- Sewing machine: A straight stitch, zigzag stitch, reverse sewing and adjustable stitch length are sufficient.
- Fabric scissors: Use them exclusively for fabric so the blade stays sharp.
- Sewing pins or fabric clips: Clips are particularly useful for thick layers and delicate fabrics.
- Seam ripper: It corrects small mistakes without unnecessarily damaging the fabric.
- Tape measure and ruler: A long ruler makes straight cutting lines easier.
- Chalk or washable marking pen: Mark seam lines, fold lines and the position of handles.
- Iron and ironing mat: Press seams during the project, not just at the end.
- Polyester thread: All-purpose thread works with many cotton fabrics and remains hard-wearing.
For fabric scraps and woven cotton fabric, you will find suitable fabrics in our range. For your first projects, choose a densely woven, non-stretch fabric. Medium-weight cotton forgives small inaccuracies and is easy to press.
Match the fabric, needle and thread
For standard cotton, a size 80/12 universal needle is usually suitable. Very thin fabrics require a finer needle, while heavy canvas or upholstery fabrics need a stronger one. Replace a bent or blunt needle immediately. It can cause skipped stitches, damage the fabric or break.
Use the same thread for the upper and lower threads while you are still practising. Different threads make it harder to troubleshoot thread tension. Choose a contrasting colour for practice seams and a matching colour for the finished project.
“Always unplug the machine immediately after use and before cleaning.”
A stable cutting area
For cutting, you need a level surface that is larger than the piece of fabric. A smooth tabletop on can serve as a height-adjustable cutting table. Position the trestles securely and place the sewing machine on a firm, low-vibration work surface when operating it.
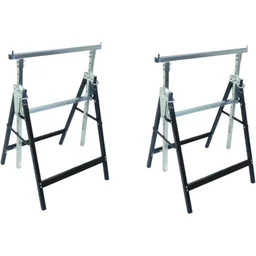
Separate cutting and sewing areas if space allows. This keeps the fabric smooth, and the scissors are not right next to the running motor. Good lighting from the side makes thread and markings easier to see.
Which sewing projects are suitable for beginners?
A suitable beginner project has straight seams, few layers of fabric and a manageable size. At first, avoid zips, stretchy fabrics, complicated curves and very small pieces. You will learn faster when a project has a clear goal and you can check each step as you go.
1. Tote bag with straight seams
A fabric tote bag is the best practice project for many basic techniques. Cut two rectangles measuring 40 x 44 centimetres each and two handles measuring approximately 70 x 8 centimetres. This gives the bag plenty of space without making it awkward to sew.
Finish the raw edges with a zigzag stitch or overlock stitch. Place the two large pieces right sides together, pin the sides and sew them with a one-centimetre seam allowance. Press the seam allowances open or to one side.
Fold the top edge inwards twice by one centimetre each time and topstitch the hem close to the edge. Fold the handles in half lengthways, press them, fold the raw edges inwards and sew along both long sides. Attach the handles symmetrically to the bag and reinforce the attachment points with a rectangle and a cross.
2. Cushion cover without a zip
A cushion cover with a hotel-style envelope closure helps you practise accurate measuring and sewing through several layers of fabric. For a 40 x 40 centimetre cushion, cut a front piece measuring 42 x 42 centimetres and a back piece measuring 42 x 58 centimetres. The longer back piece forms the overlap.
Start by hemming the two short edges of the back piece. Then place all the pieces right sides together so that the hemmed edges overlap in the centre. Sew all the way around with a one-centimetre seam allowance, finish the edges and turn the cover right side out.
Carefully push out the corners from the inside. Insert the cushion and check that the overlap stays closed. This project clearly shows how much accurate seam allowances affect the finished result.
3. Small fabric organiser
A fabric organiser for thread, tape measures or clips introduces you to several layers of fabric and reinforced edges. Cut two outer fabric pieces and two lining pieces measuring approximately 22 x 28 centimetres. A thin layer of interfacing stabilises the outer fabric, but is not necessary for your first tote bag.
First sew the outer fabric and lining into separate bags. Leave an opening of approximately eight centimetres in the lining for turning. Pin the two bags together with right sides facing, sew around the top edge and turn the organiser right side out through the opening.
Close the turning opening with edge stitching from the outside or with a few hand stitches. Push the lining inside and press the top edge. When sewing corners, stop exactly at the markings and pivot the fabric with the needle down.
Additional tip
After each project, photograph one seam and note the stitch length, needle size and fabric type. This small record shows which settings work well. For more durable projects later on, you can take inspiration from materials in the Tarps and Nets section, but only sew fabrics this thick after practising with cotton.
From practice to your own project
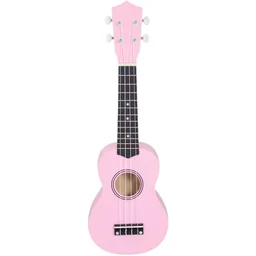
After making a tote bag and cushion cover, you can use the shapes you have learned to develop your own bags. A bag for could later be designed as a padded ukulele case. You will also need wadding, webbing and a secure fastening. This is a suitable next step, not a first sewing project.
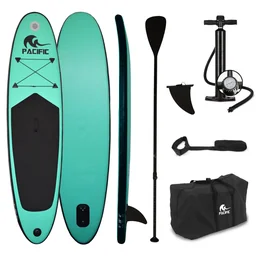
A protective cover for can be a practical follow-up outdoor project. However, durable covers require longer seams, several layers and strong handles. Start with a simple rectangular shape and test every material combination on a scrap piece.
For later textile projects involving seat cushions, storage or weather protection, the Garden + Outdoor section offers inspiration. The order remains important: start with cotton and straight seams, then move on to thick or coated materials.
How do you sew your first project step by step?
The tote bag combines the most important basics and can be completed in an afternoon. Work through the steps in the following order. Do not interrupt the process to try out new techniques at the same time.
1. Prepare the pattern pieces
Wash and dry cotton fabric before cutting. This prevents it from shrinking after you have sewn it. Iron the fabric smooth and place it on a clean, flat surface.
Cut two rectangles measuring 40 x 44 centimetres and two straps measuring 70 x 8 centimetres. Check each measurement in several places. A slightly crooked cut edge will later result in a crooked bag.
2. Mark and finish the edges
Mark one and two centimetres along each top edge. These lines indicate the two folds for the hem. Finish the sides and bottom edge with a zigzag stitch if the fabric frays heavily.
Fold the top edge inwards at the first mark and iron it. Fold it again at the second mark. Pin the hem across the seam or use fabric clips.
3. Sew the hems
Sew the hem in place about two millimetres from the inner edge. Secure the beginning and end. Leave the needle in the fabric when you reach a point where a pin needs to be removed.
Remove pins before they reach the presser foot. Never sew over a pin. The needle can break and parts can fly off.
4. Close the side and bottom seams
Place the fabric pieces right sides together. Align the top edges and sides precisely. Pin the sides and bottom, leaving the top opening free, and sew with a one-centimetre seam allowance.
Start each seam with backstitches. Pause briefly while sewing if the fabric layers shift. Lower the needle, raise the presser foot, realign the fabric and continue sewing.
5. Make and attach the straps
Fold each strap in half lengthwise and iron it. Open the strip, fold both long edges towards the centre line and iron it again. Fold the strip back together and topstitch along both long edges.
Mark two attachment points on both the front and back. For a 40-centimetre-wide bag, the distance from the side seam should be approximately nine centimetres. Check that the straps are not twisted before sewing.
First sew each strap in place as a rectangle. An additional diagonal cross distributes the pulling force. Repeat the stitching on the back and iron the finished bag.
Important note
Switch off the sewing machine and unplug it before changing the needle, cleaning the bobbin area or correcting the thread path. Keep your hands and fingers away from the presser foot and needle. Do not leave the machine running unattended, especially within the reach of children.
“Keep your fingers away from all moving parts. Take particular care around the sewing machine needle.”
What mistakes do beginners make when learning to sew?
Most problems are not caused by a lack of talent. They result from poor preparation, sewing too quickly, or using unsuitable materials. Check the simple causes first before adjusting the thread tension.
The bobbin thread forms loops
Loops on the underside of the fabric often indicate that the upper thread has been threaded incorrectly. Raise the presser foot, pull out the upper thread completely, and thread the machine again. Then check that the bobbin is inserted correctly.
Only change the thread tension once the upper and bobbin threads are correctly positioned. Turn the tension dial in small increments, then sew on a scrap of fabric. Make a note of the settings that work for different fabrics.
The seam becomes crooked
Look at the fabric edge or a marking on the needle plate, rather than directly at the needle. Guide the fabric loosely with both hands. Pulling or pushing changes the feed and causes the seam to drift off line.
Sew more slowly around curves. Raise the presser foot while the needle is lowered, then turn the fabric in small sections. First practice wide curves on paper without thread, then on fabric.
The stitches are skipped
Using the wrong, blunt, or bent needle often causes skipped stitches. Insert a new universal needle and push it up as far as it will go in the needle holder. Check the flat side of the needle according to your machine’s instructions.
Use a jersey needle for jersey fabric and choose a suitable stitch for very stretchy fabric. Avoid these materials for your first projects. Woven cotton clearly shows you the basic settings.
Four weeks of short practice sessions
Regular short sessions are more effective than an overloaded sewing Saturday. Plan three sessions per week, each lasting 20 to 30 minutes. Finish every session with a small result.
- Week 1: Threading, winding the bobbin, straight stitching, backstitching, and sewing lines on fabric scraps.
- Week 2: Hem edges, seam allowances, corners, and turning with the needle lowered.
- Week 3: Sew a tote bag or a simple cushion cover.
- Week 4: Plan a lined fabric organizer or your own small bag.
Keep fabric scraps with their settings. Write on the back which needle, thread, and stitch length you used. This creates a personal reference and helps you avoid repeating unsuccessful attempts.
Learning to sew means repeating movements and checking the results. Start with stable cotton, work slowly, and press every section. After three simple projects, you will already understand the most important processes: measuring, cutting, pinning, sewing, securing, and finishing neatly.
Frequently asked questions
- Which sewing machine is best for beginners?
- For beginners, a mechanical sewing machine for home use with straight stitch, zigzag stitch, reverse sewing, and adjustable stitch length is sufficient. A robust standard machine makes practicing and completing simple projects easier. You do not need many extra programs to begin with. Easy-to-reach controls, clear instructions, and a speed that can be controlled slowly are more important.
- Which fabric is best for your first sewing projects?
- Woven cotton is particularly well suited to your first sewing projects. Although the fabric frays, it keeps its shape and rarely slips under the presser foot. Avoid jersey, satin, velvet, and very lightweight fabrics until you have mastered stitch length, fabric handling, and thread tension.
- How can I practice sewing with a sewing machine?
- Start by practicing on fabric scraps with straight, angular, and curved lines drawn on them. Sew slowly without pulling the fabric, and secure the beginning and end of each seam by sewing in reverse. Then check the stitch quality, seam allowance, and bobbin thread tension. Repeat the exercise until your movements are smooth and even.
- Why does my fabric become wavy when sewing?
- Wavy fabric is often caused by pulling it while sewing or using an unsuitable stitch length. Let the feed dogs move the fabric and guide it only lightly. Also check the needle, thread tension, and presser foot. For lightweight fabrics, use a fine universal needle and sew slowly.
- What is a good first sewing project?
- A fabric tote bag or a simple cushion cover is a good first sewing project. Both projects mainly consist of straight seams and do not require a zipper. You can practice cutting, finishing raw edges, working with seam allowances, pressing, and securing seams. A fabric organizer is a suitable next step once you can sew corners and several layers of fabric confidently.
You may also be interested in
- Creative fabric DIY: ideas for beginners and advanced crafters
- Garden projects for beginners: from planning to a green oasis
- Top DIY projects for home improvement: 5 ideas to make yourself
- Garden plants for beginners: an easy introduction to gardening
- Build your own furniture: creative projects for your home
- Carving wooden animals: creative projects for beginners