
In brief: You can tile successfully by checking the surface, having the right tools ready and measuring the tiles precisely. Start with a clean, solid and level surface. Plan the laying pattern in advance and use tile spacers for even grout lines. Choosing the right tile adhesive for your surface and tile type is essential.
Tiling: preparation is everything
A successful tiling project begins long before the first tile is laid. You can save time and avoid frustration by checking the surface carefully. It must be completely clean, dry, solid and level. Remove old coatings, dust and loose plaster completely.
Measure the room's diagonals. This will show you whether the room is square. If there are significant deviations, plan to level the surface. Calculate how many tiles you need. Add around ten percent for waste and cuts.
Have all the tools and materials ready. These include tile adhesive, grout, a spirit level, a notched trowel, tile spacers and a rubber mallet. A tile cutter or wet saw is essential for precise cuts.
Expert tip
Lay the tiles out dry first. This lets you see the final pattern and position cut tiles optimally. Always start from the centre of the room or a prominent visible edge.
The right surface for your tiles
Screed must be sufficiently dry. Measure residual moisture with a CM moisture meter. For cement screed, the maximum value is 2 CM percent; for calcium sulphate screed (anhydrite), it is 0.5 CM percent. Existing tiles used as a surface must be firmly bonded.
Fill cracks in screed or plaster with a flexible levelling compound. Level out uneven areas with a smoothing compound. The tolerance is a maximum of three millimetres over two metres. Check this with a long spirit level or straightedge.
The quality of the surface determines how long the tiles will last. No adhesive in the world can compensate for a rotten or uneven floor.
How do you choose the right type of tile?
There is a wide range of tiles to choose from. Decide based on the level of use and where they will be laid. Porcelain tiles are extremely hard, wear-resistant and frost-proof. They are suitable for heavily used areas such as entrances, patios and bathrooms.
Wall tiles are softer and more absorbent. They are typically used on indoor walls. They are only suitable for residential floors where usage is light. Pay attention to slip resistance. Wet rooms and outdoor areas require tiles with a suitable R rating.
Natural stone such as slate, granite or marble gives every room character. Bear in mind that natural stone often needs to be impregnated. It is more demanding to work with and requires special adhesive and grout. In the quality equipment section you will also find tools for demanding materials.
Tools for professional tiling
Without the right tools, you will not get far. A sturdy tile cutter makes straight cuts. For complex shapes and holes, use tile nippers or a jigsaw with a diamond blade. A wet saw produces clean edges and minimises dust.
Apply the tile adhesive with a notched trowel. The notch depth depends on the tile size and type. Large-format tiles require deeper notches. A rubber mallet helps you press the tile gently and evenly into the adhesive.
Tile spacers ensure even grout gaps. Remove them before the adhesive sets. For subsequent care, it is worth choosing a good range of cleaning tools that is also suitable for stubborn dirt.
Important note
Always wear safety goggles and respiratory protection when cutting tiles. Tile dust, especially from porcelain tiles, is harmful to your health. Where possible, work with water cooling or in well-ventilated rooms.
Step-by-step tiling instructions
Start in the centre of the room. Find the centre lines of the two longest walls. Their intersection is your starting point. From here, lay the first tiles dry in a square. Adjust the pattern as needed.
Mix the tile adhesive according to the manufacturer's instructions. The quantity should be enough for around one hour of work. Apply the adhesive to the surface with the smooth side of the trowel. Then spread it evenly with the notched side.
Carefully place the first tile in the adhesive. Press it down firmly and move it slightly back and forth to create an optimal bond. Check that it is level with the spirit level. Insert the tile spacers immediately.
Work your way across row by row. Remove adhesive residue from the joints immediately with a damp sponge. The adhesive will have cured after around 24 hours. You can then start grouting.
The most common mistake is using too much adhesive. A thin, even layer bonds better than a thick blob. The adhesive needs to breathe to cure properly.
Mastering cuts and finishing touches
Measure carefully for edge tiles. Subtract the grout gap. Mark the cut line with a waterproof pen. Position the tile cutter and score the tile with firm, even pressure. Then snap it cleanly over the edge of the table.
For rounded cut-outs, draw a template. Use tile nippers to remove the material piece by piece. Then smooth the edges with a tile file. Skirting tiles or transition profiles give the surface a neat finish.
Products such as the
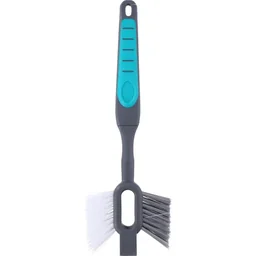
help you make precise cuts. For cleaning freshly laid surfaces, a is ideal. It also reaches tight corners.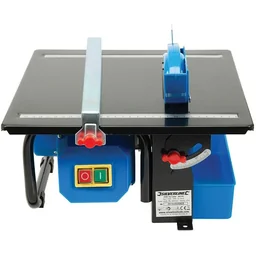
Additional advice
Take your time with the cuts. One incorrect cut can ruin an expensive tile. Practise using the cutter on an inexpensive spare tile. Do not plan narrow cuts in highly visible areas or frequently walked-through corners.
Cleaning tiles and renewing grout
Proper care extends the service life of your tiles. Only clean newly laid tiles once the adhesive and grout have fully cured. Use pH-neutral products for the initial cleaning. Aggressive acids or abrasive cleaners can damage the glaze and grout.
For everyday cleaning, lukewarm water and a microfibre cloth are sufficient. For heavy dirt, you can find special cleaners in our household cleaning tools range. A product such as the
removes dirt from grout efficiently.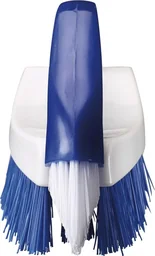
Grout is the weak point of any tiled surface. It absorbs moisture and can become dirty. Completely renew cracked or mouldy grout. Remove the old material deep into the joints with a grout scraper. is a professional tool for this job.
Grouting for long-lasting results
Choosing the right grout is crucial. In wet areas, use flexible, water-repellent epoxy grout. Cement-based grout is sufficient in living areas. Mix the material according to the instructions on the packaging. The consistency should be creamy but not runny.
Apply the grout with a rubber float or grout spreader diagonally across the joints. Press it firmly into the recesses. After allowing it to dry slightly, wipe off the excess with a damp sponge. Take care not to remove too much material from the joints.
Protect the freshly grouted surface from moisture and loads. Depending on the product and climate, curing takes several days. A special grout brush such as helps with final polishing and removing residue.
With patience, the right tools and careful planning, you can lay tiles like a professional. The result is a high-quality, long-lasting and attractive surface that you will enjoy for years. For more inspiration and specialist materials, take a look at our extensive brand shops.
Frequently asked questions
- Which tile adhesive do I need?
- The choice of adhesive depends on the substrate and the tiles. For absorbent substrates such as cement screed or masonry, use a cement-based adhesive. On non-absorbent surfaces such as existing tiles or cast asphalt, you need a flexible reactive resin adhesive suitable for thin-bed application. For large-format tiles or natural stone, use a special flexible adhesive.
- How do I cut tiles accurately?
- For straight cuts, use a manual tile cutter or a wet saw. Score the glaze deeply with the cutting wheel and snap the tile cleanly. For cut-outs around sockets or pipes, use tile nippers or a jigsaw with a diamond blade. Practise on offcuts first.
- How long does tile adhesive take to cure?
- Curing times vary. Thin-bed adhesive can usually be walked on after 24 hours, while it reaches full load-bearing capacity after around 7-14 days. Follow the manufacturer's instructions. Room temperature and humidity affect the process. Avoid draughts and do not walk on the tiles during the initial period.
- Can I lay new tiles over existing tiles?
- Yes, this is possible if the existing tiles are firmly attached, clean and free from hollow spots. You must clean the surface thoroughly and prime it with a bonding primer. Then use a special flexible adhesive suitable for thin-bed application. Bear in mind that the floor will be raised by the height of the new tiles.
- When should I renew grout?
- Renew grout when it becomes brittle, crumbles or changes colour. This often happens after many years. Completely remove the old grout with a grout scraper or a special machine. Clean the joints thoroughly before applying new flexible grout.
You may also be interested in
- Lay tiles yourself and plaster walls properly – a guide for DIYers
- Laying tiles: step-by-step guide for walls and floors
- Laying mosaic tiles: a DIY guide for your bathroom
- Laying modern tiles: a guide for DIYers
- Laying cork flooring: step-by-step guide for DIY enthusiasts
- Choosing tiles: the complete guide for your project