
In brief: To make your own aloe vera gel, cut a strong outer leaf from a healthy aloe vera plant, let the yellow sap drain away, remove only the clear inner leaf gel and briefly blend it. Work hygienically, use the gel fresh, store it in the fridge for no more than a few days and use it only externally.
Short answer: To make your own aloe vera gel, cut a strong outer leaf from a healthy aloe vera plant, let the yellow sap drain away, remove only the clear inner leaf gel and briefly blend it. Work hygienically, use the gel fresh and store it in the fridge for no more than a few days. Use it only externally.
Aloe vera stores water in its thick leaves. The clear inner gel feels cool and smooth and is suitable for simple care on unbroken skin. The key factors are choosing the right plant species, hygienic processing and completely avoiding the leaf skin and yellow latex.
This guide combines aloe vera care with growing aloe vera and shows how to turn your harvest into uncomplicated DIY plant-based skincare. You do not need a complicated recipe. A clean knife, a spoon, a jar and a refrigerator are all you need.
Which aloe vera is suitable for making your own gel?
For your home remedy, you need true aloe, botanically Aloe vera or Aloe barbadensis Mill. This species produces thick, fleshy leaves with plenty of clear inner gel. Only harvest from a vigorous plant that is actively growing and has no soft, discoloured or rotten areas.
Not every succulent with pointed leaves is aloe vera. Aloe arborescens, Aloe humilis, Gasteria and Haworthia belong to different species or genera. Their leaves look similar, but they do not automatically provide a gel that you should use for homemade skincare.
How can you identify a suitable plant?
First check the label or botanical name. The name Aloe vera must be clearly stated. A general description such as Aloe, succulent or Aloe mix is not enough for selecting a plant.
- Healthy leaves: They are firm, look plump and show no black, glassy or sunken areas.
- Mature outer leaves: The older leaves around the edge are thicker and contain more gel than the narrow leaves in the centre.
- Clean source: Do not use a plant immediately after an unknown pesticide treatment.
- Stable roots: The plant sits firmly in the pot and does not smell musty. A rotten smell indicates waterlogging or root rot.
For beginners, the True Aloe (Aloe vera)
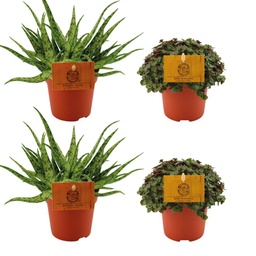
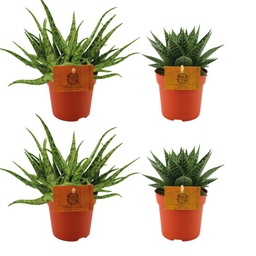
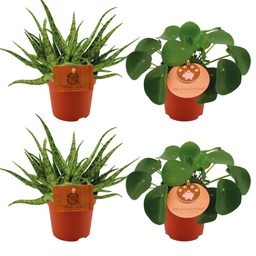
. The plant is a good starting point for harvesting your own gel and will remain in your home for many years in a bright location. The following sets contain decorative Aloe Spider plants and other succulents: , and . These combinations are suitable for a succulent collection, but they are not a substitute for a correctly identified true aloe for making your own gel.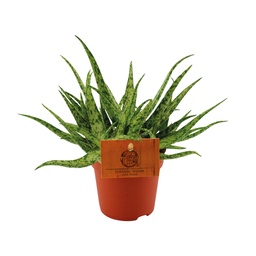
Pro tip
Label your plant with its botanical name as soon as you buy it. This will help you avoid confusing a decorative aloe or Gasteria with Aloe vera later on. Only harvest once the plant has developed several strong outer leaves.
How do you care for aloe vera when growing it in a pot?
Aloe vera comes from dry, warm regions and stores water for extended periods of drought. It grows vigorously in a pot when excess water can drain away quickly. Soggy soil for several days is more harmful to the roots than forgetting to water once.
Which location helps the plant thrive?
Place your aloe vera near a bright window where it receives several hours of light each day. A south- or west-facing window is ideal, as long as you gradually acclimate the plant to direct sunlight. After a dark winter, the leaves may otherwise develop sunburn spots.
In summer, you can move your aloe outdoors onto a balcony or patio. Choose a spot protected from rain and initially place the pot in bright morning or evening sun for just a few hours. The plant does not tolerate persistently cold nights or frost. Bring it indoors as soon as nighttime temperatures drop well below 10 degrees Celsius.
Which soil and pot are suitable?
Use loose cactus or succulent soil. Heavy potting soil retains too much water and becomes compacted in the pot. If necessary, mix in mineral materials such as pumice, lava granules or coarse sand.
The pot needs a drainage hole. A thin drainage layer made from coarse material can help, but it does not replace a free-draining growing medium. Place the pot on a saucer and empty away excess water after watering.
The right gardening and plant care accessories make repotting and everyday care easier. When repotting, choose a pot only slightly larger than the old one. Too much unused soil stays damp for a long time and increases the risk of root rot.
How should you water aloe vera?
Only water when the growing medium is completely or almost completely dry. Then add enough water for it to run out of the bottom of the pot, and allow the pot to drain thoroughly. Empty any water from the saucer.
In spring and summer, the plant needs more frequent watering in a warm, bright location. In winter, small amounts at longer intervals are often sufficient. Check the soil a few centimeters below the surface with your finger instead of following a fixed watering schedule.
How do you fertilize and protect the plant?
During the growing season, a weakly diluted cactus or succulent fertilizer about once a month is sufficient. Do not fertilize dry soil, and initially avoid adding extra nutrients after repotting. Information about plant and flower fertilizers can help you choose the right product.
Carefully wipe dust from the leaves and check the leaf joints regularly. Mealybugs and scale insects often hide in sheltered crevices. If the plant is infested, isolate it and find out about suitable pest and plant protection products. Never treat a plant whose leaves you intend to use cosmetically with a product that does not provide clear application instructions and a stated waiting period.
- Spring: Move the plant to a brighter spot, gradually acclimate it to sunlight and resume more regular watering when the growing medium is dry.
- Summer: Keep it warm and bright, avoid waterlogging and apply a weak fertilizer if needed.
- Autumn: Reduce watering and protect the plant from cold nights.
- Winter: Keep it very bright, relatively cool and dry. Do not leave the soil wet for extended periods.
“Aloe vera thrives in a bright, sunny location and needs well-drained soil.”
How do you harvest and process aloe vera leaves?
Do not harvest all the leaves from your aloe vera. The plant needs its leaves to store water and carry out photosynthesis. Instead, cut no more than one or two strong outer leaves and leave the center untouched.
When is a leaf ready to harvest?
Choose a fully grown leaf from the lower or outer edge of the plant. It should be firm, thick and at least about 15 centimeters long. Leave young central leaves on the plant so they can continue to grow.
Harvest in the morning or early evening using a sharp, clean knife. Cut the leaf as close to the base as possible without damaging neighboring leaves. Wipe the cut on the parent plant dry, then keep the area relatively dry.
Which tools do you need?
- a sharp knife or kitchen knife
- a clean chopping board
- a small bowl for collecting the yellow sap
- a spoon with a smooth edge
- a clean glass jar with a tightly fitting lid
- optionally, a fine sieve and a small blender
Thoroughly clean the work surface, knife, spoon and jar. Dry all items completely. Residual water and dirt shorten the gel’s shelf life.
How do you remove the clear gel from the leaf?
- Drain the leaf upright: Place the freshly cut leaf in a bowl with the cut surface facing down. Allow the yellow latex to drain for 15 to 30 minutes, then discard it.
- Wash the leaf: Rinse the leaf under cold water and dry it with a clean cloth.
- Remove the edges: Carefully cut off the serrated sides, removing a narrow strip of leaf flesh as well.
- Remove the skin: Lay the leaf flat on the board and completely cut away the green skin from the top and bottom. Always cut away from your body.
- Check the gel: Remove any yellow or greenish areas. Use only the clear to slightly translucent inner gel.
- Scoop out the gel: Slide a clean spoon between the skin and the gel, and remove the gel in pieces.
- Rinse the gel pieces: Briefly rinse the pieces with cold water to remove any remaining plant sap and pieces of skin.
- Achieve the right consistency: Mash the gel with a fork or blend it for just a few seconds. Blending for too long makes the gel foamy and warms it.
- Fill the jar: Immediately transfer the gel to a clean glass jar. Seal it and write the preparation date on the lid.
Fresh aloe vera gel may foam slightly or separate after a short time into a firmer and a more liquid layer. This alone does not mean it has spoiled. The smell, color and hygienic preparation process are what matter.
Which additives are suitable for DIY cosmetics?
You do not need any additives for your first application. Essential oils, lemon juice and fragrances can irritate sensitive skin and do not reliably extend the shelf life. Without tested preservatives, a homemade product remains a fresh plant-based product.
Important note
Use homemade aloe vera gel exclusively on intact skin and for external application only. Do not eat or drink the gel or any part of the leaf. The yellow latex and the leaf skin may contain aloin. Do not apply the gel to deep or open wounds, the eyes, mucous membranes or large areas of damaged skin.
How does homemade aloe vera gel stay fresh?
Aloe vera gel contains a lot of water, which makes it a good environment for microorganisms to grow if no preservative is used. Clean preparation can slow spoilage, but it cannot prevent it. Make only a small amount that you can use within a few days.
How should you store the gel?
- Refrigerator: Store the sealed jar in the refrigerator and use the gel within two to three days.
- Freezer: Fill a clean ice cube tray with small portions. Thaw only one portion in the refrigerator and use it promptly.
- Room temperature: Leave fresh gel out only while you apply it. Storing it on a windowsill, even briefly, is not a safe option.
Remove the gel with a clean spoon. Do not dip used fingers into the jar or return leftover portions to it. Instead, divide the gel into several small containers right away.
How can you tell if the gel has gone bad?
Check the gel before every use. A sour, fermented or unusual smell, bubbles, mold, noticeable discoloration or a slimy texture are signs that you should stop using it.
- Smell: Fresh gel has a mild, fresh scent, not a sour or alcoholic smell.
- Color: The inner gel should be clear to slightly milky. Yellowish or brownish discoloration may indicate sap residue or oxidation.
- Surface: Mold or unusual bubbles mean you should discard the entire jar.
- Skin feel: Burning or itching after application is a reason to wash the gel off, even if it looks normal.
Do not heat the gel to make it last longer. Heat changes its consistency and is not a substitute for tested preservation. Vitamin E also cannot reliably protect a water-rich gel from bacteria or mold.
“The use of aloe preparations is contraindicated in children under twelve years of age.”
The EMA statement refers to aloe preparations for internal use, particularly dried leaf juice. It emphasizes that homemade aloe leaf gel should not be treated as food. For cosmetic use, correct species identification, complete removal of the leaf skin and a skin test are essential.
How do you use homemade aloe vera gel for home remedies and DIY skin care?
Use aloe vera gel sparingly and while it is fresh. Apply a thin layer to clean, dry, unbroken skin. The gel can form a cooling layer and may work as a simple moisturizer for your hands, feet or dry areas of skin.
What are some simple ways to use it?
- Fresh skin care: Spread a small amount of gel over your forearm, hands or legs. Let it absorb briefly and, if needed, apply an unscented cream afterward.
- Cooling compress: Apply some gel to a clean cotton cloth and place it briefly on a warm or tight-feeling area of skin. Do not use this method on severe burns or open wounds.
- DIY plant-based skin care: Just before use, mix one teaspoon of fresh gel with a small amount of neutral, unscented cream. Do not store the mixture.
- Hair care: Distribute a very small amount through the lengths and ends of your hair. Test it first to see whether your hair tolerates the gel without sticky residue.
How do you test for skin irritation?
Apply a small amount to an inconspicuous area of your forearm. Wait several hours and check your skin. If you experience burning, redness, swelling or itching, wash the gel off with water and stop using it.
Even a natural plant can trigger contact allergies. Do not add homemade gel to eye creams, lip balms or products intended for mucous membranes. Avoid experimenting with fragrance oils, alcohol or acids if you cannot reliably assess how your skin will react.
When should you avoid using aloe vera gel?
Deep wounds, weeping skin, severe burns, blisters, pus-filled sores or persistent pain require medical attention to assess the underlying cause. Aloe vera is not a substitute for medical treatment. If you plan to use the gel on a child, during pregnancy, or if you have known allergies or chronic skin conditions, seek professional advice first.
How should you care for your aloe plant after harvesting?
Do not water the plant heavily right after cutting. Let the cut surface dry, then resume your usual aloe vera care. Do not remove any more leaves while the plant appears weakened.
A healthy plant will grow new leaves and often develop side shoots over time. It is better to harvest small amounts regularly from the outside than to cut the plant back heavily all at once. This keeps it attractive and provides individual leaves for fresh use over the long term.
Additional advice
Freeze any extra gel right away in small portions and label each one with the date. This lets you thaw only what you need and prevents a large jar from being opened repeatedly and becoming contaminated.
Conclusion: Making your own aloe vera gel is easy if you have a correctly identified true aloe, a bright location and a hygienic harvesting process. Let the yellow sap drain away and remove the entire skin before using the clear inner gel. Small, fresh portions are the most hygienic choice for DIY skin care.
Frequently Asked Questions
- How long does homemade aloe vera gel last?
- Homemade aloe vera gel usually lasts only two to three days in a clean, tightly sealed jar in the refrigerator. Without tested preservation, the risk of bacterial growth increases quickly. Divide the gel into small portions and freeze them. Discard the gel right away if its smell, color or consistency changes.
- Can I apply aloe vera gel straight from the leaf?
- Yes, you can apply the clear inner gel to unbroken skin once you have completely removed the green skin and yellow sap. Test it on a small area of your forearm first. If you experience burning, redness or itching, wash the gel off and stop using it.
- Which aloe vera plant is suitable for making homemade gel?
- True aloe, botanically known as Aloe vera or Aloe barbadensis, is suitable for making homemade gel. Use only a healthy plant that has been reliably identified. Decorative aloe species and succulents from mixed sets are not automatically suitable for cosmetic use. A plant label is not a substitute for reliable species identification.
- Why does yellow sap run from an aloe vera leaf?
- The yellow sap is latex from the part of the leaf beneath the skin and may contain aloin. For this reason, let freshly cut leaves drain upright and generously remove the skin and edge tissue. Use only the colorless inner gel. Do not use homemade preparations in drinks or food.
- Can I freeze homemade aloe vera gel?
- You can freeze the gel in small portions, preferably in a clean ice cube tray. Thaw only the amount you need in the refrigerator and use it promptly. Freezing does not replace hygienic preparation or give the gel a long shelf life as a cosmetic product.
You might also be interested in
- How to Save Aloe Vera: What to Do About Brown Leaves
- How to Care for Aloe Vera: Avoid Common Mistakes
- Create Your Own Home Apothecary: Medicinal Plants for Your Home
- Make Your Own Healing Salves: Recipes for DIY Natural Cosmetics
- Sustainable Home Remedies: Replace Drugstore Products Yourself
- Make Your Own St John's Wort Oil: A Guide to Natural Skin Care