
In brief: Installing a heating system yourself takes planning, DIY skills and the right materials. You can replace radiators or install simple systems such as patio heaters. In Germany, a qualified professional must install water-based systems. You can still significantly reduce costs by handling the preparation and installation work yourself.
DIY Heating: Step-by-Step Guide
Want to lower your heating costs and tackle some work yourself? You cannot install a complete central heating system on your own, but you can handle many related tasks. This can save you money and give you more control.
This article walks you through several projects, from replacing radiators to installing an electric supplementary heater. You will learn where the limits are and find the right products for your DIY project.
What You Need to Know First
German law strictly regulates heating installation. Only qualified specialist companies may work on gas and water-based systems. This helps protect you and your neighbors.
You can handle preparation, installation and component connections yourself. A professional takes care of the final adjustments and commissioning. This lets you combine DIY work with safety.
Important note
In Germany, work on or installation of a water-based central heating system (oil, gas, pellets) must be carried out by a qualified heating, plumbing and HVAC professional. DIY installation can create hazards, cause insurance problems and void the warranty. Always seek professional advice.
Which Heating Projects Can You Tackle Yourself?
Focus on work that is legal and safe. This includes replacing existing radiators, adding insulation and installing electric direct-heating systems.
Replacing a Radiator: How to Do It
Is your old radiator rusty or no longer powerful enough? You can replace it yourself and save on installation labor.
- Drain the system. A professional switches off your heating system and drains the affected circuit.
- Remove the old radiator. Loosen the fittings on the thermostatic and return valves. Lift the radiator off the wall.
- Prepare the new radiator. Install the supplied connection pieces correctly (left-hand and right-hand threads). Seal the threads with hemp or Teflon tape.
- Install and connect it. Hang the new radiator on the existing brackets and connect it to the valves. Tighten the connections by hand, then turn them a quarter turn with a radiator wrench.
- Fill and bleed the system. A professional refills the system and bleeds it properly.
“Preparing the threads properly is crucial when replacing a radiator. Deburr them cleanly, seal them correctly and tighten them carefully to help prevent leaks from the start.”
Installing Electric Heaters
Infrared panels, electric radiators and patio heaters are ideal DIY projects. They only need a suitable power connection.
Check the device's power consumption. Power outlets are often rated for only 2300 Watt. A 2000-Watt heater already puts a considerable load on that limit. For a fixed connection to a junction box, check the cable cross-section.
Freestanding patio heaters and permanently installed infrared heaters are suitable for patios. Make sure they are stable and protected from rain.
Pro tip
For electric outdoor heaters, use a timer near the power outlet from our commercial supplies range. It switches the heater on and off automatically, helping you save electricity and avoid leaving it on by accident.
Materials and Tools for Heating Installation
The right equipment makes the work more precise and safer. Here is what you need.
Pipes and Connections
Flexible multilayer composite pipe is suitable for modifications or installing shorter sections. It is easy to lay and does not require bending or welding.
The
Aluminium composite pipe 32mm, 50m is a versatile material. Cut it to size with a pipe cutter, then use a press tool to make watertight connections to the fittings. You can often rent a manual press tool from a specialist retailer.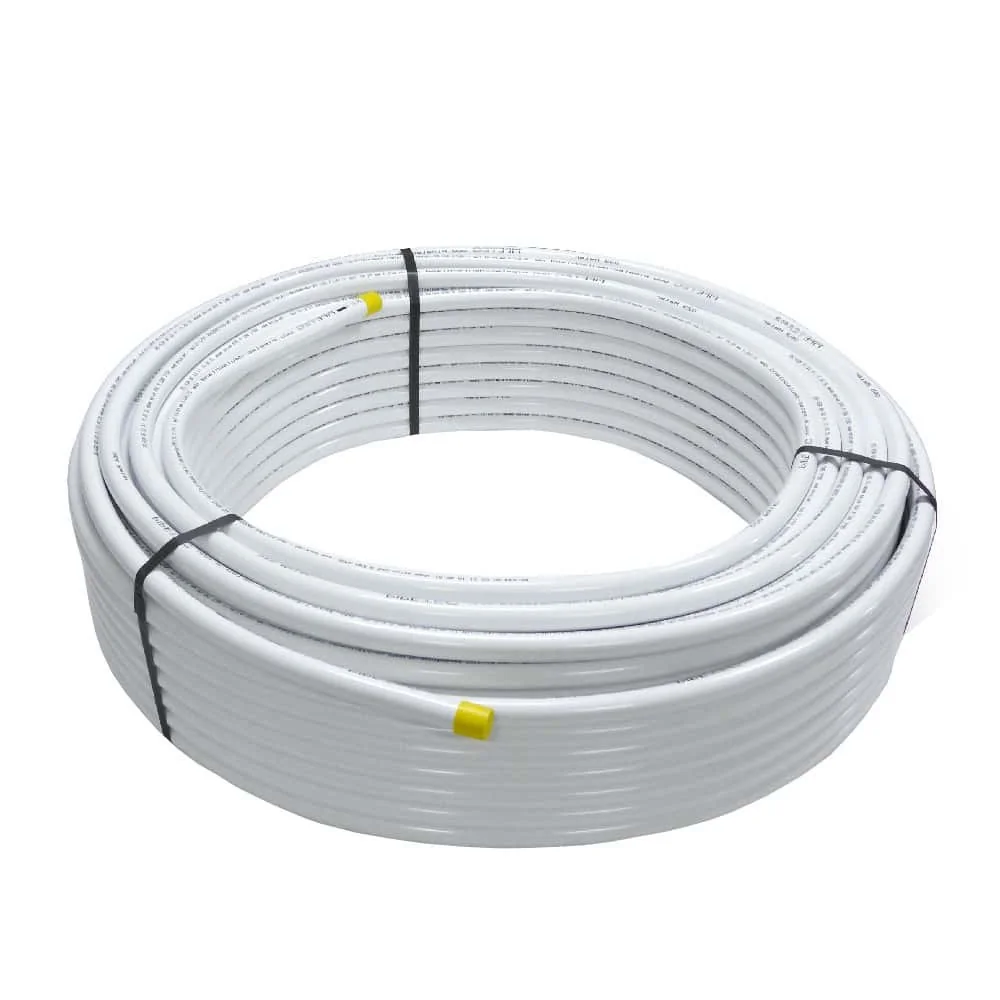
Safety and Control Equipment
Every heating system needs safety components. Plan for these even when handling the installation work yourself.
The
Surface-mounted wet-room emergency heating switch IP55 immediately switches off the heating system if it comes into contact with water. This is important in bathrooms and laundry rooms. Install it on the wall near the radiator.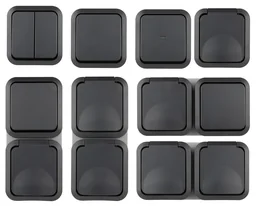
“Safety must always come first. An RCD for the circuit and an emergency shut-off for electric heaters in damp rooms are essential.”
Insulation to Prevent Heat Loss
Uninsulated heating pipes in a basement or attic waste energy. You can easily install the insulation yourself.
Cut pieces of foam or rubber pipe insulation to the right size. Place them around the pipe and seal or clamp the seam. Make sure there are no gaps, especially around elbows and connections.
Find the materials you need in our heating pipe insulation category.
Step-by-step: How to replace a radiator
Here’s a detailed guide to replacing a standard radiator in a detached house.
Step 1: Plan and gather your materials
Measure the distance between the radiator connections at floor level, from center to center. 500 mm is common. Buy a new radiator with the same measurement and similar or higher heat output (in watts).
Gather sealing material, a radiator wrench and tongue-and-groove pliers. A container to catch any leftover water will also come in handy.
Step 2: Disconnect the old radiator
Once the system has been drained, set the thermostatic valve to zero. Loosen the union nut connecting the radiator to the valve, then do the same at the return pipe.
Lift the radiator off its wall brackets and place it somewhere safe. Dispose of the scrap metal properly.
Step 3: Prepare the new connections
New radiators often come without connection fittings. Screw in the supplied fittings. Wrap hemp around the threads 10-12 times clockwise. You can also use a thick liquid thread sealant.
Tighten the fittings firmly, but don’t force them. You could damage the threads.
Additional advice
For heating-system threads, use traditional heating hemp with sealing paste. Together, they create a flexible seal that can withstand high temperatures. PTFE tape alone often isn’t enough for high-temperature applications.
Step 4: Mount and connect the radiator
Hang the new radiator on the old wall brackets. You may need to adjust the brackets. The radiator must be level.
Connect the prepared fittings to the valve union nuts. Tighten them by hand, then give each one another quarter turn with a wrench. Overtightening can damage the seal.
Step 5: Have a professional check the installation
Call your heating professional. They’ll refill the system, check the pressure, bleed the radiator and inspect all connections for leaks. Only then should you turn the heating system back on.
Lower your energy bills with simple improvements
You don’t always need to replace a radiator right away. Small improvements can often make a big difference.
Bleed your radiators
Is your radiator making gurgling noises? There’s probably air trapped inside, which can significantly reduce its efficiency. Use a radiator key to open the valve at the end of the radiator until water comes out. Hold a container underneath to catch it.
Start by bleeding the radiators on the lowest floor, then work your way up. Have a professional check the system pressure afterward.
Insulate heating pipes
Head down to your basement and feel the heating pipes. Are they warm while the room is cold? You’re losing energy.
Insulate all the pipes in unheated rooms. The insulation often pays for itself within one heating season. It’s a simple but effective DIY improvement.
Install modern thermostats
Older dial thermostats don’t regulate temperature accurately. You can replace them yourself with programmable thermostat heads. Simply unscrew the old head and fit the new one.
Program temperature setbacks for nighttime and when you’re at work. That way, you heat your home only when you’re there, which can noticeably lower your energy bills.
Where can I find products for my project?
Our shop offers a wide range of supplies for your heating projects. For pipes, fittings and tools, visit the Plumbing + Irrigation category.
For outdoor heating products such as patio heaters and grills, browse Garden + Outdoor. You’ll also find grills and fire pits for cozy evenings.
For power tools to help with installation, take a look at Power Tools.
Know your limits when it comes to DIY work. Leave critical steps to a professional. This helps you save money while keeping the job safe and properly done. Your warm home will thank you.
Frequently asked questions
- Can I install my own central heating system?
- No. In Germany, the law reserves the installation or modification of a wet central heating system for officially recognized specialist businesses (the SHK trade). However, you can do preparatory work and replace radiators by following instructions. A professional must always commission and approve the system.
- Which heating systems can I install myself without a professional?
- You can install electric direct-heating systems, such as infrared panels, electric radiators and patio heaters, as long as the electrical installation (outlet and wire gauge) is suitable. Installing a fireplace or stove as supplemental heat is also a possible DIY project, but you must strictly follow fire-safety regulations.
- What tools do I need to replace a radiator?
- You’ll need a pipe cutter or hacksaw, a pipe puller and expansion pliers for multilayer pipe, a radiator wrench to tighten the connections, tongue-and-groove pliers, a radiator key and sealing material such as hemp or Fermit. A water leak detector can help you find leaks.
- How can DIY projects help lower my energy bills?
- Reduce heat loss by insulating heating pipes in unheated areas. Replace old thermostatic valves with programmable ones. Bleed your radiators regularly to keep them working efficiently. These simple steps can directly lower your heating bill.
- Where can I find supplies for my DIY heating projects?
- Our Plumbing + Irrigation section offers pipes, fittings and tools. For electric heaters, browse the Garden + Outdoor category. You can find specialized heating pipe insulation here: Heating Pipe Insulation.
You may also be interested in
- How to install underfloor heating: Step-by-step guide
- How to lay heating pipes: A DIY guide to efficient heating
- How to install a gas heating system: Step-by-step guide
- How to choose the right heating system for your home
- How to install wall heating: A guide to proper installation
- How to install a wood-burning heating system: Connect and use the boiler efficiently