
In brief: You can create an affordable concrete-look kitchen backsplash yourself using specialty filler, textured paint, or peel-and-stick film. Clean and prime the surface thoroughly, apply your chosen material according to the manufacturer's instructions, and seal the surface afterward. A final seal protects the wall from splashes, grease, and moisture and makes it easy to clean.
Why is a concrete-look kitchen backsplash a good idea?
With its unfinished charm, cool elegance, and raw texture, concrete has evolved from a building material into a design statement. A kitchen with a concrete-look backsplash feels modern and uncluttered, with an urban, industrial vibe. It makes the perfect backdrop for stainless-steel appliances, solid wood countertops, or colorful accents.
The biggest advantage: you don't need to install heavy, expensive concrete slabs. With the right materials and techniques, you can easily create the look yourself. Every wall you design is unique. Your trowel marks, technique, and personal touch make it one of a kind. It's also one of the most affordable ways to transform your kitchen and explore countless kitchen design ideas.
Concrete is a noble material when used with skill and care.
Which materials are suitable for a DIY concrete look?
There are several ways to create the perfect concrete look. The right choice of backsplash material depends on your DIY skills, budget, and desired result.
Concrete filler / texture compound
Specialty filler creates the most authentic texture and appearance. It's usually a cement-based powder that you mix with water or a ready-to-use paste. This material lets you recreate the depth and texture of concrete more effectively than other options. It takes some practice, but the result looks incredibly realistic.
Concrete-look paint / textured paint
If you'd rather skip the work of applying filler, textured paint is a good alternative. These paints contain fine quartz particles that create a slightly grainy, concrete-like surface when dry. It's as easy to apply as regular paint, but the texture isn't as pronounced as it is with filler.
Peel-and-stick film and panels
The quickest and cleanest option is to use high-quality adhesive film or ready-made concrete-look wall panels. Film is especially suitable for rentals because it can be removed without leaving residue. Large composite panels create a seamless, easy-care kitchen wall covering, but they're also the most expensive DIY option.
Pro tip
Practice applying the filler on an old drywall or wood panel first. This will help you get a feel for the material and see how different tools affect the finish before you tackle the wall. Experiment with the pressure and angle of the trowel to find the texture you want.
Guide: How to create a concrete-look kitchen backsplash
The filler technique produces the most convincing result. Follow this step-by-step guide to complete your project successfully.
Step 1: Prepare the surface
Careful preparation is the key to a long-lasting result. The wall must be clean, dry, and in good condition. Remove any old wallpaper residue. Clean the surface thoroughly with a degreaser to remove cooking residue and grease. Fill any holes or cracks with joint compound.
Carefully mask off countertops, cabinets, outlets, and light switches with painter's tape. Cover the floor and work surface with plastic sheeting or a drop cloth. Then apply a bonding primer. This helps the filler adhere properly to the surface, whether it's plaster, drywall, or old tile.
Step 2: Mix and apply the material
Mix the filler with water according to the manufacturer's instructions. Use a clean bucket and an electric mixer to make a smooth, lump-free mixture. Keep all the tools you need within reach, for example on a workshop cart and material stand, so you can work without interruption.
Apply the first coat with a Venetian trowel or a wide putty knife. Work wet-on-wet and spread the material at an angle of about 45 degrees. This first coat serves as a base, so it doesn't need to look perfect. A coat thickness of 1-2 millimetres is ideal.
Important note
Follow the manufacturer's drying times carefully. Drying too quickly because of drafts or direct sunlight can cause cracks. Keep the room at an even temperature and provide adequate, but not excessive, ventilation. Allowing the material to cure completely is essential for a durable finish.
Step 3: Create the texture
The second coat determines the final look. Apply it once the first coat has set but isn't completely dry (follow the manufacturer's instructions). Apply a very thin coat and shape the surface right away. For a calm, smooth look, move the trowel across the surface in long, overlapping strokes. For a more dynamic texture, use short, crisscrossing movements or gently dab the material onto the surface.
Step 4: Sand and smooth (optional)
Once the second coat has dried completely, you can lightly sand the surface by hand with fine sandpaper (120 grit or finer). This removes ridges and edges and leaves the wall feeling smoother. Then wipe away all the sanding dust with a slightly damp cloth.
Step 5: Seal the surface – essential in the kitchen
This is the most important step for a long-lasting concrete-look kitchen. Without a sealer, the wall will absorb water and grease and become stained. A specialty sealer for concrete or mineral surfaces protects the wall and makes it washable.
Apply the sealer in at least two thin coats using a fine foam roller or soft brush. Let each coat dry completely before applying the next one. A particularly durable 2-component PU sealer is recommended for the area directly behind the cooktop.
Additional advice
Pay attention to the joints where the wall meets the countertop and wall cabinets. Even if the wall is sealed, these joints should be sealed with kitchen-grade silicone. This prevents water from getting behind the countertop and causing damage.
How do you care for a concrete-look kitchen backsplash?
Caring for your new backsplash is easy. Thanks to the sealer, most liquids simply bead up and roll off. Wipe up splashes of tomato sauce, grease, or coffee promptly with a soft cloth and a little warm water and mild dish soap.
Avoid abrasive cleaners, rough sponges, and acidic cleaners (e.g. vinegar or citrus cleaners). They can wear away the sealer and damage the surface over time. With proper care, your concrete-look wall will stay beautiful for many years.
Alternatives to the Skim-Coat Technique: More Ideas for a Concrete Look
If applying a skim coat seems too time-consuming, there are easier ways to get the sought-after concrete look.
The Quick Option: Paint and Film
Concrete-effect paint lets you create the look right on the wall. After thoroughly cleaning and priming the surface, apply the paint according to the instructions. You may need two coats to get the finish you want. An even easier option is self-adhesive furniture film with a concrete design. Measure the area precisely, cut the film to size, and apply it without bubbles. It's ideal for a quick makeover.
The Durable Solution: Wall Panels
Wall panels made of acrylic glass or aluminum composite with a concrete print are a high-quality, long-lasting alternative. They can be glued or screwed directly onto the wall. The result is a completely pore-free, seamless, easy-to-clean surface. Cutting openings for outlets requires precise work with a jigsaw or circular saw.
The ultimate luxury is being able to relax and enjoy your home.
The Finishing Touch: Industrial-Style Decor
Your new kitchen backsplash is the star, but the right accessories complete the look. Industrial style thrives on the interplay of rough textures and clean lines. Pair the concrete look with black metal accents, such as shelf brackets, lights, or fixtures.
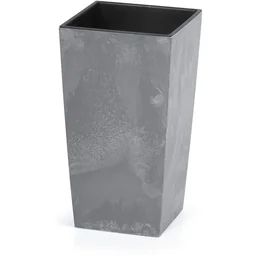
An oak countertop or reclaimed wood counter adds warmth to the room and creates an eye-catching contrast with the cool concrete wall. Add accents with carefully chosen decorative pieces. A
in a stylish industrial design on the countertop or a large on the floor underscores the urban feel. Keep your decorative or installation materials on a practical material stand so everything stays in view. This transforms your kitchen into a space where design and function work together beautifully.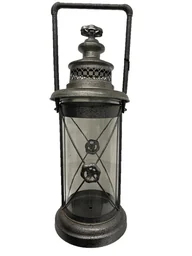
Frequently Asked Questions
- Can I apply a concrete-look backsplash directly over old tile?
- Yes. Clean the tiles thoroughly and apply a special bonding primer. This helps the skim coat adhere securely to the smooth tile surface. For an even base, fill the grout lines during the first skim coat application.
- How heat-resistant is a skim-coated concrete-look wall behind the cooktop?
- Cement-based skim coats are inherently noncombustible and heat-resistant. The sealer is the key component. Choose a high-quality, heat-resistant polyurethane (PU) sealer to protect the wall from grease splatters and heat from the cooktop.
- Is a DIY concrete-look backsplash really waterproof?
- The skim coat itself absorbs water. Only the final sealer makes the surface waterproof and resistant to dirt. Apply at least two coats of sealer, paying particular attention to the joints where the backsplash meets the countertop and cabinets. Seal these joints with silicone, too.
- What tools do I need for the skim coat technique?
- The most important tool is a high-quality Venetian or finishing trowel with rounded corners. You will also need a mixing bucket, a drill paddle mixer, drop cloths, painter's tape, sandpaper, and a brush or roller for applying the primer and sealer.
- How much does a DIY concrete-look kitchen backsplash cost?
- It costs significantly less than a backsplash made of glass, stainless steel, or genuine concrete slabs. Depending on the manufacturer and the quality of the skim coat and sealer, expect to pay around 20 to 50 euros per square meter. This makes it a budget-friendly option for modern kitchen design.
You may also be interested in
- Wall effects: Create a modern stone look on your walls yourself
- Kitchen backsplash as a splash guard: DIY planning & installation
- Christmas wreath with a concrete look: DIY guide to festive decor
- Improve the look of exposed aggregate concrete slabs: DIY ideas for patios and gardens
- Painting a kitchen countertop: An easy way to get a fresh look
- Casting concrete candle holders: Step-by-step DIY guide