
In brief: Strong screw joints in wood require the right screw and proper preparation. Choose the screw length and diameter to match the material thickness. Always drill a pilot hole to prevent stress cracks. Make sure the screw is driven to the correct depth and use suitable screw types, such as fully threaded or partially threaded screws, for different types of wood.
How do you choose the right wood screw?
The choice of screw determines the success of your wood joint. Pay attention to three key features: material, dimensions and head shape.
Zinc-plated screws such as our or provide basic protection for indoor use. For permanent outdoor projects in the Garden + Outdoor range, hot-dip galvanised or coated screws are better suited.
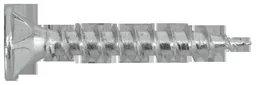
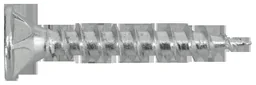
Length is crucial. Calculate it by adding the thickness of the top piece of wood to the desired penetration depth in the lower piece. This should be at least two and a half times the screw diameter.
Diameter affects tensile and shear strength. For delicate work such as wooden toys, 3mm is sufficient. Load-bearing structures require 4.5mm or 5mm screws, such as and .


Expert tip
Never buy screws individually; always choose a practical bulk pack. That way, you have the right stock ready for your next project and save time and money. A pack of 200, such as , is a smart investment.
Countersunk, pan or round head?
The countersunk head is the standard choice for wood. It sits flush in a countersunk hole, creating a smooth surface. It is ideal for furniture or components that people may brush against.
A pan head provides a larger bearing surface beneath the head. It presses the material together more firmly but sits slightly proud of the surface. It is perfect for softer materials or when appearance is less important.
Round heads with washers are used for temporary connections or very soft wood to prevent the head from sinking into the material.
Why is the pilot hole so important?
Drilling a pilot hole is not an optional extra step; it is the foundation of a clean, stable wood screw joint. It prevents the screw from splitting the wood as it is driven in.
Working close to an edge or with dry hardwood is particularly critical. This is where high levels of stress can cause the material to crack without proper preparation.
Important note
Never drive screws into hardwood or into the end grain side of the wood without drilling a pilot hole. The risk of splitting is extremely high and can irreparably damage your workpiece.
Choose the right drill bit. For the screw shank (the smooth section beneath the head), use a bit with the same diameter as the screw without the thread.
For the thread in the lower piece of wood, choose a bit measuring around 60-70% of the screw's core diameter. A 4mm screw therefore requires a 2.5mm pilot hole for the thread.
The most common source of errors in wood joints is the wrong combination of screw diameter and pilot hole. Too small and the wood splits; too large and the screw will not hold. Measure it—don't guess.
Two-stage drilling for countersunk heads
For a professional, flush finish, you need two holes. First, drill the hole for the shank and thread to the appropriate depth.
Then use a countersink bit. It cuts a conical recess into which the screw head sits neatly. Work precisely to avoid fraying the wood surface.
How do you create a strong, clamped wood joint?
A friction-fit joint transfers forces through friction. The screw presses the two pieces of wood together so firmly that they can no longer slide against each other.
Partially threaded screws are the first choice for this. Their smooth shank in the upper section slides through the pilot hole. Only the thread in the lower piece of wood engages and pulls the pieces together as the screw is driven in.
The pressure must be even. Use a cordless drill/driver with adjustable torque or tighten the screw by hand with care. Excessive torque can strip the thread or snap off the screw head.
Additional advice
Apply a thin layer of glue between different types of wood, such as softwood and hardwood. This increases friction and prevents the joint from creaking as temperature and humidity change. For large surfaces, use a wood cover tarp to protect them from rain while you work.
The right order for driving screws
Always start with the centre hole in a row. Then work outwards in a star pattern. This distributes the clamping pressure evenly and prevents the components from warping.
Initially, tighten the screws only hand-tight. Check the alignment and adjust it if necessary. Only then tighten all the screws fully.
When do you need form-fit or bonded joints?
Not every joint relies on pressure. A form-fit joint prevents movement through its geometric shape, as with a dowel.
Bonded joints are created by gluing. Here, the screw can only press the parts together while the adhesive cures or serve as permanent additional reinforcement.
For pure tensile joints, where the components are pulled apart, fully threaded screws are better. Their thread engages along the entire length and provides greater pull-out resistance.
Think in terms of forces. Will the joint be subjected to shear, compression or tension? The answer tells you whether you need partially threaded or fully threaded screws, thick screws or many thin ones. A static shelf has different requirements than a wobbly garden chair.
Special case: screwing into end grain
Screwing into the end of the wood is tricky. The fibres run towards the screw shaft, offer little lateral support and split easily.
Always use fully threaded screws here and drill a precise, deep pilot hole. Even better, replace this critical joint with a form-fit method such as a mortise-and-tenon joint or reinforce it with a metal angle bracket.
How do you protect screw joints outdoors?
Moisture is the greatest enemy of screws in wood outdoors. It causes rust and therefore reduces holding power.
Choose corrosion-resistant screws from the outset. Galvanisation or special plastic coatings are essential for patios, fences and garden furniture.
Avoid standing water around the joints. Build your structure so that rain can run off. Countersunk heads should never collect water.
For large outdoor projects involving a lot of cut timber, a wood Big Bag is practical for transport and storage.
The right tools for the job
A suitable screwdriver or bit set is essential. A stripped slot or rounded internal multi-spline profile makes the screw unusable and damages the wood when you try to remove it.
For large quantities and long screws such as the (4.5x50mm), a cordless screwdriver with long battery life and a second speed setting for final tightening is worthwhile.
For delicate work, such as attaching wooden letters for a children's room, a small hand screwdriver with a precision tip is the better choice.
Practical check: Common mistakes and their solutions
The screw spins without gripping: The thread no longer has any hold in the wood. The cause is often a pilot hole that is too large or brittle, old wood. The solution: Use a thicker and longer screw or fill the hole with hardened wood adhesive and a wooden dowel before driving in a new screw.
The head breaks off: This is usually caused by excessive torque or a poor-quality, brittle screw. Use high-quality screws such as the HOX professional wood screws from our range and adjust the force.
The joint becomes loose: Wood moves. As humidity fluctuates, it expands and contracts. This can slowly push screws out. Check the tightness after a few weeks. For permanent structures, you can secure the screws with a drop of thread-locking varnish.
With these basics, you can choose the right wood screws, prepare the material properly and create stable, reliable wood joints that last for all your home and garden projects.
Frequently asked questions
- Why does my wood split when I screw into it?
- Wood usually splits because you have not drilled a pilot hole or the screw is too thick for the wood. The wood has no room to give way to the screw and splits. A pilot hole with a slightly smaller diameter than the screw core is essential, especially in hardwood or near an edge.
- How deep should I drive a screw into wood?
- The screw should pass completely through the wood being joined and engage with at least 2.5 times its thickness in the underlying wood. For a 4mm-thick screw, this means at least 10mm in the second board. The countersunk head should finish flush with or slightly below the surface.
- Can I use any screw for wood?
- No. Use special wood screws. They have a coarse, deep thread for better grip in the wood fibre structure and a sharp, self-tapping point. Universal or metal screws have a finer thread and a flatter point that is more likely to slip in wood and provides less grip.
- What is the difference between fully threaded and partially threaded screws?
- Partially threaded screws only have a thread on the lower section. They pull the two wooden parts tightly together because the smooth upper shaft slides through the pilot hole. Fully threaded screws have threads along their entire length and are better suited to tensile joints or where a strong clamping effect is not required.
- Do I need the same screws for softwood and hardwood?
- Basically yes, but the preparation differs. For hardwood such as oak or beech, a precisely sized pilot hole is crucial, often separately for the shaft and thread. For softwood such as spruce, the pilot hole can be slightly smaller. The screw itself should always be sharp and corrosion-protected.
You may also be interested in
- How to use wood drill bits correctly: For precise woodworking
- How to use a cordless screwdriver efficiently: Insider tips
- How to remove stuck screws: Expert tips for DIYers
- How to choose self-tapping screws correctly
- Learn how to rout wood: Techniques and tips for DIYers
- How to prepare and care for wood: Keep it looking great for longer