
In brief: A joint cutter is better for cleaning paving joints when you want to remove weeds, moss and stubborn dirt directly from between the pavers. A pressure washer is better suited to large paved areas and surface dirt. Excessive pressure can wash away jointing material. The right method depends on the joint filling, paving and type of dirt.
Moss, young weeds and ground-in dirt can make paved areas look neglected. There are two very different ways to clean them: a joint cutter works directly in the gaps, while a pressure washer directs water across the surface and into the joints.
Which method cleans better depends on what is growing or collecting in the joints and how they are filled. For weeds and stubborn dirt in individual joints, a joint cutter is usually easier to control. A pressure washer is more effective on larger areas with surface dirt.
If you are looking for a tool for regular maintenance, the : 2-in-1 Power Joint Cutter with Collection Box is a suitable option. It is priced at 79,99 euros and is in stock. The collection box catches loosened material so it does not simply get scattered across the paving as you work.
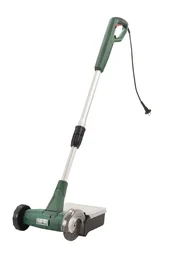
In this comparison of paving joint cleaning methods, you will learn how the two approaches differ, what to consider for different paved surfaces and how to keep joints clean without losing more jointing material than necessary.
How do a joint cutter and a pressure washer differ?
You guide a joint cutter along the gap. Its working head removes weeds and stuck-on dirt directly from between the pavers. This lets you target individual joints without spraying down the entire area first. On long paths or driveways, this can make the work more consistent and easier to plan than using a water jet.
A pressure washer removes deposits with a powerful jet of water. Depending on the nozzle, pressure and distance, the jet hits the paver or penetrates the gap. It can remove algae and surface dirt from a larger area. At the same time, it can wash out loose jointing material and spray dirty water onto nearby surfaces.
Tackle weeds and dirt directly
Weeds often grow in joints because soil, dust and organic debris collect there. A joint cutter reaches the growth at its base. It is especially useful when individual plants or patches of moss are the main reason the paving looks untidy. Check the area you have treated afterwards: deep roots may need a second pass.
A water jet quickly removes light dirt, but it does not automatically get rid of every root. Young plants may be washed out, but the jet can scatter the soil along with the jointing material. What looks like a thorough clean can leave an open or sunken joint. This is especially important with paving that has loose joint filling.
Choose the surface or the joint as your target
Before choosing a method, ask yourself: do you want to clean the paver or the gap? A pressure washer can be practical for widespread algae on sturdy pavers. If you want to clean paving joints and tackle weeds in a controlled way, a joint cutter lets you work more precisely. If you have both problems, you can use the tools one after the other, but not every joint needs both methods.
Pro tip
Test each tool on a small, inconspicuous area first. Then check the paver surface and joint filling. This helps you spot early on whether the cutter is too aggressive or the water jet is loosening sand.
Which cleans joints more thoroughly: a joint cutter or a pressure washer?
A joint cutter often wins for deep-rooted growth because it works directly in the gap. A pressure washer can be quicker for loose surface dirt and larger areas of sturdy paving. So “thorough” does not mean the same thing for every surface: what matters is the cleaning result and the condition of the joints afterwards.
Comparing the tools for common jobs
| Criteria | Joint cutter | Pressure washer |
|---|---|---|
| Weeds in individual joints | Removes growth directly | Can wash out young plants, but may not reach the roots |
| Surface algae | Only suitable to a limited extent for large paved areas | Can quickly clean larger areas of sturdy paving |
| Jointing material | Can loosen it if you work too deeply or forcefully | Can wash out loose sand or grit |
| Splashes | A collection box can catch loosened material | Water and dirt can spray a long way |
| Water use | No water jet is needed to use the tool | Plan for a water supply and drainage from the area |
This overview shows why there is no clear winner in every paving joint cleaner test. A fair comparison needs to take into account the type of joint filling, the size of the area and whether the paving is sensitive to pressure. The work involved after cleaning matters too: will you need to replace washed-out sand or sweep up loosened plant debris?
With paved joints, the type of joint filling comes first. Use a tool that moves only as much material as you can replace afterwards.
If you only want to remove the top layer of dirt, start with the gentlest suitable method. A broom and water are often enough for loose dust. This avoids the extra work caused by a powerful tool when the dirt is only on the surface.
Which method suits each paved surface?
First, assess the surface, the joints and the condition of the area. Well-laid, durable concrete pavers can usually withstand different treatment than delicate natural stone or old, crumbling joints. The type of jointing material also determines how aggressively you can clean.
Paved paths and driveways
For a long driveway with regular weed growth, work section by section with a joint cutter. Guide it steadily and remove no more material than necessary. This lets you clean the joints without soaking the entire surface with water. A broom is often enough to collect loosened material afterwards.
If the driveway is instead covered with dust or a loose layer of algae, a pressure washer can save time. Start with a wide nozzle and lower pressure, if your machine allows this. Keep the jet at an angle and moving rather than directing it at one spot in a joint for too long. Check the edges and any areas with damaged jointing material especially carefully.
Natural stone and delicate surfaces
With natural stone, material compatibility matters. A powerful water jet can roughen the surface or dislodge loose pieces. A cutter can also damage edges if you guide the working head over the stone instead of through the joint. Read the care instructions for your paving and test the tool in an inconspicuous spot.
Take extra care with narrow joints, crumbling stone edges or firm mortar joints. Only remove the growth you actually want to get rid of. If mortar starts to come loose or the stones wobble, stop and first check whether the area needs repair. Aggressive cleaning won’t fix loose paving.
Loose sand and grit joints
Sand and grit allow water to drain well, but they don’t always stay firmly in the joints. A pressure washer can easily wash out the filler. A cutter can also remove material if you work too deeply. With either method, plan to check the joints afterwards and top them up if needed.
Loose spots can become noticeable, especially after heavy rain or frost. Check that the paving is still stable and the joints are sufficiently filled. Where growth regularly appears, clean, refilled joints and quick routine checks can help. Find more articles about caring for your outdoor spaces under Garden + Outdoor.
Important note
Don’t aim a pressure washer jet at a joint from close range for too long. It can wash out jointing sand and send dirty spray towards walls, windows or garden beds. Wear safety glasses and keep other people out of the spray area.
How do you clean paving joints?
Following a clear sequence helps you work more carefully and avoid unnecessary repeat work. First remove loose dirt, then choose the right tool and check the joints after each section. Once cleaning is complete, decide whether you need to add more jointing material.
Work step by step
- Prepare the area: Move furniture, planters and loose objects off the paving. Sweep away leaves and larger debris so you can see the growth and joints more clearly.
- Check the joints: Look for loose stones, missing sand and crumbling mortar. A badly damaged joint needs the right repair before you use a powerful tool.
- Choose your tool: For weeds and moss between the pavers, a joint cutter is usually the better choice. For surface dirt on durable, stable paving, a pressure washer may be suitable.
- Start small: Test the method in an inconspicuous spot. When using a pressure washer, start farther away and use a wide nozzle. Guide the cutter so the working head stays in the joint.
- Clean section by section: Work steadily without making the joints too deep. Sweep away loosened plants and dirt or collect them in the catcher before moving on to the next section.
- Check your work: Make sure the joints are still sufficiently filled and the stones are stable. Add suitable jointing material wherever it is missing, and follow the material’s instructions for use.
The 2-in-1 Joint Power Cutter with Collection Box suits this targeted approach. The collection box is handy when you want to collect loosened growth as you work instead of sweeping it together on the paving. For regular maintenance, remember to clean the machine and working head after use and store them dry.
If you’re weighing up a cutter and a pressure washer, find suitable types of equipment under Power Tools for Garden and Outdoor. Examples of pressure washers listed include the at 105 bar and the at 135 bar. Neither product is currently in stock; the pressure ratings are provided here to compare the models and are not a recommendation to clean joints at maximum pressure.
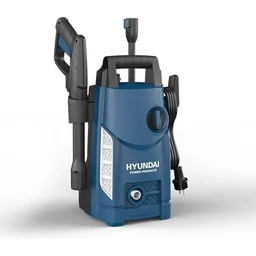
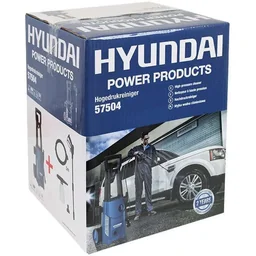
When using a pressure washer, make sure you have a water supply and somewhere for the dirty water to drain. Keep soil and plant debris out of drains where they could cause a blockage. Find information about suitable water supplies in the Plumbing + Irrigation category.
Clean the surface first, then the joints, and test a small area. This shows you whether the stone can withstand the pressure and whether the jointing material is suitable for your chosen method.
What Makes a Good Joint Cleaner Test?
A useful joint cleaner test looks beyond how clean the surface appears right after the job. It also assesses the condition of the joints, the work needed afterwards and how well the tool performs on different surfaces. If you want to clean paving joints, the test should examine the joints themselves closely.
What to look for
- Cleaning task: Check whether the test covers weeds, moss, dust or widespread algae. Each job calls for different tools.
- Joint filling: Results on a surface with firm jointing say little about loose sand or grit. A good comparison specifies the type of joint.
- Surface: Check whether the test was carried out on durable concrete pavers, natural stone or a delicate surface. How well the results apply to your own paving depends on this.
- Follow-up work: A test should show whether any jointing material was lost, how much dirt was left behind and whether you need to refill the joints or rinse the surface afterwards.
- Ease of use: For long paths, handling and working time matter. On tightly laid paving, manoeuvrability and control are more important than sheer coverage.
The bar rating of a pressure washer alone does not tell you how gently it cleans a joint. The nozzle, distance, water flow and angle also affect the result. A tool with a higher maximum pressure is not automatically the best choice for paving joints. Use only as much pressure as the dirt and surface require.
Regular care saves jointing material
Remove young plants before they take deep root and widen the joints. Sweep away leaves and soil regularly, especially after windy weather. The less organic matter there is in the joints, the fewer places new plants can take hold.
Factor the seasons into your maintenance routine. In spring, check where jointing material has been lost over winter; during the gardening season, remove any new growth as it appears. After each thorough clean, check that the paving is still stable. If you find loose pavers, fix the cause instead of trying to cover it up with more pressure.
Extra tip
Keep a small amount of the right jointing material for repairs. Make a note of the mix you used. This makes future top-ups easier and helps avoid differences in colour and grain size.
For most homeowners, a joint cutter is the more targeted option for weeds growing directly in the joints. A pressure washer can be quicker for surface dirt across a large, durable paved area, provided you use the right distance and pressure. Check the joints after every clean and top them up if the water jet or cutting head has loosened the material.
Frequently Asked Questions
- Is a joint cutter or a pressure washer better for removing weeds?
- A joint cutter is better for removing weeds growing directly in individual paving joints. Its cutting head targets the growth. A pressure washer can rinse out young plants, but it often removes loose jointing material too and does not always reach the roots completely.
- Can a pressure washer damage paving joints?
- Yes. A strong, concentrated water jet can wash sand or grit out of the joints and damage delicate mortar. Keep a safe distance, start with low pressure and test it on an inconspicuous spot before cleaning the whole area.
- How often should I clean paving joints?
- Clean the joints as needed, when weeds or dirt start to take hold. A quick check in spring and during the gardening season is often enough to remove young plants early. Frequent cleaning with a powerful water jet can loosen jointing material unnecessarily.
- How can I clean paving joints without washing out the sand?
- Remove growth as precisely as possible with a joint cutter or suitable hand tool. Work carefully, then check whether any jointing material is missing. Refill open joints with suitable material so the pavers stay stable and water can drain properly.
- Is a joint cutter suitable for every paved surface?
- No. First check that the joints are wide and accessible enough and that the paving can withstand the cutting head. For delicate natural stone, brittle edges or tightly mortared surfaces, test it carefully on an inconspicuous spot first.
You might also be interested in
- Weeds in paving joints: Remove them for good with a joint cutter?
- Buying a joint cutter: What to look for and the best choice for your patio
- How to use a Fugen-Power joint cutter: A guide to perfect joints
- Joint cleaner test and comparison 2026: The best products put to the test
- Cleaning joints: The best time to use your tools
- Buying a joint brush: Metal vs nylon – Which should you choose?