
In brief: If your sweeper is not sweeping properly, first check the brushes and sealing lip for wear. Then adjust the sweeping height correctly so that the bristles make optimal contact with the ground. Check the drive for blockages and make sure the dirt container is empty and correctly fitted.
A sweeper saves time and protects your back. But what should you do if the machine no longer sweeps properly? When dirt is left behind and streaks appear, frustration quickly sets in. The good news is that simple causes are usually responsible and you can often fix them yourself in just a few steps. From worn brushes to incorrect settings, this guide shows you the most common problems and their solutions.
How can I tell if the sweeping brushes are worn?
The most common cause of reduced sweeping performance is worn brushes and a damaged sealing lip. These parts are in constant contact with the ground and are subject to natural wear. Instead of replacing the entire machine, you can often restore its sweeping performance with a simple replacement.
The replacement parts set for sweepers (), consisting of two new disc brushes and a fresh sealing lip, is the most effective first-aid measure. It quickly restores your machine to its former performance.
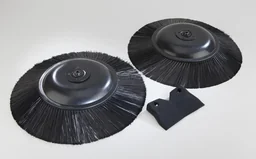
Look out for these clear signs of wear:
- Shortened bristles: Compare the bristle length with its original condition. If they are noticeably shorter, they lose tension and can no longer pick up dirt effectively.
- Flattened or bent bristles: If the bristles are permanently bent in one direction or lie flat, they have lost their springiness. They slide over the dirt instead of sweeping it up.
- Gaps in the bristles: Missing bristle tufts leave untidy streaks on the ground.
- Frayed ends: Heavily frayed bristle ends indicate significant wear and can no longer hold fine dust effectively.
The sealing lip at the rear of the sweeping housing is just as important. An intact lip conforms to the ground and prevents stirred-up fine dust from escaping backwards. If it is cracked, hard or partly torn off, the machine sweeps particularly poorly on smooth surfaces.
Pro tip
Take a photo of the arrangement of the brushes and drive before removing any parts. This makes reassembly easier and ensures that everything is put back in the correct place.
How do I adjust my sweeper correctly?
Even with new brushes, you will not achieve perfect results if the settings are incorrect. The height of the sweeping rollers and disc brushes must be adjusted precisely to suit the surface. An incorrect setting either leaves dirt behind or unnecessarily accelerates brush wear.
Adjusting the height of the main sweeping roller
The main sweeping roller does the heavy lifting. Its setting determines the sweeping result. Look for an adjustment wheel or lever, usually located near the wheels or on top of the housing. Proceed step by step to find the optimum height.
Place the machine on a level surface. Adjust the height so that the tips of the bristles just touch the ground. Push the machine forward one metre. You should feel slight resistance. If the bristles bend too much, the pressure is too high. If they hover above the ground, the gap is too large. The perfect contact point sweeps effectively without overloading the bristles.
Adjusting the disc brushes (side brushes)
The side brushes are responsible for moving dirt from corners and along edges in front of the main roller. Their contact pressure can often be adjusted as well. They should lightly “scratch” the ground, but not be pushed across it with force. A setting that is too low slows the machine down and quickly wears out the bristles. A setting that is too high leaves dirt along the edges.
Precise adjustment is not a one-time task. Always adapt the brush contact pressure to the surface in question, whether rough concrete or smooth screed. This maximises cleaning performance and the service life of the parts.
Why have the brushes on my sweeper stopped turning?
This is a particularly frustrating problem: you push the machine, but nothing happens. The brushes remain still. This issue is usually related to the drive mechanism, which transfers the movement of the wheels to the brushes. Here are the three main suspects.
Removing blockages and foreign objects
The simplest cause is often the correct one. Long blades of grass, cords, leaves or plastic film can wrap around the brush or roller axles and block them. This stops the entire drive.
Carefully tilt the machine to the side to gain clear access to the underside. Inspect the areas around the disc brushes and main roller. Carefully remove all foreign objects with pliers or by hand. Turn the brushes manually to make sure they can move freely again.
Important note
With cordless or petrol sweepers, remove the battery or disconnect the spark plug cap before every inspection or cleaning of the sweeping mechanism. This prevents the machine from starting accidentally and protects you from injury.
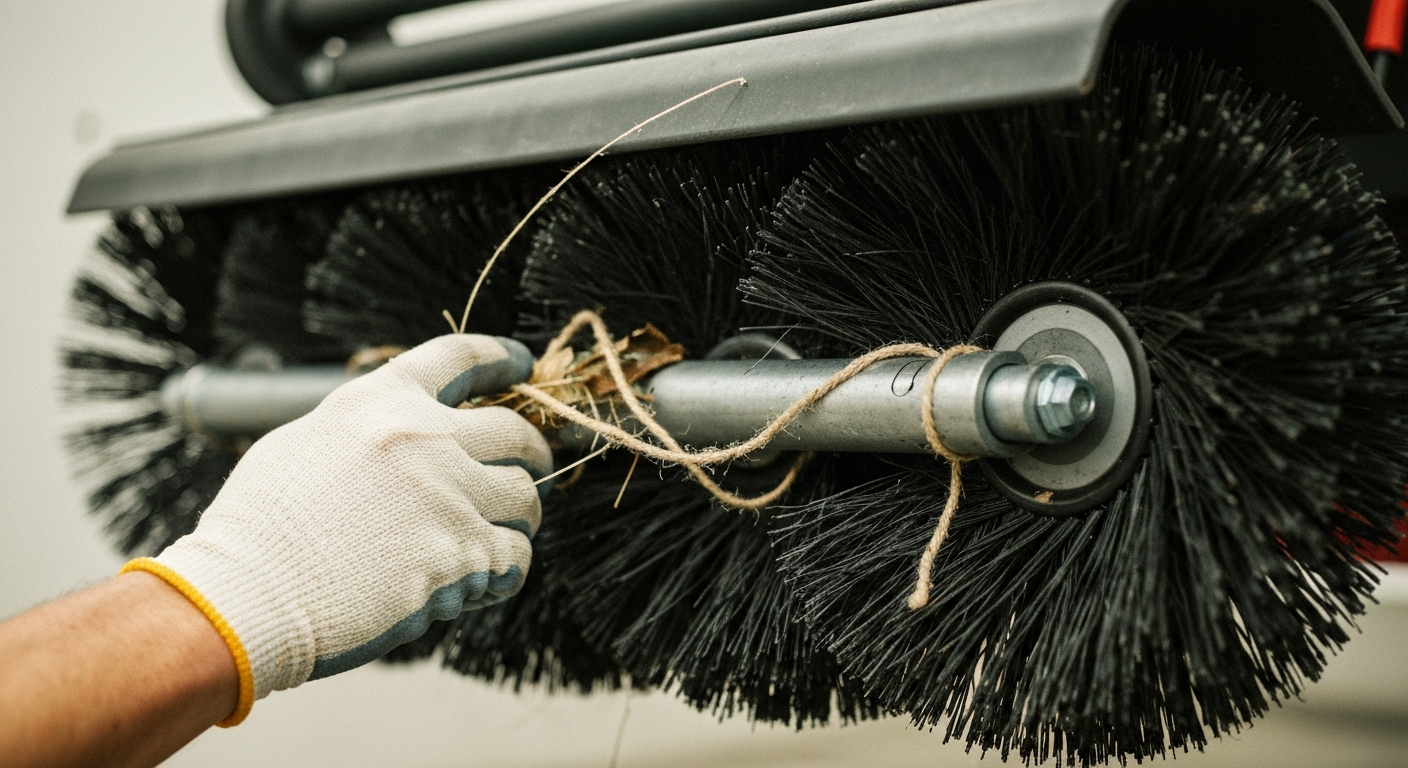
Checking the drive belt or gears
Many walk-behind sweepers use a belt or gear drive. The wheels drive the brushes through this mechanism. Open the drive's side cover according to the operating instructions. Check that the belt is still on the pulleys and sufficiently tensioned. A broken or worn belt must be replaced. With a gear drive, check whether any teeth are broken or dirt is blocking the gears.
Checking the wheels and axles
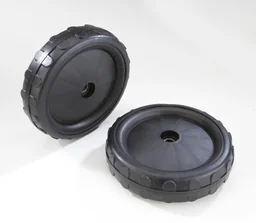
The drive starts with the wheels. If they no longer grip properly or are difficult to turn, no power can be transferred to the brushes. Check the wheel tread. If it is heavily worn, the wheels will spin on smooth surfaces. Damaged or heavily worn wheels should be replaced. A set of replacement wheels for your sweeper () provides the necessary grip and smooth power transmission again.
What should I do if the sweeper does not pick up dirt?
The brushes are rotating and the machine is moving, but the dirt is not ending up in the container—it is simply being spread around. This problem indicates that the path of the swept material is blocked or that collection is being disrupted.
Is the dirt container full or incorrectly fitted?
It sounds obvious, but it is often overlooked: A full collection container cannot take in any more dirt. Empty it in good time. Also check that the container is fitted correctly and sits flush. If it is crooked, a gap can form, allowing dirt to escape or blocking the intake.

The sealing lip as a key component
We already mentioned it when discussing wear, but its role in collecting dirt is crucial. The rubber lip at the edge of the dirt container is not only a seal, but also acts like a “scoop”. It helps direct the dirt thrown up by the main roller into the container. If this lip is hard, wavy or cracked, much of the fine swept material will pass underneath it. Replacing it is easy and makes a huge difference.
Additional advice
Sweep in even, slightly overlapping paths. Pushing too quickly can cause the brushes to fling the dirt away rather than pick it up. A moderate, steady speed produces the best results.
How can I extend the service life of my sweeper?
Prevention is better than repair. With regular care, you can not only ensure consistently good sweeping performance, but also significantly extend the service life of your machine. This applies to simple manual sweepers just as much as to powerful models from our range of power tools.
Clean the machine regularly after every use
Take two minutes after finishing the job. Remove coarse dirt, leaves and threads from the brushes and housing. Empty the dirt container and wipe it out with a damp cloth if necessary. This prevents dirt from becoming embedded and blocking moving parts.
Store it correctly
Store your sweeper in a dry, sheltered place. Direct sunlight and moisture can make plastic parts porous and rubber lips brittle. If possible, hang up the machine or position it so that the bristles are not permanently pressed flat. This helps them retain their shape and springiness.
I used a manual sweeper for years. For my new, larger yard, I switched to a battery-powered sweeper. The consistent brush rotation, even in corners, makes a huge difference. It is no comparison to simply pushing it along.
When is it worth buying a new sweeper?
Even with the best care, every machine eventually reaches the end of its service life. If the frame, wheel mounts or drive system also have significant damage in addition to the usual wear parts, repair costs can quickly exceed the value of buying a new machine. Modern devices often also offer greater convenience and better performance.
The battery-powered sweeper TE-SW 18/610 () features motorised brush rotation, for example. This ensures even sweeping results without any effort, even when walking slowly. For professional users or large properties requiring business supplies, petrol-powered models are a powerful alternative.
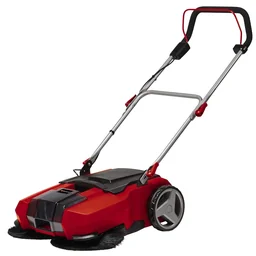
Whether you repair or replace it, a properly working sweeper is an indispensable helper. With the right steps and suitable replacement parts, you can keep your yard and pavements clean with ease. Browse our range of Garden + Outdoor products and find the perfect solution for your needs.
Frequently asked questions
- Why does my sweeper leave a strip in the middle?
- This usually indicates worn main brush rollers or an incorrectly adjusted height. The bristles in the middle are too short and no longer reach the ground. Replacing the brushes will usually solve the problem.
- How often should I replace my sweeper's brushes?
- The service life depends on how often the machine is used and the type of surface. Check the bristles every few months. If they are visibly shorter, frayed or flattened and sweeping performance is declining, it is time to replace them.
- My sweeper squeaks when I push it. What can I do?
- Squeaking is often caused by dry wheel axles or brush bearing points. Clean these areas to remove dirt and apply a little silicone spray or multi-purpose oil to the moving parts. This reduces friction and noise.
- Can I use a sweeper to pick up wet leaves?
- That is not ideal. Wet leaves are heavy and sticky, so they quickly clog the brushes and the intake to the container. Sweepers work best with dry to slightly damp material. It is best to wait for a dry day.
- The drive belt on my sweeper has snapped. Can it be repaired?
- Yes, on most models the drive belt is a replaceable wear part. You can often find replacement belts from the manufacturer or at specialist retailers. Fitting it is usually straightforward and is described in the instruction manual.
You may also be interested in
- Buy sweeper replacement parts: The ultimate guide
- Sweeper maintenance: How to replace brushes and sealing lips correctly
- Types of sweepers: The ultimate guide
- Sweeper reviews and comparison 2026
- How to clean and maintain a sweeping set: Make it last longer!
- How to use a standing sweeping set correctly: The guide to effortless sweeping